There’s something magical about the combination of zesty lemon, aromatic garlic, and rich butter that transforms humble shrimp into a restaurant-quality meal. As someone who’s tested countless shrimp recipes in my home kitchen, I can confidently say that Lemon Garlic Butter Shrimp stands out as the perfect blend of simplicity and sophistication. Whether you’re planning a quick weeknight dinner or looking to impress guests without spending hours in the kitchen, this recipe delivers incredible flavor with minimal effort.
I first discovered this recipe during a coastal vacation when a local fisherman shared his secret for preparing the day’s catch. His technique was so straightforward yet produced such remarkable results that I’ve been perfecting my own version ever since. Today, I’m thrilled to share my carefully refined recipe that turns out perfectly every single time.
Why You’ll Love This Recipe
Before diving into the ingredients and instructions, let me tell you why this dish deserves a permanent spot in your recipe collection:
- Quick and effortless – Ready in just 15 minutes from start to finish
- Versatile – Works as an appetizer, main course, or addition to pasta and rice dishes
- Impressive – Looks and tastes like something from an upscale seafood restaurant
- Economical – Makes frozen shrimp taste as good as fresh
- Nutritious – High in protein and relatively low in calories
- Customizable – Easy to adjust seasonings to suit your taste preferences
There’s a reason this recipe has become my go-to option when I’m short on time but still want something special on the table. The combination of speed and sophistication simply can’t be beaten!
Ingredients: Quality Matters
For this recipe to truly shine, using high-quality ingredients makes all the difference. Here’s what you’ll need to serve 4 people:
| Ingredient | Quantity | Notes |
|---|---|---|
| Large shrimp (21-25 count) | 1 pound (450g) | Peeled and deveined, tails on or off according to preference |
| Unsalted butter | 4 tablespoons (56g) | Divided; high-quality European-style butter recommended |
| Olive oil | 1 tablespoon (15ml) | Extra virgin preferred for better flavor |
| Garlic | 6 cloves (about 2 tablespoons) | Freshly minced, not from a jar |
| Red pepper flakes | ¼ teaspoon | Adjust according to heat preference |
| Fresh lemon juice | 3 tablespoons | From approximately 1 large lemon |
| Lemon zest | 1 teaspoon | From the same lemon |
| Fresh parsley | ¼ cup (15g) | Finely chopped, plus extra for garnish |
| Sea salt | ½ teaspoon | Adjust to taste |
| Freshly ground black pepper | ¼ teaspoon | Adjust to taste |
| Dry white wine (optional) | 2 tablespoons (30ml) | Can substitute chicken broth |
Ingredient Notes and Substitutions
- Shrimp: While fresh is wonderful if you have access, high-quality frozen shrimp works beautifully. I always keep a bag in my freezer for last-minute meals. If using frozen, thaw completely and pat dry before cooking.
- Butter: I recommend using unsalted European-style butter with higher butterfat content for a richer sauce. However, regular unsalted butter will still yield delicious results.
- Garlic: Fresh garlic makes a significant difference in this recipe. Pre-minced garlic from jars typically has a sharper, less complex flavor that can overwhelm the dish.
- Wine: A dry white wine like Sauvignon Blanc or Pinot Grigio adds complexity to the sauce, but chicken broth works well as an alcohol-free alternative.
Essential Equipment
You don’t need fancy kitchen gear for this recipe, but having the right tools makes the process smoother:
- Large skillet or sauté pan (12-inch preferred)
- Sharp knife and cutting board
- Microplane or zester for the lemon
- Juicer or citrus reamer
- Measuring spoons and cups
- Tongs for turning shrimp
Step-by-Step Instructions
Follow these precise steps for perfectly cooked shrimp in a luscious lemon garlic butter sauce:
Preparation Phase (5 minutes)
- Pat the shrimp dry with paper towels to ensure proper browning.
- Season shrimp with ¼ teaspoon salt and ⅛ teaspoon black pepper.
- Mince garlic, chop parsley, zest and juice the lemon, and measure remaining ingredients.
Cooking Phase (10 minutes)
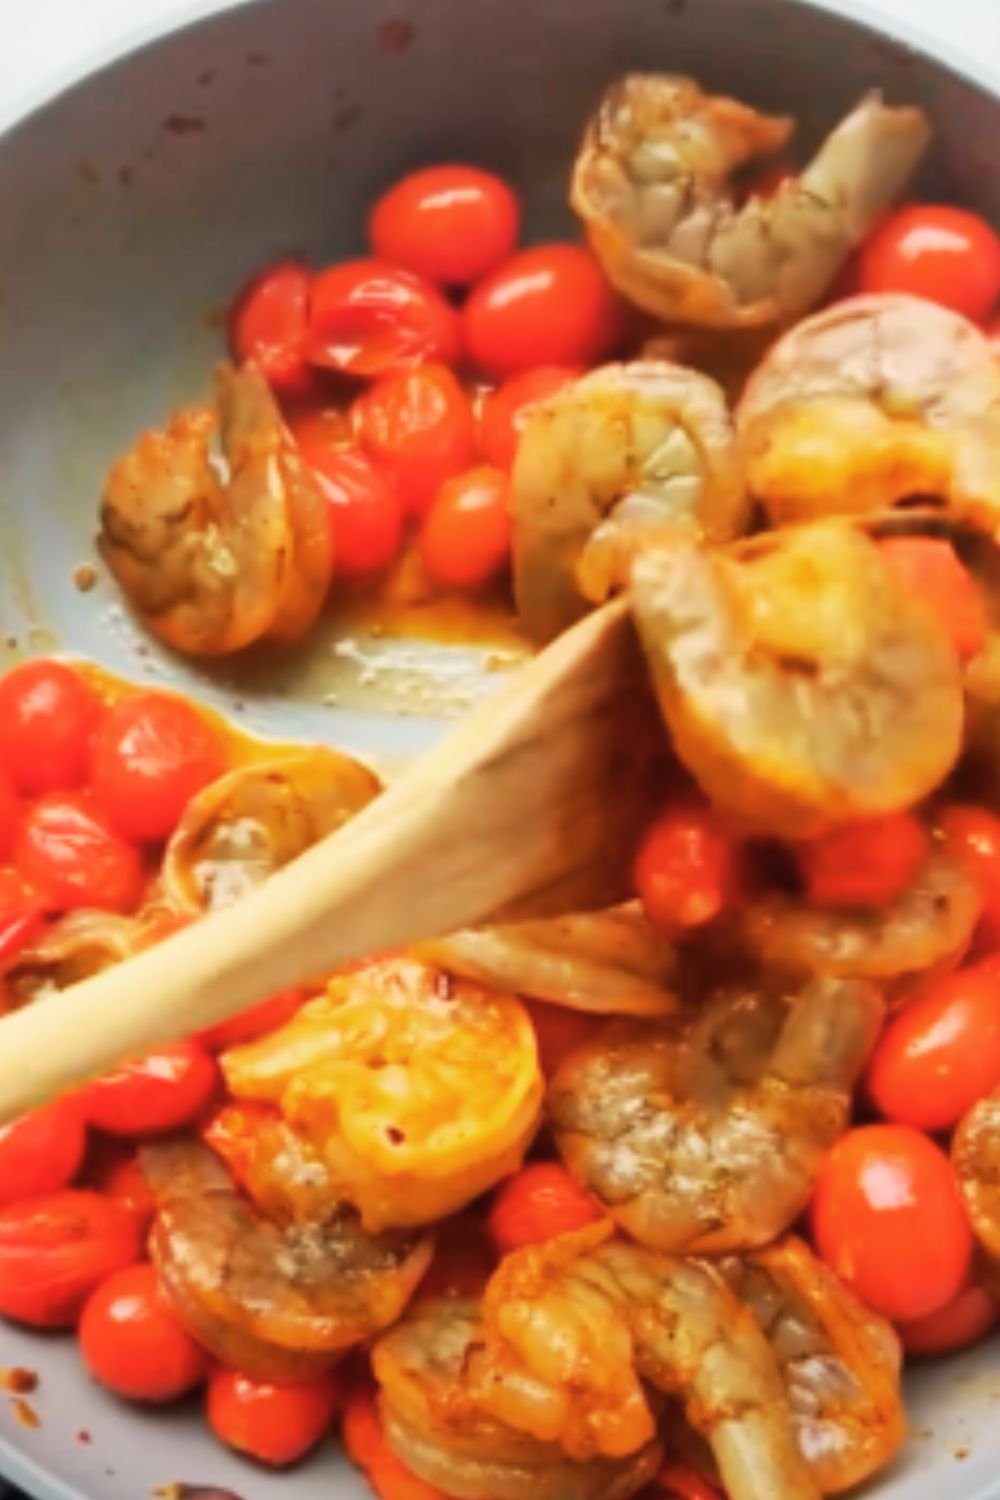
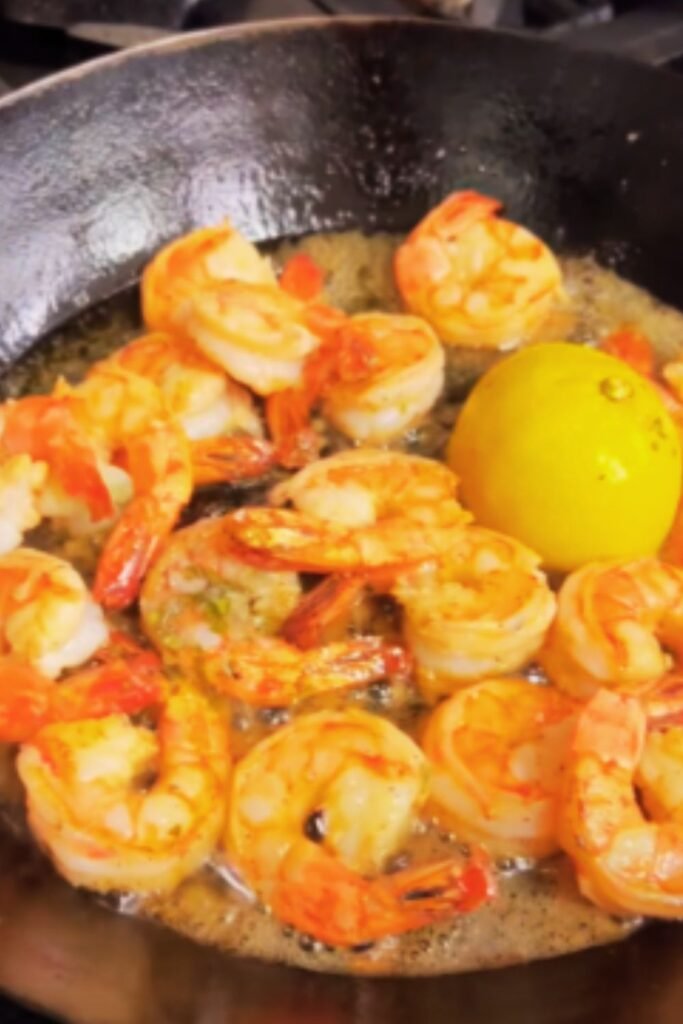
- Heat a large skillet over medium-high heat. Add 2 tablespoons butter and olive oil.
- Once butter is melted and mixture is hot (but not smoking), add shrimp in a single layer.
- Cook undisturbed for 2 minutes until bottom side develops a golden crust.
- Flip shrimp using tongs and cook for 1 additional minute.
- Transfer partially cooked shrimp to a plate (they’ll finish cooking later).
- Reduce heat to medium-low and add remaining 2 tablespoons butter to the same pan.
- Once melted, add minced garlic and red pepper flakes. Cook for 30-45 seconds until fragrant but not browned.
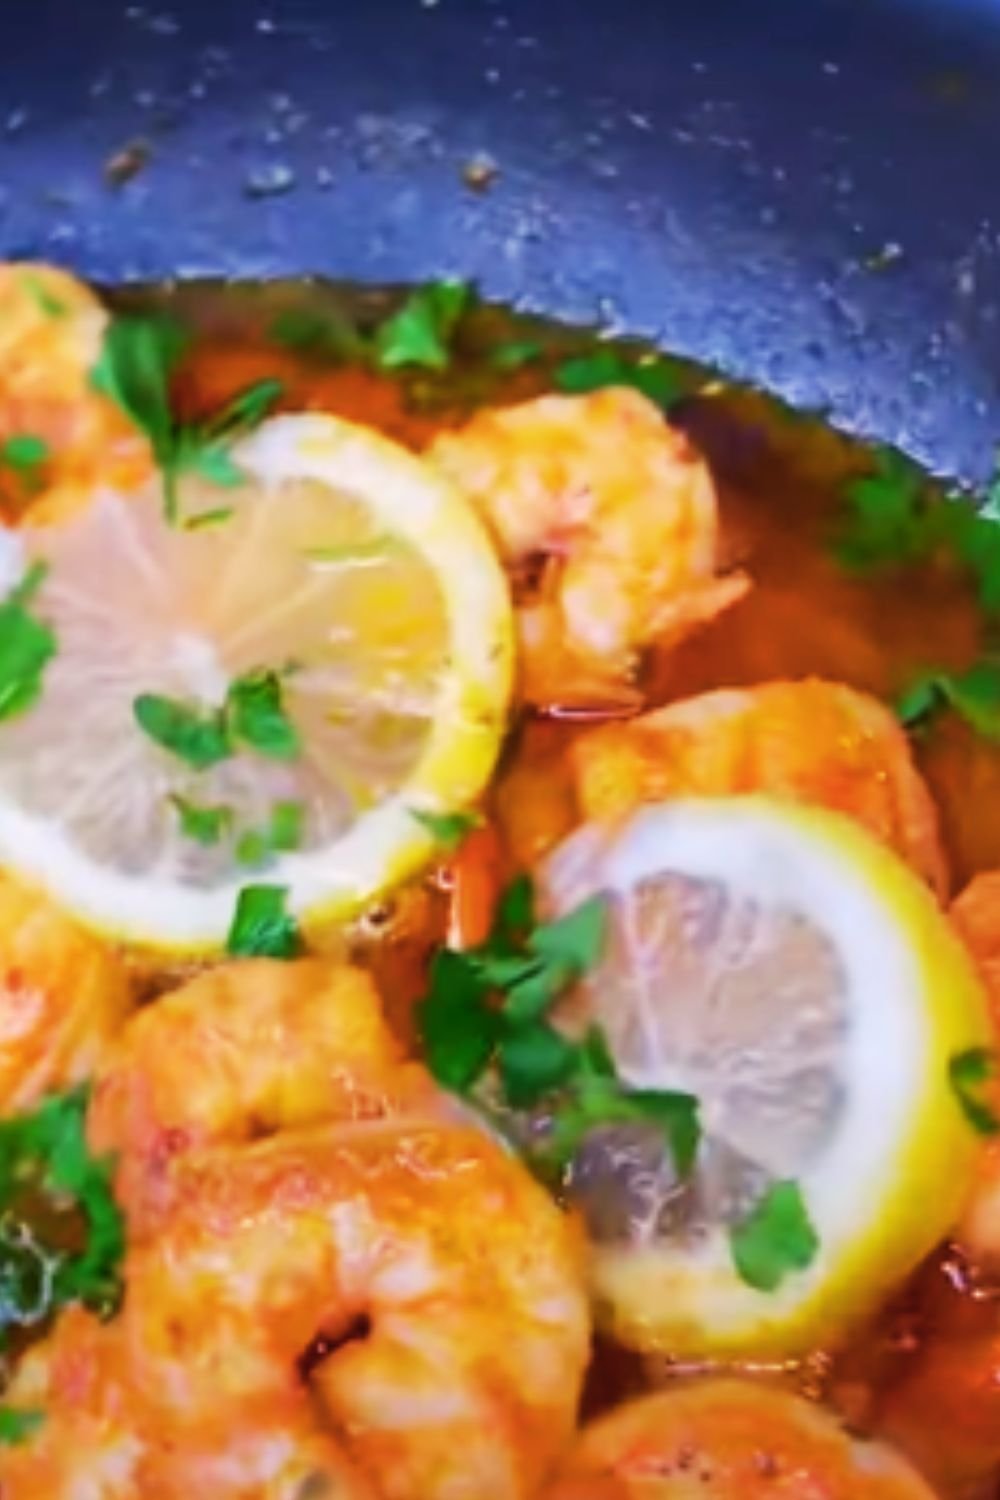
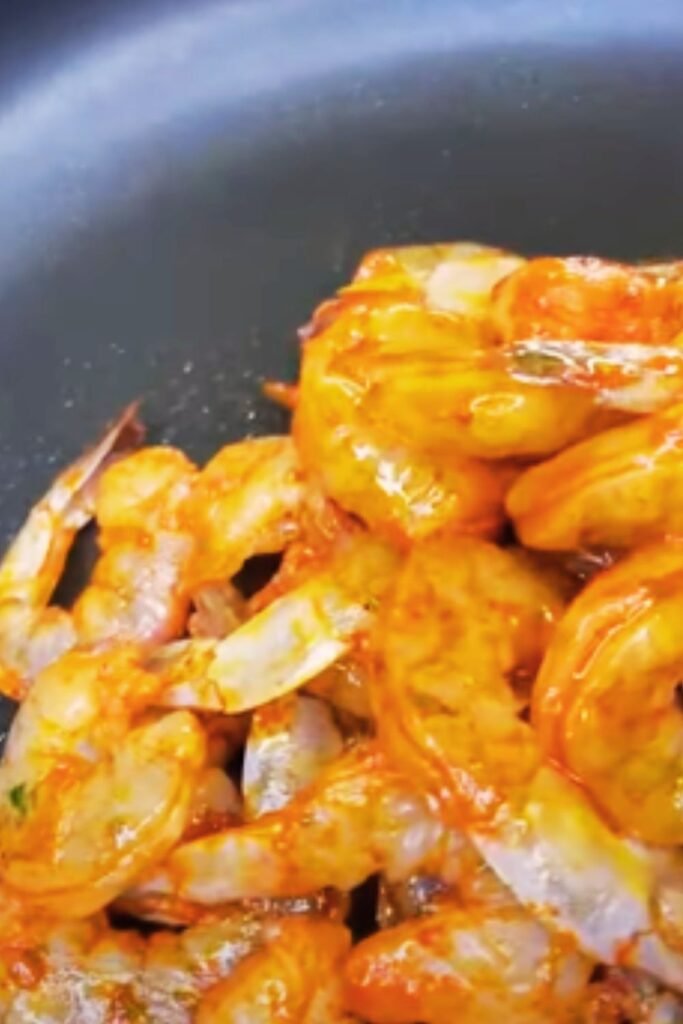
- Pour in white wine or broth, lemon juice, and lemon zest. Simmer for 1-2 minutes to reduce slightly.
- Return shrimp to the pan along with any accumulated juices. Cook for 1-2 minutes until shrimp are just opaque throughout and sauce has thickened slightly.
- Remove from heat and stir in chopped parsley, remaining salt, and black pepper.
Chef’s Tips for Perfect Results
- Don’t overcrowd the pan. Cook shrimp in batches if necessary to maintain proper browning.
- Watch the cook time carefully. Overcooked shrimp become tough and rubbery.
- The carry-over cooking is real. Remove shrimp from heat when they’re just barely opaque, as they’ll continue cooking slightly in the hot sauce.
- Taste before serving. Lemon intensity can vary, so adjust seasoning if needed.
How to Know When Shrimp Are Perfectly Cooked
Properly cooked shrimp are the key to this recipe’s success. Here’s how to tell they’re done:
- They form a “C” shape (overcooked shrimp curl into a tight “O” shape)
- They’ve turned from translucent gray to opaque pink with bright red tails
- The flesh feels slightly firm but still has a bit of spring when pressed
- The internal temperature reaches 120°F (49°C) if using a thermometer
Serving Suggestions and Meal Ideas
This versatile dish works beautifully in multiple presentations:
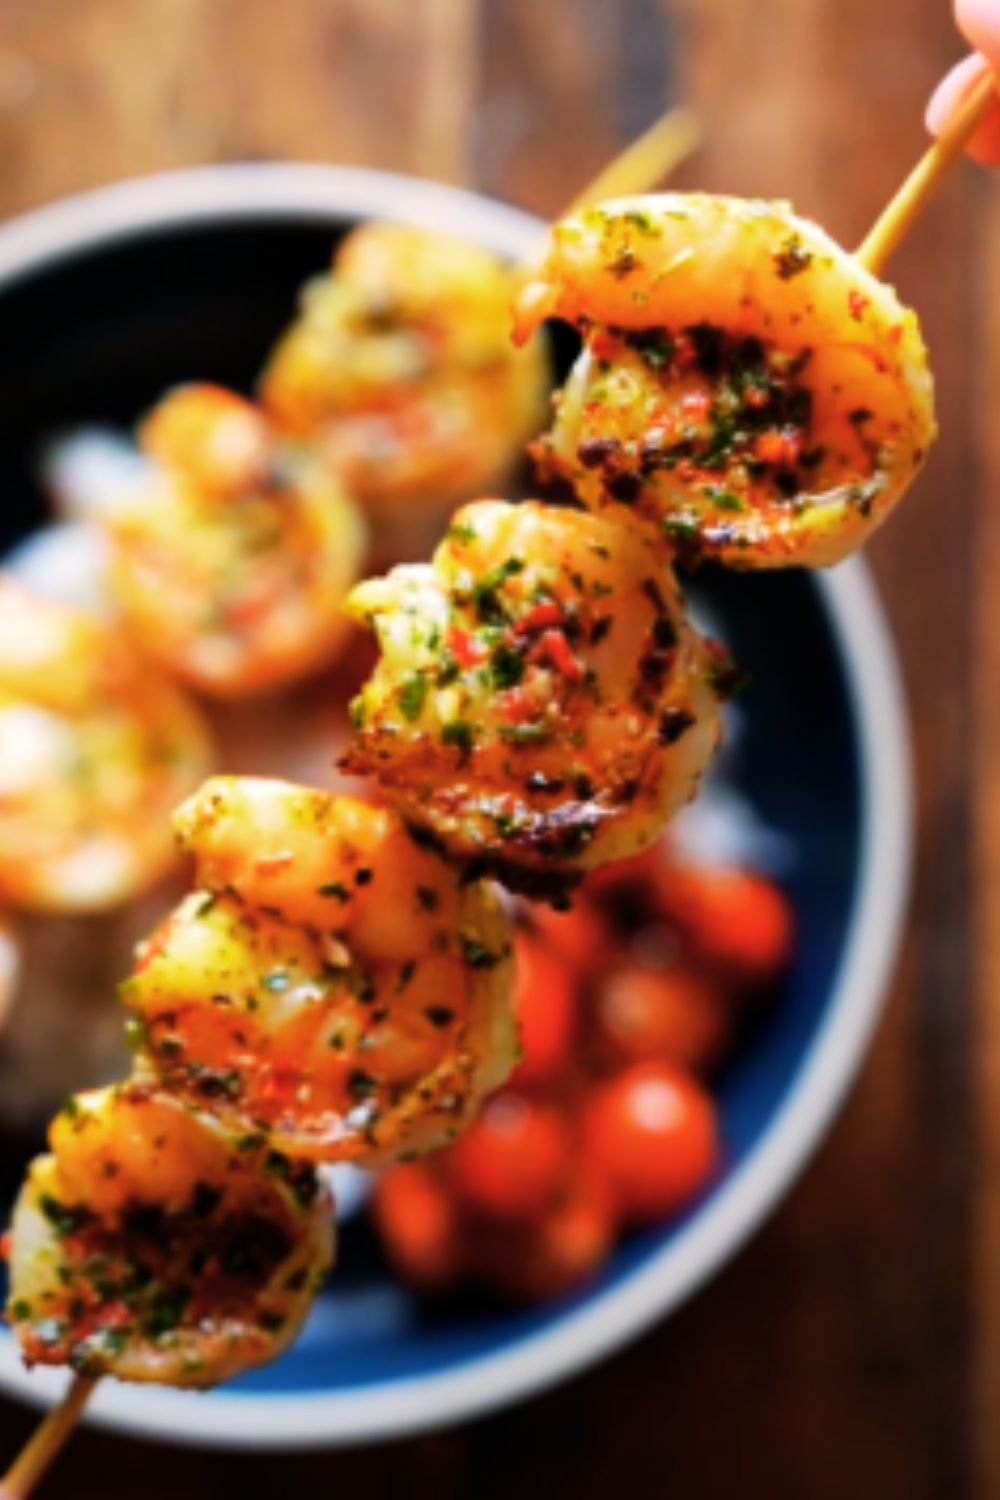
As an Appetizer
- Arrange on a platter with lemon wedges and extra parsley
- Serve with crusty bread for dipping in the sauce
- Provide small plates and cocktail forks
As a Main Course
- Pair with crusty bread and a simple green salad
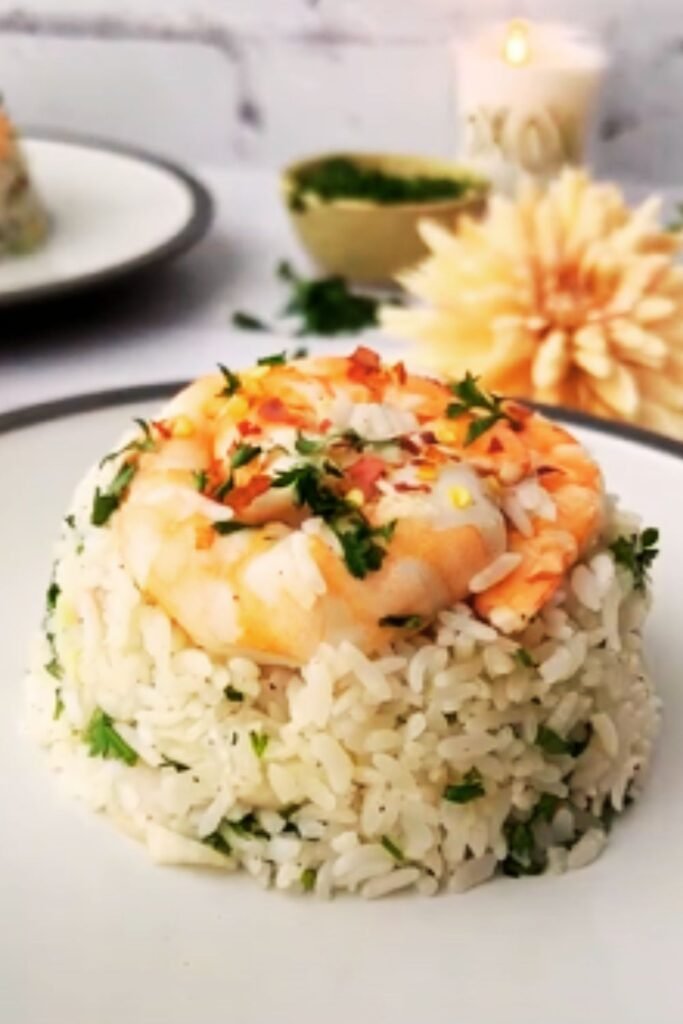
- Serve over steamed jasmine or basmati rice
- Toss with al dente linguine or angel hair pasta
- Accompany with roasted asparagus or broccolini
- Spoon over creamy polenta or mashed potatoes
Complementary Side Dishes
- Garlic bread or dinner rolls
- Simple green salad with vinaigrette
- Steamed or roasted vegetables
- Rice pilaf
- Cauliflower rice (for a low-carb option)
Make-Ahead and Storage Information
While this dish is best enjoyed immediately after cooking, here are some practical tips for preparation and storage:
Preparation in Advance
- Clean and season shrimp up to 8 hours ahead; store covered in refrigerator
- Prep all ingredients (mince garlic, chop parsley, zest and juice lemon) up to 4 hours ahead
- Store prepped ingredients in separate containers in the refrigerator
Storing Leftovers
- Refrigerate in an airtight container for up to 2 days
- Reheat gently in a skillet over medium-low heat just until warmed through
- Add a splash of water or broth when reheating to revive the sauce
Freezing (Not Recommended)
I don’t recommend freezing this dish, as the texture of the shrimp and quality of the sauce deteriorate significantly upon thawing and reheating.
Nutritional Information
For those tracking nutritional content, here’s an approximate breakdown per serving (¼ of recipe, without sides):
| Nutrient | Amount per Serving |
|---|---|
| Calories | 285 |
| Total Fat | 18g |
| Saturated Fat | 9g |
| Cholesterol | 225mg |
| Sodium | 980mg |
| Total Carbohydrates | 4g |
| Dietary Fiber | 0.5g |
| Sugars | 0.5g |
| Protein | 25g |
| Vitamin A | 10% DV |
| Vitamin C | 15% DV |
| Calcium | 8% DV |
| Iron | 10% DV |
Values are approximate and may vary based on specific ingredients used.
Variations to Try
Once you’ve mastered the basic recipe, consider these delicious variations to keep things interesting:
Mediterranean Style
Add ¼ cup chopped sun-dried tomatoes and ¼ cup crumbled feta cheese at the end of cooking.
Spicy Cajun
Replace regular salt with Cajun seasoning and double the red pepper flakes.
Coconut Lime
Substitute half the butter with coconut milk and replace lemon with lime juice and zest.
Herb Garden
Add 1 tablespoon each of fresh chopped basil, thyme, and chives along with the parsley.
Asian Fusion
Add 1 tablespoon grated ginger with the garlic and finish with 1 tablespoon soy sauce and 1 teaspoon sesame oil.
Common Mistakes and How to Avoid Them
Even experienced cooks can encounter challenges with seafood. Here are solutions to common problems:
Rubbery Shrimp
Problem: Overcooked shrimp become tough and rubbery. Solution: Cook just until opaque and remove from heat immediately. Remember they continue cooking in the hot sauce.
Bitter Garlic
Problem: Garlic turns bitter when browned or burned. Solution: Cook garlic on medium-low heat just until fragrant (30-45 seconds).
Broken Sauce
Problem: Butter separates, making the sauce look greasy. Solution: Keep heat moderate and whisk sauce continuously when adding cold ingredients.
Watery Sauce
Problem: Excess moisture from shrimp dilutes the sauce. Solution: Pat shrimp very dry before cooking and allow sauce to reduce properly.
Bland Flavor
Problem: The dish lacks punch despite following the recipe. Solution: Use fresh ingredients, especially garlic and lemon. Add a pinch more salt or a few drops of lemon juice right before serving.
Frequently Asked Questions
Based on my experience sharing this recipe with friends and family, here are answers to the most common questions:
Q: Can I use pre-cooked shrimp? While fresh or frozen raw shrimp work best for this recipe, you can use pre-cooked shrimp in a pinch. If using pre-cooked, add them at the very end of cooking, just long enough to warm through (about 30 seconds). Any longer will result in overcooked, rubbery shrimp.
Q: Is it necessary to devein shrimp? I strongly recommend deveined shrimp for the best eating experience. The “vein” is actually the digestive tract and can contain grit and impart an unpleasant taste. Most frozen shrimp come deveined, but if yours aren’t, use a small paring knife to make a shallow cut along the back and remove the dark vein.
Q: Should I leave the tails on or remove them? This is purely preference. Leaving the tails on creates an attractive presentation and provides a handle for appetizer-style eating. Removing tails makes the dish easier to eat when served over pasta or rice. I typically leave them on for special occasions and remove them for family dinners.
Q: Can I make this dish dairy-free? Yes, you can substitute the butter with a high-quality olive oil or a dairy-free butter alternative. The flavor profile will change slightly but will still be delicious.
Q: How spicy is this recipe? As written, the recipe has just a hint of heat from the red pepper flakes. If you’re sensitive to spice, you can omit them entirely. If you enjoy heat, feel free to double or even triple the amount.
Q: What can I use instead of wine? Chicken or vegetable broth makes a great substitute. You can also use clam juice for an enhanced seafood flavor, or simply use water with an extra squeeze of lemon juice.
Q: Can I add vegetables to make it a complete meal? Absolutely! Spinach, cherry tomatoes, and asparagus all work beautifully. Add quick-cooking vegetables like spinach or tomatoes in the last minute of cooking. For firmer vegetables like asparagus or bell peppers, sauté them first, remove from the pan, then add back with the shrimp at the end.
Why This Recipe Works: The Science Behind Perfect Shrimp
Understanding a few culinary principles explains why this method produces such outstanding results:
- Patting the shrimp dry removes surface moisture, allowing proper browning through the Maillard reaction, which creates complex flavors.
- Cooking in two stages prevents overcooking while ensuring the shrimp absorb the sauce flavors.
- The butter-oil combination raises the smoke point of the fat, allowing higher-temperature cooking without burning the butter.
- Acid from the lemon balances the richness of the butter and enhances the natural sweetness of the shrimp.
- Finishing with fresh herbs adds brightness that would be lost with longer cooking.
My Personal Touch
While developing this recipe, I discovered that adding a small amount of lemon zest makes a remarkable difference in the final flavor. Unlike lemon juice, which provides acidity, the zest contains aromatic oils that infuse the entire dish with a subtle citrus essence that perfectly complements the garlic and butter. It’s this small detail that elevates a good shrimp dish to an unforgettable one.
I also found that using half salted and half unsalted butter creates the perfect balance of seasoning throughout the dish. This is my secret technique that ensures the sauce has enough salt to enhance flavors without becoming overpowering.
Perfect Wine Pairings
While this dish stands beautifully on its own, the right beverage can elevate the experience further:
- Non-alcoholic options: Sparkling water with a slice of lemon, iced tea with mint, or a virgin mojito all provide refreshing contrasts to the rich, buttery sauce.
- Mocktails: A cucumber-mint spritzer or a non-alcoholic citrus punch complements the lemon notes in the dish.
Final Thoughts
My Lemon Garlic Butter Shrimp has become more than just a recipe in my household—it’s a reliable solution for those evenings when time is short but I refuse to compromise on flavor. The balance of richness from the butter, acidity from the lemon, and umami from the perfectly cooked shrimp creates a harmony of flavors that continues to delight my family and guests time after time.
What I appreciate most about this dish is its honest simplicity. There are no fancy techniques or obscure ingredients—just a thoughtful combination of quality components that, when treated with care, transform into something greater than the sum of their parts. It’s a powerful reminder that extraordinary meals don’t require extraordinary effort when you understand the fundamentals.
I hope this recipe brings the same joy to your table that it has to mine. Remember, the most important ingredient is confidence—trust the process, follow your instincts, and enjoy the delicious results!