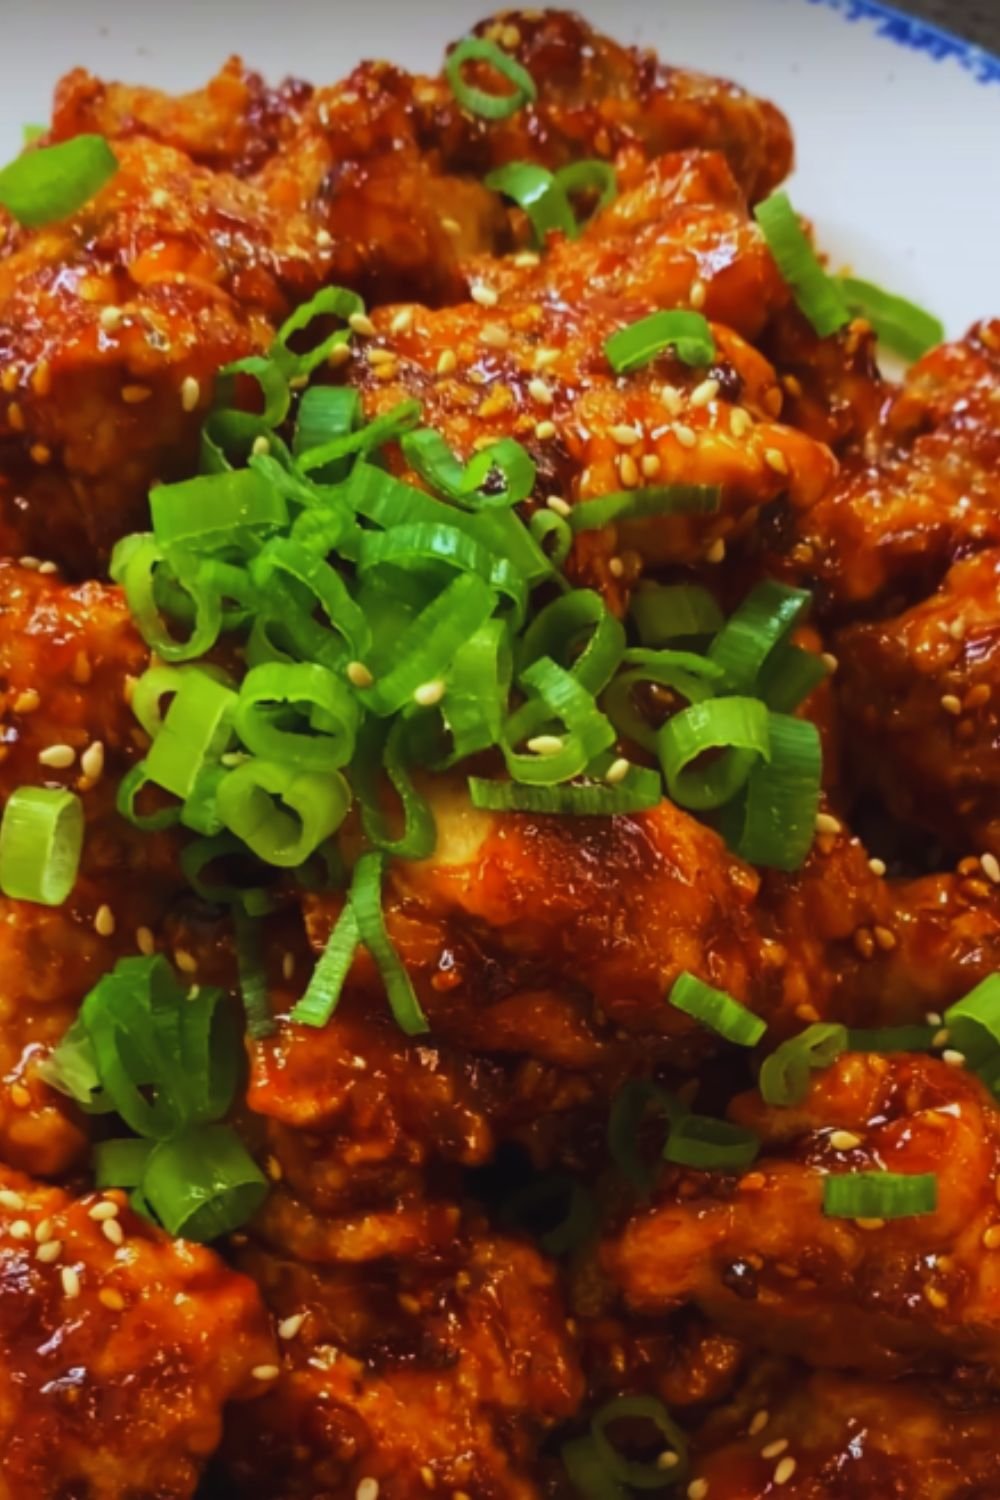
Have you ever craved that perfect combination of sweet, spicy, and crunchy all in one bite? Well, you’re in for a treat! Today, I’m sharing my absolutely foolproof recipe for Baked Crunchy Hot Honey Chicken that will revolutionize your dinner game. This dish combines the indulgent crunch of perfectly seasoned breadcrumbs with a drizzle of spicy honey that’ll make your taste buds dance.
Why You’ll Love This Recipe
I’ve spent countless hours perfecting this recipe, and I can confidently say it’s become a staple in my kitchen. What makes it special? It’s the perfect balance of textures and flavors – crispy exterior, juicy interior, and that incredible hot honey finish that elevates it from good to extraordinary. Plus, it’s baked, not fried, making it a healthier alternative that doesn’t sacrifice any of the crunch factor.
Nutrition Information
| Nutrient | Amount per Serving |
|---|---|
| Calories | 385 |
| Protein | 32g |
| Fat | 14g |
| Carbohydrates | 35g |
| Fiber | 2g |
| Sugar | 12g |
| Sodium | 580mg |
| Iron | 2.5mg |
| Potassium | 420mg |
Serving size: 2 pieces (approximately 6 oz)
Kitchen Equipment Needed
| Essential Equipment | Optional But Helpful |
|---|---|
| Large baking sheet | Meat thermometer |
| Parchment paper | Wire cooling rack |
| 3 shallow dishes | Kitchen tongs |
| Measuring cups/spoons | Silicone brush |
| Large bowl | Food processor |
Ingredients
For the Chicken
- 4 chicken breasts (about 2 pounds), cut into even-sized pieces
- 2 cups buttermilk
- 3 cups panko breadcrumbs
- 1 cup all-purpose flour
- 3 large eggs
- 2 tablespoons olive oil
For the Seasoning Mix
- 2 teaspoons garlic powder
- 2 teaspoons paprika
- 1½ teaspoons onion powder
- 1 teaspoon black pepper
- 2 teaspoons kosher salt
- ½ teaspoon cayenne pepper (adjust to taste)
For the Hot Honey Sauce
- ⅔ cup honey
- 2 tablespoons hot sauce
- 1 tablespoon butter
- 1 teaspoon red pepper flakes
- ¼ teaspoon kosher salt

Step-by-Step Instructions
Preparation (4-24 hours ahead)
- In a large bowl, combine buttermilk with 1 tablespoon of the seasoning mix.
- Add chicken pieces, ensuring they’re well-coated.
- Cover and refrigerate for at least 4 hours, preferably overnight.
Making the Coating
- Preheat your oven to 400°F (200°C).
- Line a large baking sheet with parchment paper and drizzle with olive oil.
- Set up your coating station with three shallow dishes:
- Dish 1: Flour mixed with half the remaining seasoning mix
- Dish 2: Beaten eggs with 2 tablespoons water
- Dish 3: Panko breadcrumbs mixed with the rest of the seasoning

Coating and Baking Process
- Remove chicken from buttermilk, allowing excess to drip off.
- Dredge each piece in the seasoned flour.
- Dip in egg wash.
- Coat thoroughly with seasoned panko, pressing gently to adhere.
- Place on prepared baking sheet, leaving space between pieces.
- Drizzle or spray lightly with olive oil.
- Bake for 15-20 minutes.
- Flip carefully, then bake additional 10-15 minutes until golden brown and internal temperature reaches 165°F (74°C).
Making the Hot Honey Sauce
- While chicken bakes, combine honey, hot sauce, butter, and red pepper flakes in a small saucepan.
- Heat over medium-low, stirring until butter melts and mixture is well combined.
- Add salt and keep warm until ready to serve.

Pro Tips for Perfect Results
- Pat chicken pieces dry before adding to buttermilk marinade
- Don’t skip the marinating time – it’s crucial for tender, flavorful chicken
- For extra crunch, toast panko breadcrumbs in a dry skillet before using
- Use a meat thermometer to ensure chicken is properly cooked
- Let chicken rest 5 minutes before drizzling with hot honey
- Keep sauce warm but not hot to maintain the right consistency
Storage and Reheating
| Storage Method | Duration | Notes |
|---|---|---|
| Refrigerator | 3-4 days | Store sauce separately |
| Freezer | Up to 3 months | Freeze before adding sauce |
| Room Temperature | 2 hours max | Not recommended |
Reheating Instructions
- Oven Method (Best):
- Preheat to 375°F (190°C)
- Place on wire rack
- Heat 10-12 minutes until crispy
- Air Fryer Method:
- 375°F for 3-4 minutes
- Shake basket halfway through
- Microwave (Last Resort):
- Use 50% power
- Heat in 30-second intervals
- Won’t maintain crispiness
Serving Suggestions
- Fresh green salad with citrus vinaigrette
- Honey-butter cornbread
- Crispy roasted brussels sprouts
- Creamy coleslaw
- Sweet potato fries
- Pickled vegetables
- Garlic mashed potatoes
Common Questions and Answers
Q: Can I make this gluten-free?
A: Yes! Replace all-purpose flour with rice flour and use gluten-free panko breadcrumbs. The result will be just as crispy.
Q: What if I don’t have buttermilk?
A: Make your own by adding 1 tablespoon of lemon juice or white vinegar to 1 cup of milk. Let stand for 5 minutes before using.
Q: Can I use chicken thighs instead of breasts?
A: Absolutely! Adjust cooking time to about 5-7 minutes longer, as thighs are thicker and have more fat.
Q: Is there a way to make this less spicy?
A: Reduce or omit the cayenne pepper in the seasoning mix and use less hot sauce in the honey mixture. You can also serve the hot honey on the side.
Q: How do I prevent the breading from falling off?
A: Make sure to: 1) Pat chicken dry before marinating, 2) Let excess egg drip off completely, 3) Press breading firmly onto chicken, and 4) Don’t move chicken for first 15 minutes of baking.
Q: Can I prepare this in advance for a party?
A: Yes! Bread the chicken up to 8 hours ahead and refrigerate on a wire rack. Bring to room temperature 30 minutes before baking. Make sauce fresh just before serving.
Recipe Variations
Flavor Twists
- Add a tablespoon of bourbon to the hot honey sauce
- Mix grated parmesan into the breadcrumbs
- Use maple syrup instead of honey for a different sweetness
- Add fresh herbs like thyme or rosemary to the breading
- Incorporate lemon zest in the flour mixture
Dietary Adaptations
- Keto: Use crushed pork rinds instead of breadcrumbs
- Dairy-Free: Replace buttermilk with coconut milk + lemon juice
- Low-Carb: Use almond flour and crushed almonds for coating
Remember, the key to this recipe’s success lies in the details – taking time with the breading process, maintaining the right oven temperature, and being patient while it bakes to golden perfection. The result is a dish that combines restaurant-quality crunch with a sweet-heat finish that’ll have everyone asking for seconds.