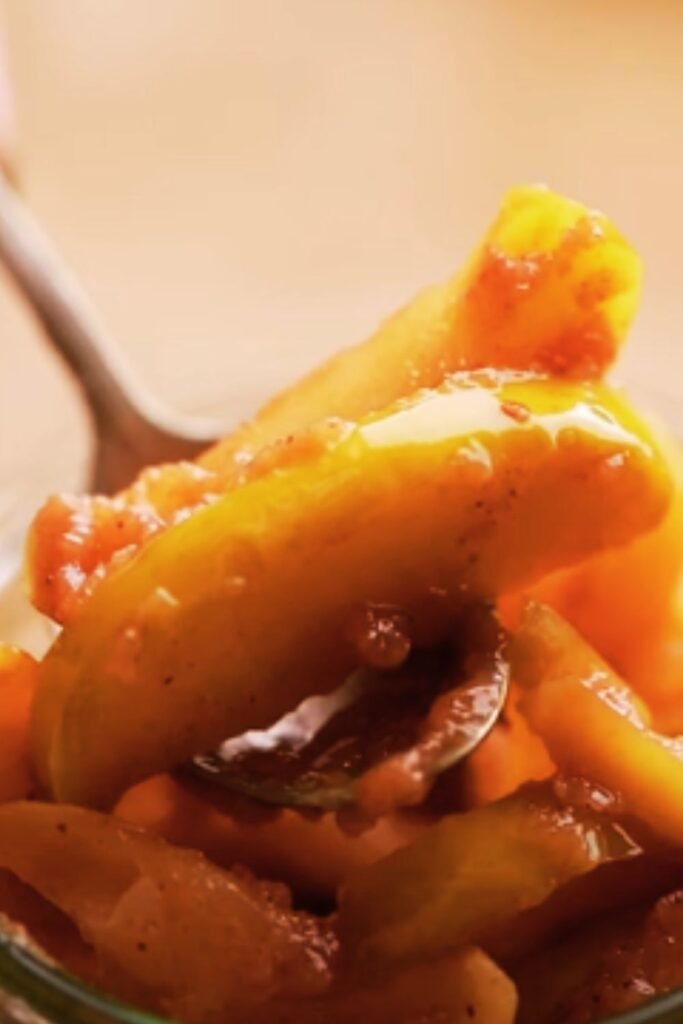
Nothing beats the comforting aroma of homemade apple pie filling simmering on the stovetop. I’ve perfected this recipe through years of testing, and I’m excited to share my foolproof method for creating the most delicious apple pie filling you’ll ever taste. Whether you’re planning to can it for later use or use it immediately in your favorite pie recipe, this filling will make your desserts shine.
Why You’ll Love This Recipe
I’ve discovered that homemade apple pie filling offers so many advantages over store-bought versions. The natural sweetness of fresh apples combined with warm spices creates an irresistible flavor that can’t be matched by anything from a can. Plus, you’ll know exactly what ingredients are going into your filling – no preservatives or artificial flavors needed!
The Perfect Apple Pie Filling Features:
- Made with fresh, crisp apples
- Perfectly balanced sweetness
- Warm autumn spices
- Versatile use in various desserts
- Can be frozen or canned
- Ready in just 30 minutes
Ingredients
I’ve carefully selected these ingredients to create the perfect balance of flavors and textures:
| Ingredient | Amount | Notes |
|---|---|---|
| Fresh apples | 6 cups (about 8 medium apples) | Peeled, cored, and sliced |
| Granulated sugar | 1 cup | Adjust based on apple sweetness |
| Brown sugar | 1/2 cup | Adds caramel notes |
| Ground cinnamon | 1 tablespoon | Use Ceylon cinnamon for best results |
| Ground nutmeg | 1/4 teaspoon | Freshly grated if possible |
| Ground allspice | 1/4 teaspoon | Optional but recommended |
| Salt | 1/4 teaspoon | Enhances overall flavor |
| Cornstarch | 1/4 cup | For thickening |
| Water | 2 cups | For cooking syrup |
| Lemon juice | 2 tablespoons | Prevents browning |
| Butter | 2 tablespoons | Adds richness |
Best Apples for Pie Filling
Through extensive testing, I’ve found these apple varieties work best:
| Apple Variety | Texture After Cooking | Sweetness Level | Best Used For |
|---|---|---|---|
| Granny Smith | Firm, holds shape | Tart | Traditional pies |
| Honeycrisp | Crisp, stable | Sweet-tart | Pies and desserts |
| Braeburn | Medium-firm | Sweet | Multi-purpose |
| Golden Delicious | Soft but intact | Sweet | Cooking down |
| Pink Lady | Firm, stable | Sweet-tart | Extended storage |
Step-by-Step Instructions
Preparation
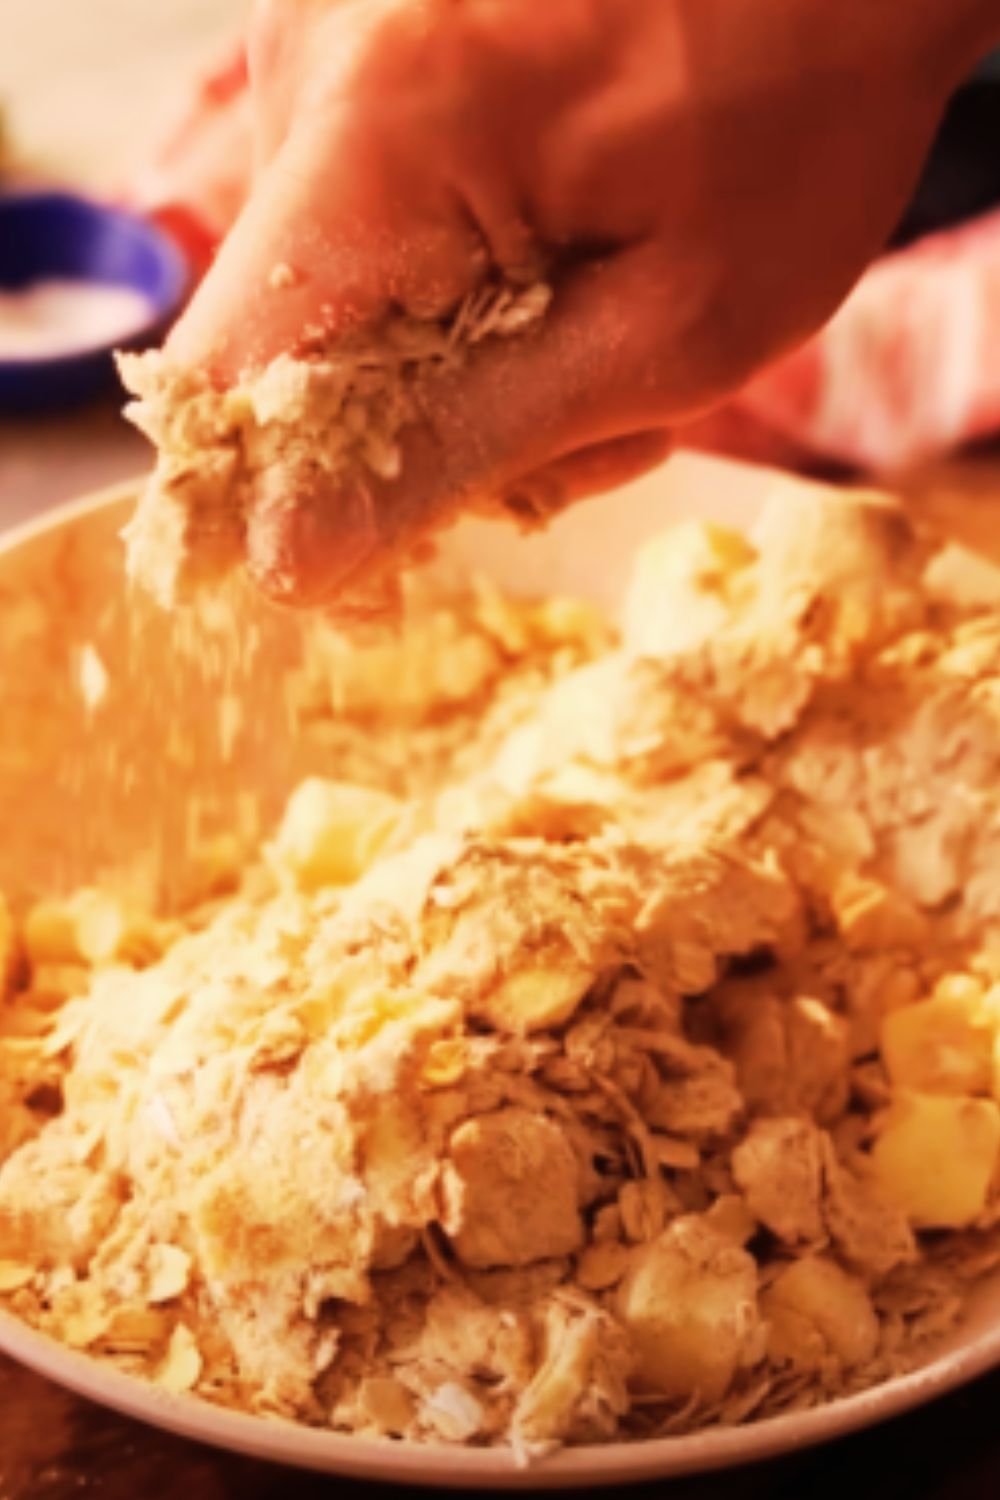
- Wash, peel, and core your apples
- Slice apples into uniform 1/4-inch pieces
- Toss with lemon juice to prevent browning
- Combine dry ingredients in a separate bowl

Cooking Process
I’ve developed this foolproof method over many years:
- In a large pot, combine water, sugars, and spices
- Bring to a gentle boil over medium heat
- Whisk cornstarch with 1/4 cup cold water until smooth
- Slowly stir cornstarch mixture into boiling syrup
- Cook until thickened, about 2 minutes
- Add apple slices and butter
- Reduce heat to low and simmer for 10-12 minutes
- Test apple tenderness with a fork
- Remove from heat and cool completely
Storage Instructions
| Storage Method | Temperature | Duration | Container Type |
|---|---|---|---|
| Refrigerator | 40°F (4°C) | 5-7 days | Airtight container |
| Freezer | 0°F (-18°C) | Up to 6 months | Freezer-safe bags |
| Canned | Room temp | Up to 1 year | Sterilized jars |
Canning Instructions
For long-term storage, I recommend this canning process:
- Sterilize glass jars and lids
- Fill hot jars with filling, leaving 1-inch headspace
- Remove air bubbles
- Wipe rims clean
- Process in water bath for 25 minutes
- Cool completely before storing
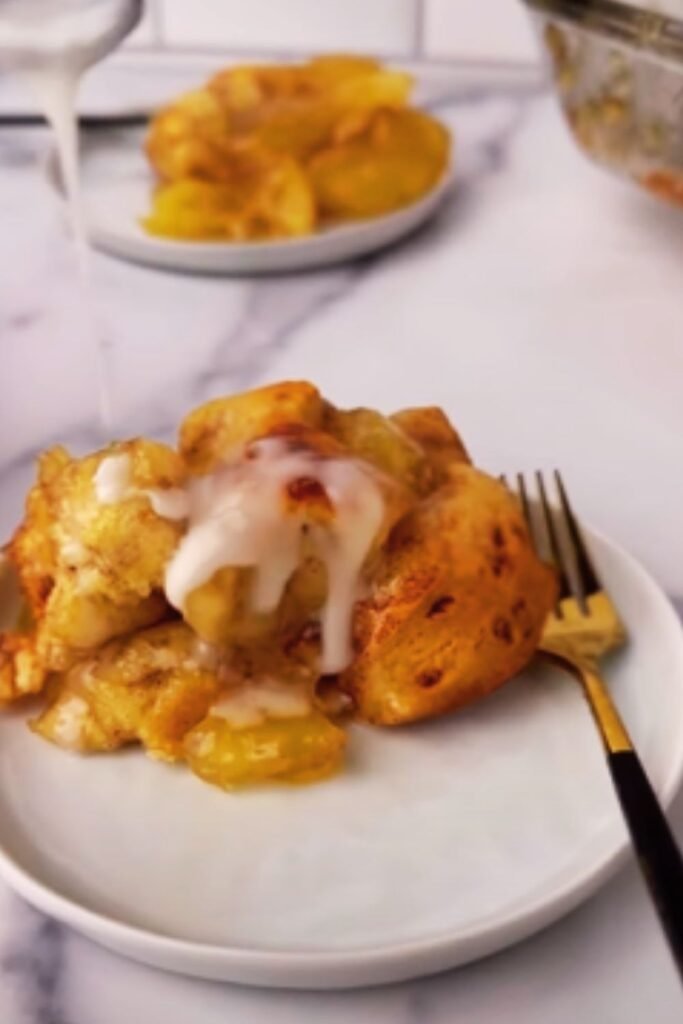
Serving Suggestions
I love using this versatile filling in various desserts:
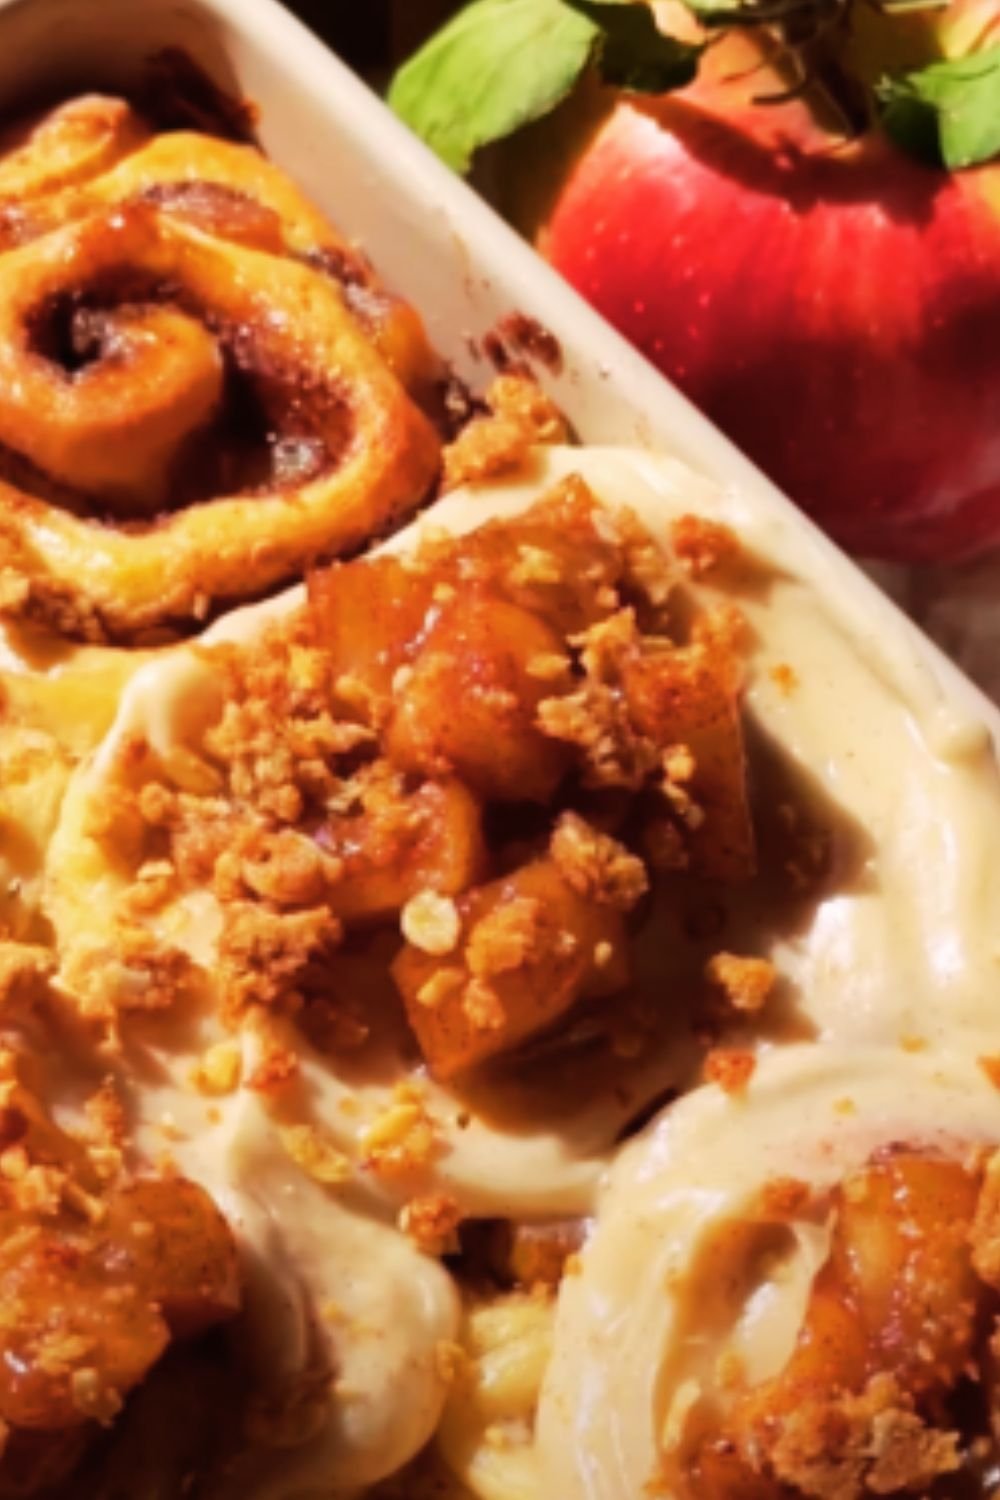
- Classic double-crust apple pie
- Apple crisp or crumble
- Turnovers with puff pastry
- Topping for vanilla ice cream
- Mixed into yogurt or oatmeal
- Apple hand pies
- Coffee cake filling
- Danish pastry topping
Recipe Variations
Sugar-Free Version
- Replace sugars with monk fruit sweetener
- Add 1/2 teaspoon xanthan gum for thickening
- Reduce cooking time by 2 minutes
Spiced Version
- Add 1/2 teaspoon cardamom
- Include 1/4 teaspoon ginger
- Drop in one cinnamon stick while cooking
Caramel Version
- Replace 1/2 cup granulated sugar with caramel sauce
- Add 1/4 teaspoon sea salt
- Increase butter to 3 tablespoons
Troubleshooting Guide
| Issue | Cause | Solution |
|---|---|---|
| Runny filling | Insufficient cornstarch | Add 1 tbsp more cornstarch mixed with cold water |
| Mushy apples | Overcooked | Reduce cooking time by 2-3 minutes |
| Too sweet | Apple variety | Use tarter apples or reduce sugar |
| Cloudy filling | Impurities in syrup | Strain through cheesecloth |
| Discoloration | Oxidation | Add more lemon juice |
Common Questions
Q: Can I use different types of apples together?
A: Yes! I actually recommend using a mix of sweet and tart apples for the best flavor profile. Just make sure they have similar cooking times.
Q: Why did my filling turn out cloudy?
A: Cloudiness usually occurs when starch isn’t fully dissolved. Make sure to whisk the cornstarch with cold water before adding it to the hot syrup.
Q: Can I reduce the sugar amount?
A: Absolutely! The sugar can be reduced by up to half, but keep in mind this may affect the preservation quality if you’re planning to can the filling.
Q: How do I prevent my apples from turning to mush?
A: Use firmer apple varieties and don’t overcook them. The apples should be tender but still hold their shape when pierced with a fork.
Q: Can I add other fruits to this filling?
A: Yes! Pears, cranberries, or raisins make excellent additions. Add firmer fruits at the beginning and softer ones toward the end of cooking.
Pro Tips
- Cut apples into uniform sizes for even cooking
- Use cold water when mixing cornstarch to prevent lumps
- Let filling cool completely before using in baked goods
- For extra flavor, add a vanilla bean during cooking
- Always taste-test your apples before adding sugar
- Use a heavy-bottomed pot to prevent scorching
- Store filling in portions suitable for your recipes
- Label storage containers with the date made
Remember, the key to perfect apple pie filling lies in selecting the right apples and paying attention to cooking times. With these detailed instructions and tips, you’ll be making delicious homemade filling that’ll elevate all your apple desserts to the next level.