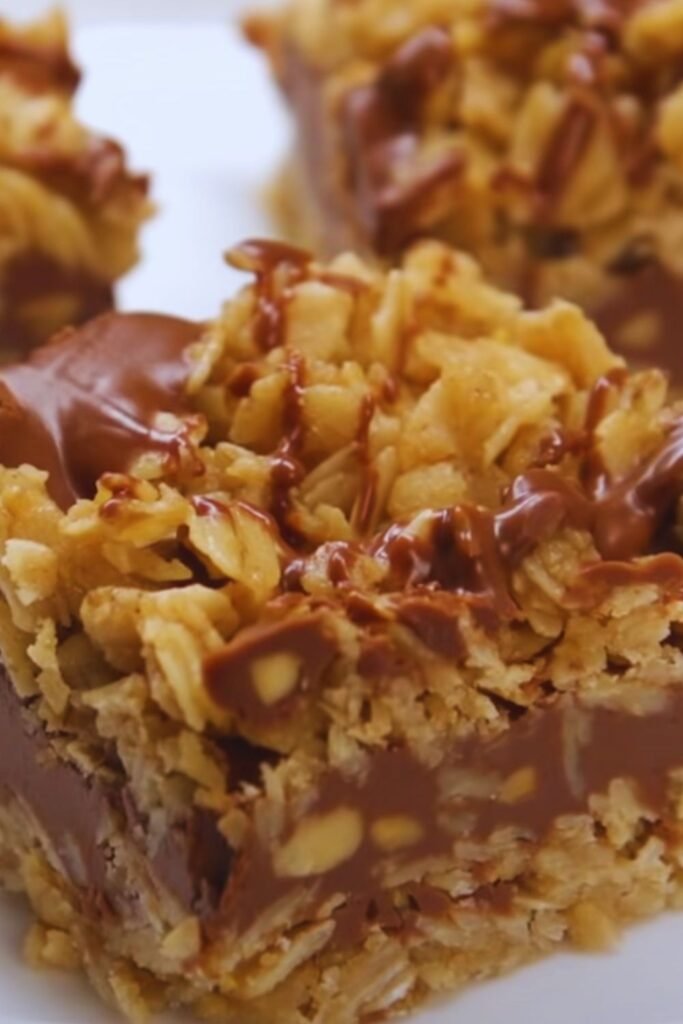
There’s something magical about the combination of chocolate and peanut butter that makes my taste buds dance with joy. When you pair these two heavenly ingredients with hearty oats in a no-bake treat, you’ve got yourself a winner that’s impossible to resist. I’ve been making these No-Bake Chocolate Oatmeal Bars for years, and they never fail to disappear within hours of setting them on the counter.
What makes these bars truly special isn’t just their decadent flavor profile—it’s how ridiculously simple they are to prepare. No oven required, minimal ingredients, and ready in under an hour (including chill time)? It’s almost too good to be true, except it isn’t. These bars are very real and about to become your new go-to treat for satisfying sweet cravings, impressing guests, or packing in lunchboxes.
Why You’ll Love These No-Bake Chocolate Oatmeal Bars
Before diving into the recipe, let me share why these bars have earned a permanent spot in my dessert rotation:
- Quick preparation: Just 15 minutes of active time
- No baking required: Perfect for hot summer days or when you don’t want to fire up the oven
- Pantry-friendly ingredients: You likely have everything you need already
- Customizable: Easily adaptable to dietary preferences and taste preferences
- Crowd-pleaser: Beloved by kids and adults alike
- Make-ahead friendly: Actually better when made a day in advance
- Portable: Ideal for picnics, potlucks, and lunchboxes
These bars strike that perfect balance between wholesome and indulgent. The oats provide a hearty, nutritious base while the chocolate and peanut butter deliver that satisfying sweetness we all crave occasionally. It’s the best of both worlds in one perfectly portioned treat.
Essential Ingredients for Perfect No-Bake Chocolate Oatmeal Bars
Let’s break down what you’ll need to create these delectable bars. The beauty of this recipe lies in its simplicity and the likelihood that you already have most, if not all, of these ingredients in your pantry.
Base Layer Ingredients
- 1 cup (226g) unsalted butter
- 1/2 cup (100g) light brown sugar, packed
- 1 teaspoon pure vanilla extract
- 3 cups (270g) old-fashioned rolled oats
- 1 cup (125g) all-purpose flour
- 1/2 teaspoon sea salt
- 1 cup (250g) creamy peanut butter
Chocolate Topping Ingredients
- 1 1/4 cups (225g) semi-sweet chocolate chips
- 1/4 cup (62g) creamy peanut butter
- 1/4 teaspoon sea salt (optional, for garnish)
Ingredient Notes and Substitutions
Old-fashioned rolled oats : These provide the perfect chewy texture. Quick oats can be substituted but will give a slightly different texture. Steel-cut oats won’t work in this no-bake recipe.
Creamy peanut butter : I recommend using a commercial brand like Jif or Skippy for the most consistent results. Natural peanut butter can separate and affect the texture of your bars.
Light brown sugar : This adds a deeper molasses flavor than white sugar. Dark brown sugar also works beautifully if you prefer an even richer taste.
All-purpose flour : This helps bind the bars together. For a gluten-free option, substitute with a 1:1 gluten-free flour blend.
Semi-sweet chocolate chips : These provide the perfect balance of sweetness. You can use milk chocolate for a sweeter bar or dark chocolate for a richer, less sweet version.
Unsalted butter : Using unsalted butter allows you to control the exact amount of salt in the recipe. If you only have salted butter, reduce the added salt by 1/4 teaspoon.
Equipment You’ll Need
What makes this recipe even more appealing is the minimal equipment required:
- 9×9-inch (23x23cm) baking pan
- Parchment paper
- Medium saucepan
- Mixing bowl
- Rubber spatula
- Measuring cups and spoons
- Microwave-safe bowl (for melting chocolate)
Step-by-Step Instructions
Now that we’ve gathered our ingredients, let’s dive into the process. I promise it’s so straightforward that even novice cooks will have success.
Preparing the Pan
- Line your 9×9-inch baking pan with parchment paper, leaving some overhang on the sides to easily lift the bars out later.
- Make sure the parchment extends up all four sides of the pan—this creates “handles” that make removal effortless.
Making the Oatmeal Base
- In a medium saucepan over medium heat, melt the butter completely.
- Add the brown sugar and stir until dissolved and the mixture is smooth, about 2 minutes.
- Remove from heat and stir in the vanilla extract.
- In a large mixing bowl, combine the oats, flour, and salt, mixing well.
- Pour the butter mixture over the dry ingredients and stir until thoroughly combined.
- Add 1 cup of peanut butter and mix until fully incorporated. The mixture will be thick and slightly sticky.
- Reserve 1/4 of the oat mixture (about 1 cup) for the topping.
- Press the remaining oat mixture firmly into the prepared pan, creating an even base layer. I find using the bottom of a measuring cup helps create a smooth, even surface.
Creating the Chocolate Layer
- In a microwave-safe bowl, combine chocolate chips and 1/4 cup peanut butter.
- Microwave in 30-second intervals, stirring between each, until fully melted and smooth. This usually takes 1-2 minutes total.
- Pour the chocolate mixture over the oat base, spreading it evenly with a spatula.
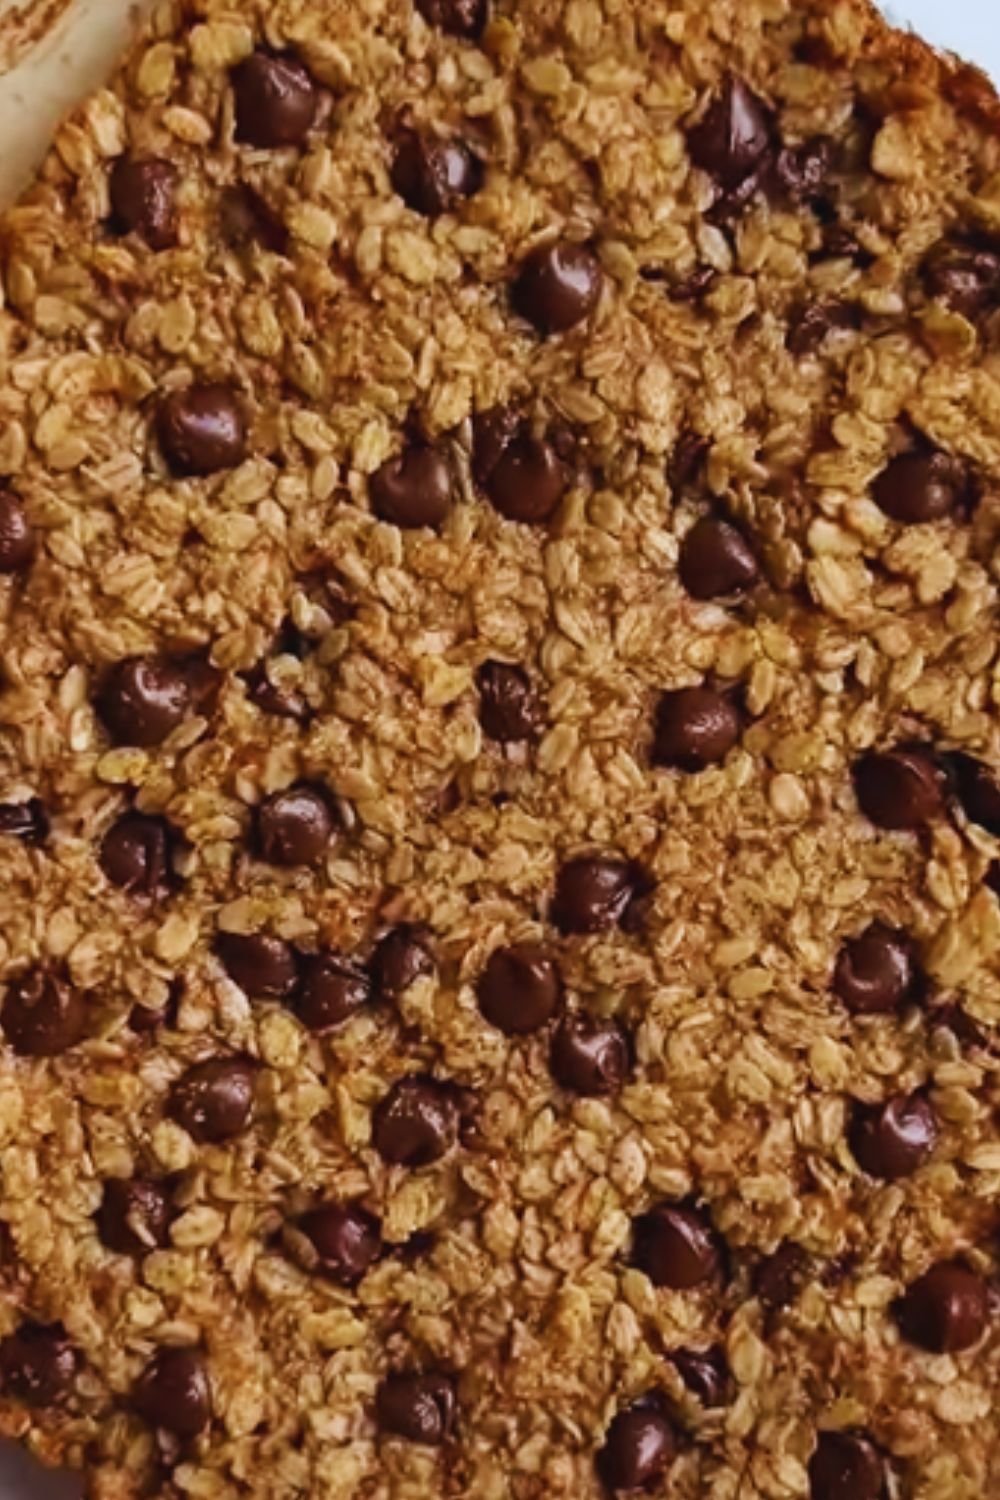
Adding the Crumble Topping
- Crumble the reserved oat mixture evenly over the chocolate layer.
- Gently press the crumbles into the chocolate to ensure they adhere.
- If desired, sprinkle with a light dusting of sea salt for that sweet-and-salty contrast.
Chilling and Setting
- Refrigerate the bars for at least 2 hours, or until completely set.
- For the cleanest cuts, place in the freezer for 15 minutes before slicing.
- Use the parchment paper “handles” to lift the bars out of the pan.
- With a sharp knife, cut into 16 squares (or smaller bars if you prefer).
The Science Behind Perfect No-Bake Bars
Understanding a few key principles will help ensure your bars turn out perfectly every time:
The Role of Butter
Butter serves multiple functions in these bars:
- It binds the oats and flour together
- It contributes richness and flavor
- It helps solidify the bars when chilled
When melted with brown sugar, butter creates a caramel-like mixture that coats the oats and flour, helping everything stick together. The fat content in butter also helps the bars set properly when chilled, giving them that perfect firm-yet-chewy texture.
Temperature Matters
The temperature of your ingredients can significantly impact the final result:
- Room temperature peanut butter blends more easily with other ingredients.
- Properly melted chocolate (not overheated) ensures a smooth, glossy top layer.
- Adequate chilling time (at least 2 hours) is crucial for the bars to set completely.
Variations to Try
One of the reasons I adore this recipe is its versatility. Here are some exciting ways to customize your no-bake chocolate oatmeal bars:
Alternative Nut Butters
- Almond butter: Creates a slightly more delicate flavor profile
- Cashew butter: Offers a milder, creamier taste
- Sunflower seed butter: Perfect for nut-free environments like schools
- Cookie butter: For an indulgent, spiced variation
Mix-Ins for the Oat Layer
- Shredded coconut (1/4 cup): Adds tropical notes and interesting texture
- Mini chocolate chips (1/4 cup): For double chocolate goodness
- Chopped nuts (1/4 cup): Provides crunch and nutty flavor
- Dried cranberries (1/4 cup): Contributes chewy texture and tart contrast
Topping Alternatives
- White chocolate drizzle: Creates an elegant, contrasting finish
- Crushed pretzels: Adds salty crunch
- Toffee bits: Introduces caramel notes
- Flaky sea salt: Enhances all flavors with that sweet-salty balance
Storage and Make-Ahead Tips
These bars actually improve after a day in the refrigerator as the flavors meld together, making them perfect for advance preparation.
Short-Term Storage
- Refrigerator: Store in an airtight container for up to 1 week. Separate layers with parchment paper to prevent sticking.
- Room temperature: They’ll keep at cool room temperature (below 70°F/21°C) for up to 2 days, though the chocolate layer will be softer.
Long-Term Storage
- Freezer: These bars freeze beautifully for up to 3 months. Here’s how to do it properly:
- Cut into individual squares
- Place on a baking sheet and freeze until solid (about 2 hours)
- Transfer to a freezer-safe container or bag, separating layers with parchment
- Label with the date and contents
- To thaw, place in the refrigerator overnight or let sit at room temperature for 30 minutes
Nutritional Information
Understanding the nutritional content can help you enjoy these treats mindfully. The following table provides approximate values per bar (when cut into 16 squares):
| Nutrient | Amount per Bar |
|---|---|
| Calories | 320 kcal |
| Total Fat | 21g |
| Saturated Fat | 9g |
| Trans Fat | 0g |
| Cholesterol | 25mg |
| Sodium | 150mg |
| Total Carbohydrates | 30g |
| Dietary Fiber | 2g |
| Sugars | 15g |
| Protein | 6g |
Note: These values are approximate and may vary based on specific brands of ingredients used.
Serving Suggestions
These versatile bars can be enjoyed in numerous ways:
- Classic pairing: With a cold glass of milk or hot coffee
- A la mode: Warmed slightly and topped with a scoop of vanilla ice cream
- Breakfast indulgence: Alongside fresh berries and Greek yogurt
- Afternoon pick-me-up: With a cup of tea or coffee
- Dessert platter: Cut into smaller pieces as part of a dessert sampler alongside fruit
- Gifting: Wrapped in parchment and tied with string for homemade food gifts
Troubleshooting Common Issues
Even with such a straightforward recipe, occasional challenges may arise. Here’s how to address them:
Bars Too Crumbly
Possible causes and solutions:
- Not enough binding agent: Add an extra tablespoon of peanut butter or butter
- Overmeasured dry ingredients: Be sure to measure flour and oats correctly (spoon and level flour, don’t pack it)
- Insufficient pressing: Press the base layer very firmly into the pan
- Inadequate chilling time: Allow full 2+ hours in the refrigerator
Chocolate Layer Too Hard or Soft
Possible causes and solutions:
- Too hard: May have too much chocolate in proportion to peanut butter; add an extra tablespoon of peanut butter to the chocolate mixture
- Too soft: Chocolate and peanut butter may not be fully incorporated; ensure thorough melting and mixing, and adequate chilling time
Bars Sticking to the Pan
Possible causes and solutions:
- Insufficient lining: Always use parchment with overhang on all sides
- Removing too soon: Ensure bars are completely chilled before attempting to remove
- Warm kitchen: If your kitchen is very warm, chill an additional 30 minutes
Frequently Asked Questions
Q: Can I make these bars gluten-free?
A: Absolutely! Replace the all-purpose flour with a 1:1 gluten-free flour blend and ensure your oats are certified gluten-free (as some may be processed in facilities that also process wheat).
Q: How can I make these bars vegan?
A: Substitute the butter with coconut oil or vegan butter. Ensure your chocolate chips are dairy-free (many dark chocolate varieties are naturally vegan, but always check labels).
Q: Can I use natural peanut butter?
A: While I recommend commercial peanut butter for the most consistent results, you can use natural peanut butter if you stir it very well before measuring. The bars may have a slightly different texture but will still be delicious.
Q: How do I know when the bars are properly set?
A: The bars should feel firm to the touch and the chocolate layer should not be tacky. When you cut into them, they should hold their shape cleanly.
Q: Can I double this recipe for a larger crowd?
A: Yes! Double all ingredients and use a 9×13-inch pan instead. The chilling time may need to be increased by 30-60 minutes for the larger batch.
Q: My bars seem too sweet. How can I reduce the sweetness?
A: Try reducing the brown sugar to 1/3 cup and using dark chocolate chips instead of semi-sweet. You can also add a generous sprinkle of sea salt to balance the sweetness.
Q: Is there a way to make these without peanut butter for someone with allergies?
A: Yes, substitute the peanut butter with sunflower seed butter, soy butter, or wow butter for allergies. The flavor will be different but still delicious.
Why This Recipe Stands the Test of Time
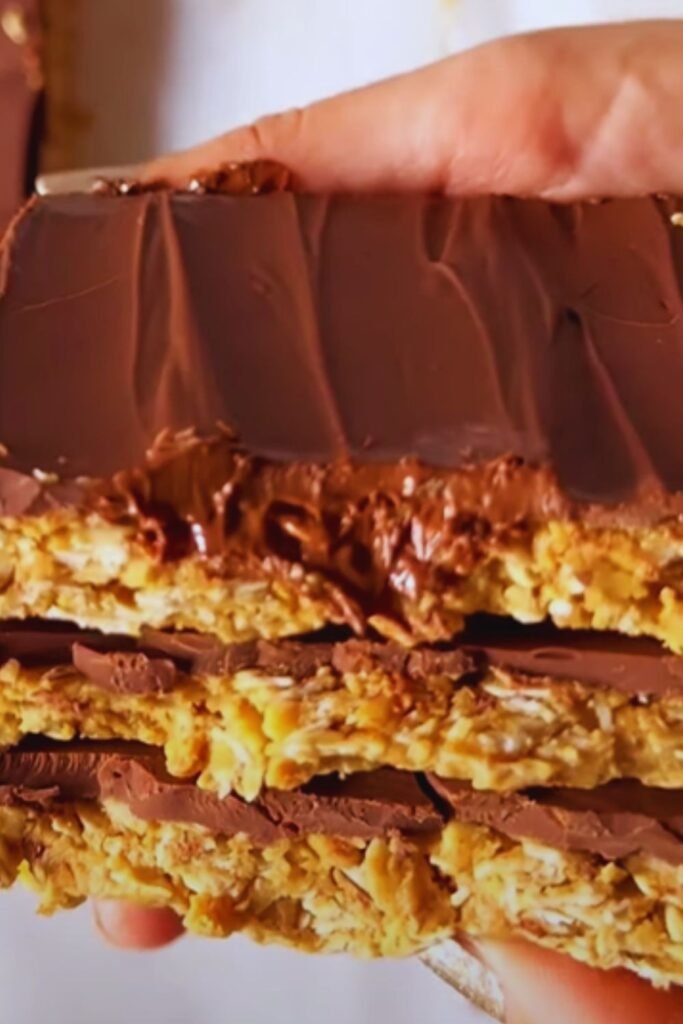
I’ve been making these bars for over a decade now, and they’re still requested at every family gathering. What makes them truly special is their ability to satisfy various dietary preferences without sacrificing flavor or texture. They’re decadent enough for dessert lovers yet contain wholesome ingredients like oats that make them feel less indulgent than many other treats.
The combination of textures—the chewy oat base, the smooth chocolate middle, and the crumbly topping—creates a multi-dimensional experience that keeps you coming back for “just one more bite.” And the sweet-salty balance, especially if you add that finishing touch of sea salt, hits all the right notes on your palate.
Perhaps the most compelling reason these bars have become a staple in my kitchen is their reliability. They’re practically foolproof, making them appropriate for bakers of all skill levels. Whether you’re a seasoned pastry chef or someone who’s just beginning to explore the world of homemade treats, these no-bake chocolate oatmeal bars deliver consistent, delicious results every time.
So the next time you’re craving something sweet but don’t want to turn on the oven, or when you need a crowd-pleasing dessert that comes together in minutes, remember this recipe. I’m confident it will become a favorite in your household just as it has in mine.
Happy no-baking!