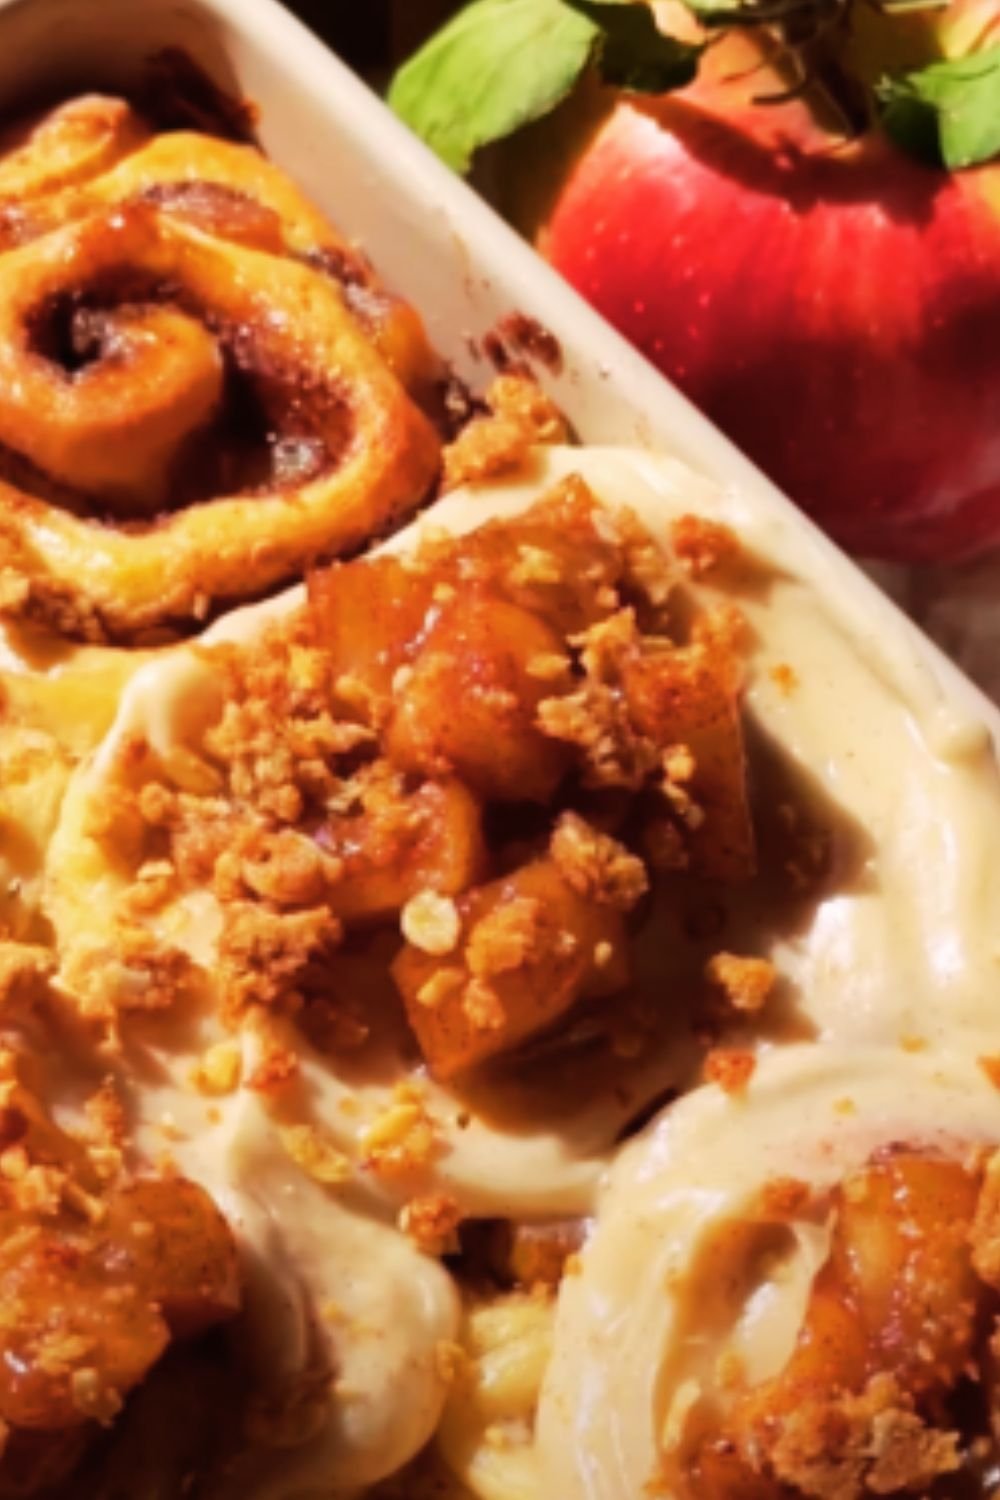
There’s something magical about the aroma of cinnamon-spiced apples baking in the oven, especially when they’re topped with a buttery, crisp topping. As someone who has been baking apple crisp for over two decades, I’ve perfected this classic dessert through countless iterations. Today, I’m thrilled to share my absolute best apple crisp recipe – one that has consistently earned rave reviews at family gatherings, potlucks, and holiday celebrations.
What Makes This Apple Crisp Special
I’ve always believed that the perfect apple crisp strikes a delicate balance: tender, juicy apples with just the right amount of sweetness and spice, crowned with a topping that delivers on its promise of being genuinely “crisp.” After years of tweaking and testing, I’ve discovered the secrets to achieving this ideal balance.
The magic lies in several key elements: selecting the right apples (a mix provides the best flavor and texture), adding a touch of lemon to brighten the flavors, incorporating the perfect blend of spices, and creating a topping that remains crisp even after storage. I’ve also found that a brief pre-cooking of the apples ensures they’ll be perfectly tender without becoming mushy.
The Perfect Apples for Crisp
Choosing the right apples makes all the difference. I recommend using a combination for the best flavor and texture:
- Granny Smith: Provides tartness and holds its shape well
- Honeycrisp: Offers a perfect balance of sweet and tart with a crisp texture
- Braeburn: Adds complex flavor with notes of spice
- Golden Delicious: Contributes sweetness and breaks down slightly for a varied texture
Using a mix creates a complex flavor profile with some apples breaking down while others maintain their structure. This gives you both sauce-like elements and distinct apple pieces in each bite.
Ingredients You’ll Need
For the Apple Filling:
- 3 pounds mixed apples (about 8-9 medium apples)
- 3/4 cup granulated sugar
- 2 tablespoons fresh lemon juice
- 2 tablespoons cornstarch
- 1 1/2 teaspoons ground cinnamon
- 1/4 teaspoon ground nutmeg
- 1/4 teaspoon ground allspice
- 1/8 teaspoon ground cloves
- 1/4 teaspoon salt
- 2 tablespoons unsalted butter
- 1 teaspoon pure vanilla extract
For the Crisp Topping:
- 1 cup all-purpose flour
- 1 cup old-fashioned rolled oats
- 3/4 cup packed light brown sugar
- 1/2 cup granulated sugar
- 1 teaspoon ground cinnamon
- 1/2 teaspoon ground nutmeg
- 1/4 teaspoon salt
- 3/4 cup (1 1/2 sticks) cold unsalted butter, cubed
- 1 cup chopped nuts (walnuts or pecans work beautifully)
Step-by-Step Instructions
Preparing the Apples:
- Preheat your oven to 350°F (175°C) and grease a 9×13-inch baking dish.
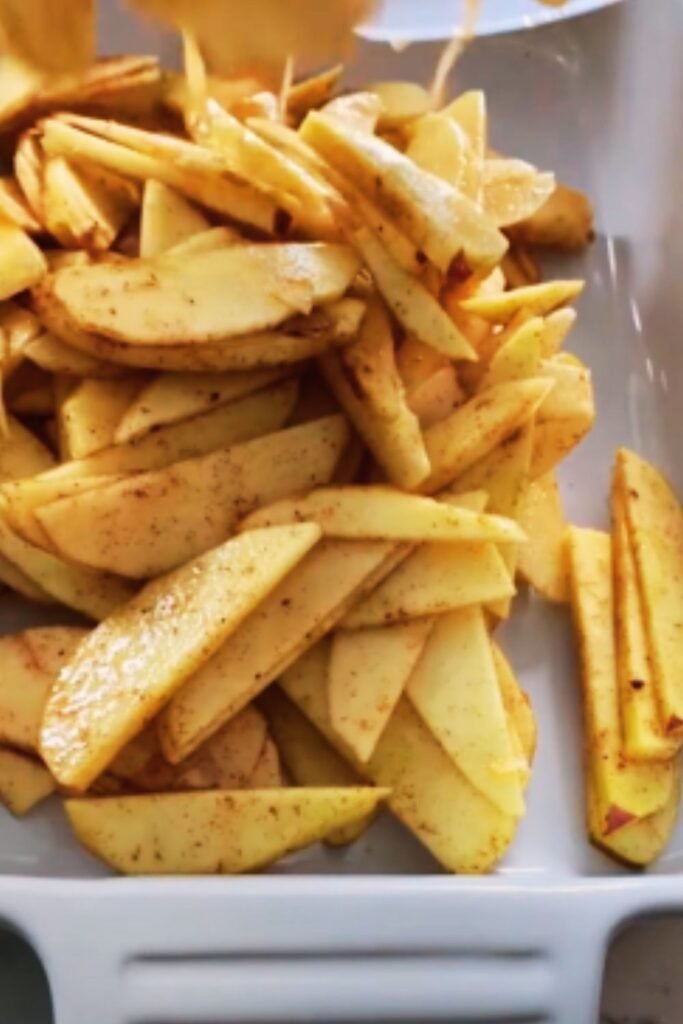
- Peel, core, and slice the apples into 1/4-inch thick slices. I prefer slicing rather than chunking for more consistent baking.
- In a large bowl, toss the apple slices with granulated sugar, lemon juice, cornstarch, cinnamon, nutmeg, allspice, cloves, and salt until evenly coated.
- In a large skillet over medium heat, melt the 2 tablespoons of butter. Add the apple mixture and cook for about 5 minutes, stirring occasionally, until the apples start to soften slightly and release their juices.
- Remove from heat and stir in the vanilla extract.
- Transfer the apple mixture to the prepared baking dish, spreading it out evenly.
Making the Perfect Crisp Topping:
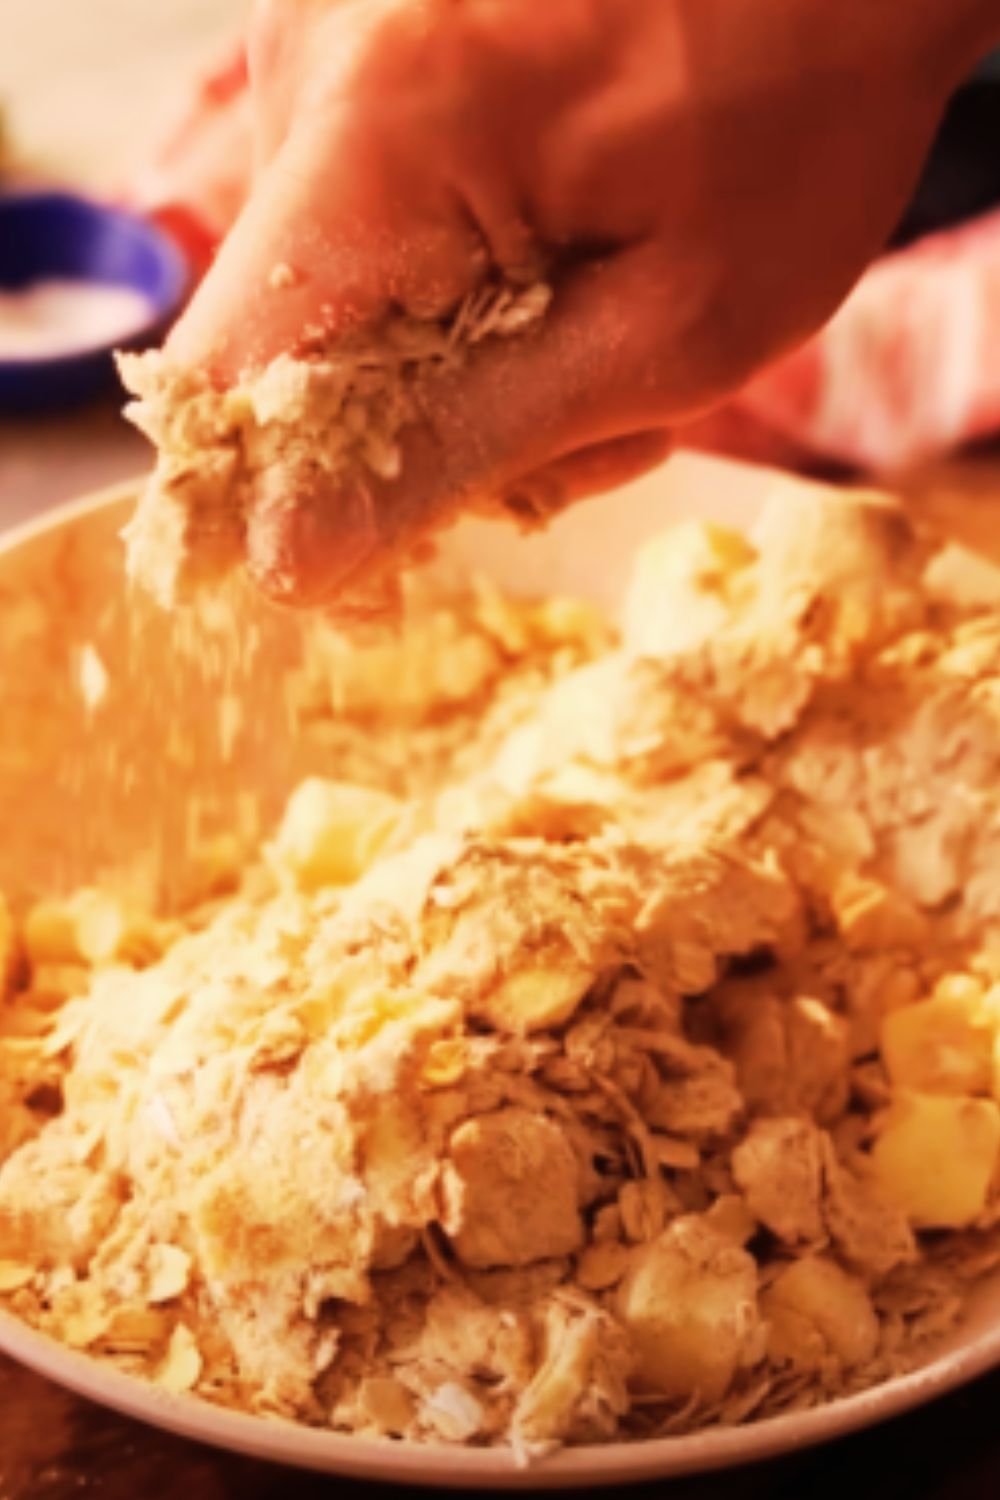
- In a large bowl, whisk together the flour, oats, brown sugar, granulated sugar, cinnamon, nutmeg, and salt.
- Add the cold cubed butter and use a pastry cutter or your fingers to work the butter into the dry ingredients until the mixture resembles coarse crumbs with some pea-sized pieces remaining.
- Stir in the chopped nuts.
- Spread the topping evenly over the apple filling, covering it completely.
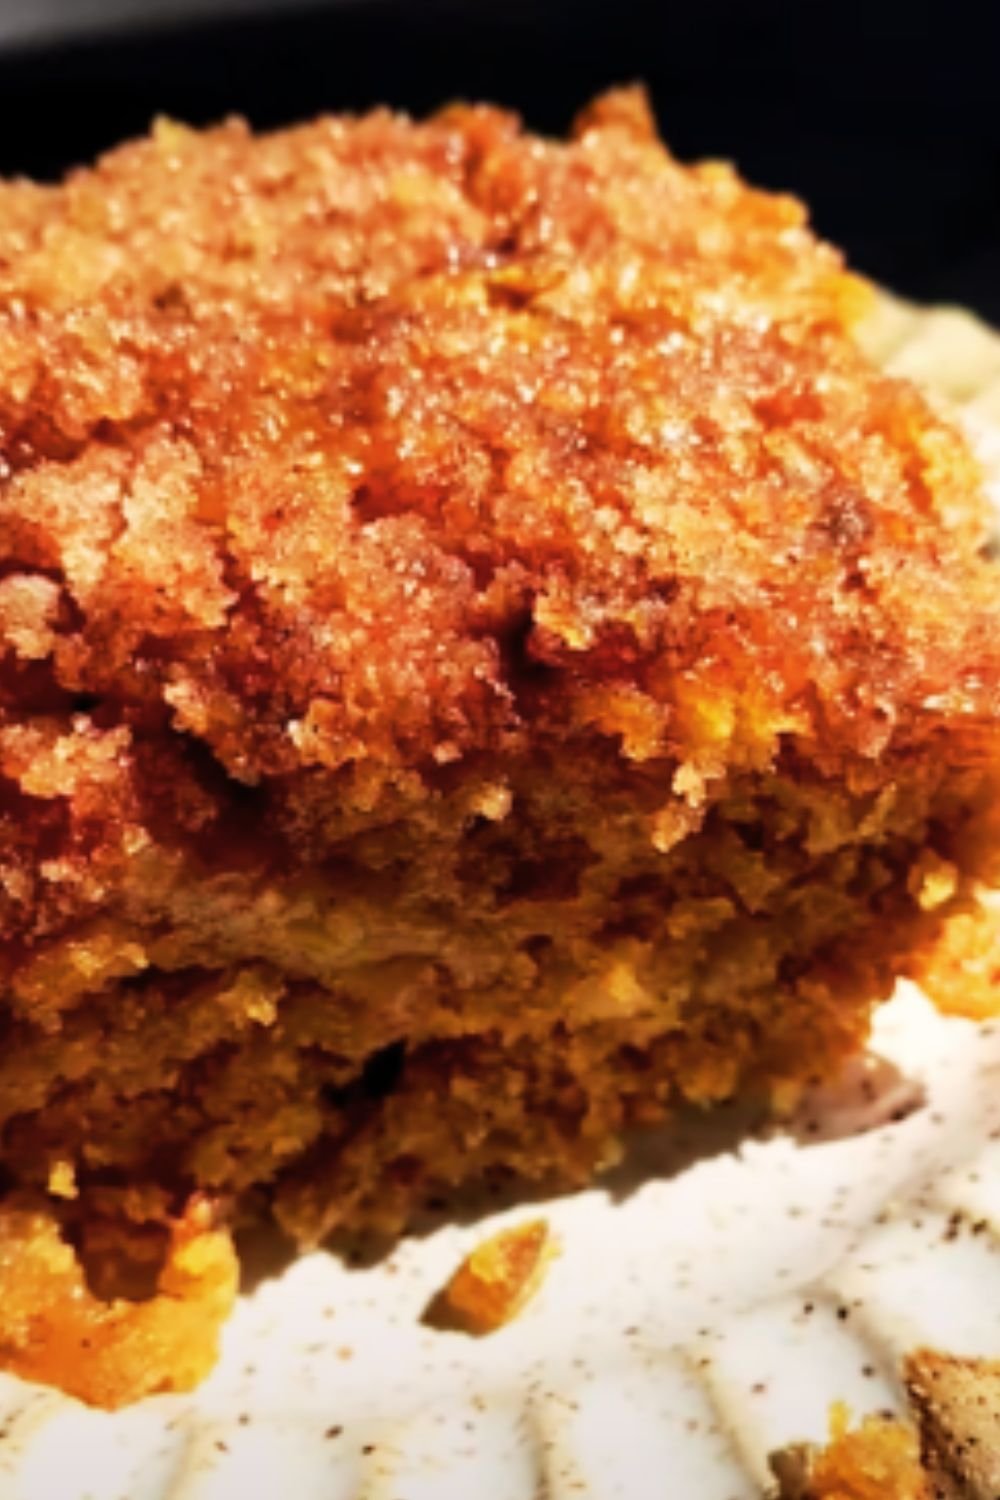
Baking to Perfection:
- Bake in the preheated oven for 45-50 minutes, or until the filling is bubbling around the edges and the topping is golden brown.
- If the topping starts to brown too quickly, loosely cover with aluminum foil for the remaining baking time.
- Allow the crisp to cool for at least 20 minutes before serving. This cooling period allows the filling to set slightly, making it easier to serve.
The Science Behind the Perfect Crisp
Over the years, I’ve learned there’s actual science behind what makes a truly exceptional apple crisp:
The Apple Chemistry
When apples bake, several things happen:
- Pectin (a natural thickener) breaks down at different rates depending on the apple variety
- Acids and sugars react to create complex flavors
- Cell walls soften at different rates based on variety and size of pieces
That’s why pre-cooking the apples slightly helps ensure even texture. The cornstarch binds with the juice released during cooking, creating a thick, luxurious sauce rather than a watery filling.
The Crisp Factor
The perfect crisp topping relies on:
- Cold butter creating small pockets that expand during baking, creating a flaky texture
- The right flour-to-butter ratio, preventing a dry or overly dense result
- Brown sugar containing molasses, which adds both moisture and flavor complexity
- Oats providing structure and a satisfying chew
Adding nuts introduces another textural element that contrasts beautifully with the soft apples. Toasting them first intensifies their flavor.
Comparison of Different Baking Methods
| Method | Pros | Cons | Best For |
|---|---|---|---|
| Standard Baking (350°F) | Even cooking, reliable results | Takes longer (45-50 minutes) | Most home kitchens |
| High Heat (400°F) | Faster cooking, very crisp topping | Risk of burning topping before filling cooks | When short on time |
| Two-Stage (375°F then 325°F) | Perfect balance of crisp top and tender filling | More complex to execute | Special occasions |
| Covered then Uncovered | Prevents over-browning, tender apples | Extra step | Large batches |
| Cast Iron Skillet | Beautiful presentation, extra crisp edges | Potentially uneven cooking | Rustic presentation |
I personally prefer the standard baking method most of the time, as it produces reliable results with minimal monitoring. For special occasions, I’ll use the two-stage method for an extra-perfect result.
Variations to Try
While the classic recipe is perfection itself, here are some delicious variations I’ve developed over the years:
Caramel Apple Crisp
Add 1/2 cup of caramel sauce to the apple mixture before baking, and drizzle more over the top when serving.
Cranberry Apple Crisp
Add 1 cup of fresh cranberries to the apple mixture for a tart contrast to the sweet apples.
Maple Pecan Crisp
Replace half the granulated sugar in the topping with maple sugar, and use all pecans for the nuts.
Gluten-Free Option
Substitute the all-purpose flour with a high-quality gluten-free flour blend and make sure your oats are certified gluten-free.
Whole Grain Version
Use whole wheat flour instead of all-purpose for a nuttier flavor and additional nutrients.
Tips for the Absolute Best Results
- Slice apples uniformly: This ensures even cooking. I aim for about 1/4-inch thickness.
- Don’t skip the lemon juice: It brightens the flavor and prevents browning.
- Use cold butter for the topping: Cold butter creates those perfect little pockets of crispy goodness when it melts in the oven.
- Let it rest before serving: I know it’s tempting to dig in right away, but allowing your crisp to rest for 20-30 minutes allows the juices to thicken and the flavors to meld.
- Consider your baking dish: Ceramic and glass dishes retain heat longer, while metal conducts heat more quickly. If using a metal pan, you may need to reduce the baking time slightly.
- Add a pinch of salt: Salt enhances sweetness and brings out the flavors in both the filling and topping.
- Taste and adjust: Always taste your apple mixture before baking. Different apples vary in sweetness, so you might need to adjust the sugar.
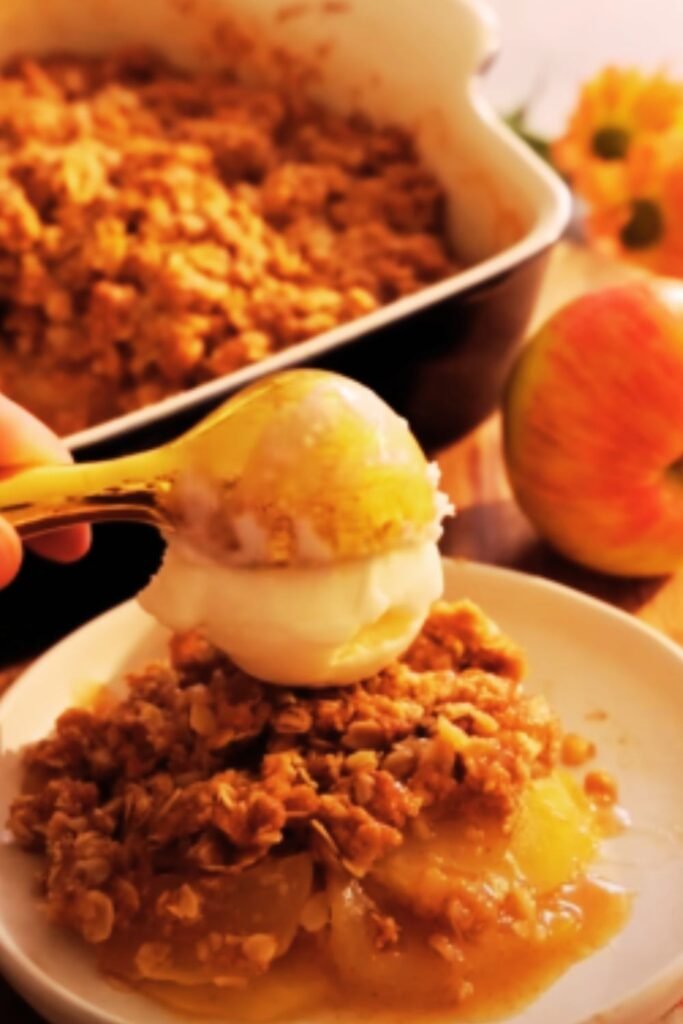
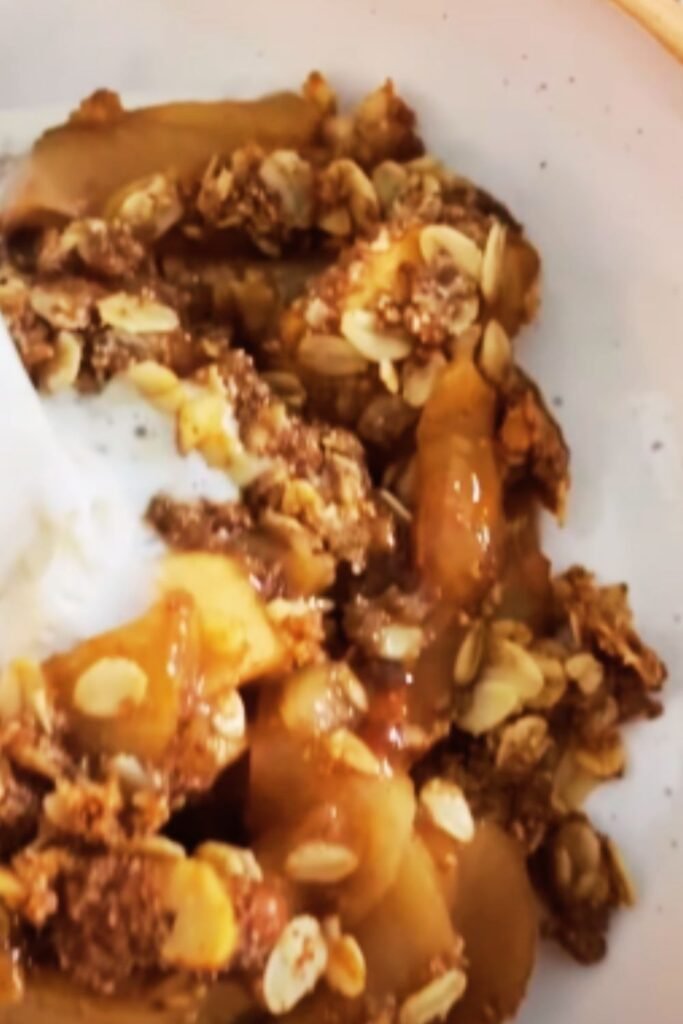
Serving Suggestions
The way you serve your apple crisp can elevate it from simply delicious to absolutely unforgettable. Here are my favorite serving ideas:
Classic Accompaniments:
- Vanilla ice cream (the contrast of hot crisp and cold ice cream is unbeatable)
- Freshly whipped cream with a hint of cinnamon
- Warm custard sauce for a British touch
Gourmet Touches:
- Homemade caramel sauce drizzled on top
- Crème fraîche with a hint of maple syrup
- Mascarpone cheese whipped with a touch of honey
For Special Diets:
- Dairy-free coconut whipped cream
- Greek yogurt sweetened with honey (lower in fat than traditional options)
- Vanilla almond milk ice cream for a vegan option
For a truly special presentation, I like to serve individual portions in ramekins, especially for dinner parties. This allows for beautiful plating and ensures everyone gets the perfect amount of topping.
Storage and Make-Ahead Tips
One of the reasons I love this recipe is how well it handles storage and make-ahead preparation.
To Store Leftover Crisp:
- Cool completely before covering
- Cover with plastic wrap or transfer to an airtight container
- Refrigerate for up to 5 days
To Reheat:
- Individual portions: Microwave for 30-45 seconds
- Whole crisp: Cover with foil and heat in a 300°F oven for 15-20 minutes
Make-Ahead Options:
- Prepare the filling up to 24 hours ahead, adding an extra teaspoon of lemon juice to prevent browning
- Make the topping up to 3 days ahead and store in the refrigerator
- Assemble the entire crisp up to 12 hours before baking, keep refrigerated
To Freeze:
- Freeze unbaked crisp: Wrap tightly in plastic wrap, then foil, freeze for up to 3 months
- Freeze baked crisp: Cool completely, wrap tightly, freeze for up to 2 months
- Thaw overnight in refrigerator before reheating
Nutritional Information
While apple crisp is definitely a treat, it does offer some nutritional benefits. Here’s the approximate nutrition breakdown per serving (assuming 10 servings):
| Nutrient | Amount | % Daily Value |
|---|---|---|
| Calories | 420 | – |
| Fat | 19g | 24% |
| Saturated Fat | 11g | 55% |
| Carbohydrates | 63g | 21% |
| Fiber | 4g | 14% |
| Sugars | 43g | – |
| Protein | 4g | 8% |
| Vitamin C | 8mg | 9% |
| Calcium | 40mg | 3% |
| Iron | 1.5mg | 8% |
| Potassium | 220mg | 5% |
The apples provide fiber, vitamin C, and antioxidants, while the oats contribute additional fiber and nutrients. Using less sugar or a sugar substitute can reduce the calorie and sugar content.
Why This Recipe Works Every Time
After making this apple crisp dozens of times, I’ve identified key factors that guarantee success:
- The apple variety mix: Using multiple varieties ensures balanced flavor and texture.
- Pre-cooking the apples: This step ensures the apples are perfectly tender.
- The perfect spice blend: Warming spices complement the apples without overwhelming them.
- Butter temperature matters: Cold butter in the topping creates the perfect texture.
- Proper pan size: A 9×13 dish allows for the right ratio of filling to topping.
- Resting time: Allowing the crisp to rest before serving lets the flavors meld.
What truly makes this recipe foolproof is that it’s forgiving – even if you need to substitute ingredients or adjust baking times for your oven, the result will still be delicious.
Frequently Asked Questions
Q: Can I make this apple crisp ahead of time?
A: Absolutely! You can prepare the filling and topping separately up to 2 days ahead. Store both in the refrigerator, then assemble and bake when ready. You can also assemble the entire crisp and refrigerate for up to 12 hours before baking.
Q: What’s the best way to store leftover apple crisp?
A: Once cooled completely, cover the baking dish with plastic wrap or transfer portions to airtight containers. Refrigerate for up to 5 days. The topping may soften slightly, but it will still be delicious!
Q: Can I freeze apple crisp?
A: Yes! You can freeze it either baked or unbaked. For unbaked: assemble, cover tightly with plastic wrap followed by foil, and freeze for up to 3 months. Thaw overnight in the refrigerator before baking. For baked: cool completely, cover tightly, and freeze for up to 2 months.
Q: What if I don’t have all the specified apple varieties?
A: Use what you have! The key is mixing tart apples (like Granny Smith) with sweeter varieties. Just avoid very soft apples like McIntosh if using them exclusively, as they’ll break down too much.
Q: Can I make this recipe gluten-free?
A: Definitely! Simply substitute the all-purpose flour with your favorite gluten-free flour blend and ensure you’re using certified gluten-free oats.
Q: How do I know when the apple crisp is done baking?
A: Look for these signs: the filling should be bubbling around the edges, the apples should be tender when pierced with a knife, and the topping should be golden brown.
Q: Why is my apple crisp watery?
A: This can happen if your apples were particularly juicy or if the crisp didn’t bake long enough. The pre-cooking step and cornstarch in the recipe help prevent this. If it still happens, simply bake it a bit longer to allow more liquid to evaporate.
Q: Can I reduce the sugar in this recipe?
A: Yes, you can reduce the sugar by up to one-third without significantly affecting the texture. The sweetness level can be adjusted to your preference.
Q: What can I use instead of nuts if I have allergies?
A: You can simply omit the nuts or substitute with seeds like pumpkin or sunflower seeds. For extra crunch without nuts, try adding 1/2 cup of unsweetened coconut flakes to the topping.
The History of Apple Crisp
As I’ve perfected this recipe over the years, I’ve become fascinated by its history. Unlike fancy French pastries with documented origins, apple crisp is a humble dessert with roots in early American cooking.
Apple crisp (sometimes called apple crumble) first appeared in cookbooks in the early 1900s, though similar desserts likely existed well before then. It gained popularity during the Great Depression and World War II when ingredients for traditional pies were limited or rationed. The simple combination of fruit with a flour, butter, and sugar topping made for an economical yet satisfying dessert.
In New England, where I first learned to make this dish from my grandmother, apple crisp became a staple fall dessert, taking advantage of the abundant local apple harvest. Each family developed their own version, passing down techniques and ratios through generations.
What I love most about apple crisp is how it represents the best of American cooking – practical, adaptable, and delicious without pretension. It transforms simple ingredients into something truly special, bringing comfort with every bite.
Final Thoughts
There’s something deeply satisfying about creating a dessert that connects us to culinary history while still feeling fresh and relevant. My best-ever apple crisp brings together traditional techniques with modern understanding of flavor and texture, resulting in a dessert that never fails to impress.
What makes this recipe special isn’t just the perfect balance of flavors or the contrast between tender apples and crispy topping – it’s the way it brings people together. In my experience, nothing gets a more enthusiastic response at a gathering than the moment I pull a bubbling, fragrant apple crisp from the oven.
I hope you’ll try this recipe and make it your own, perhaps adding it to your family’s tradition. Whether you follow it exactly or adapt it to your preferences, the joy of sharing homemade apple crisp is an experience that creates lasting memories. Happy baking!