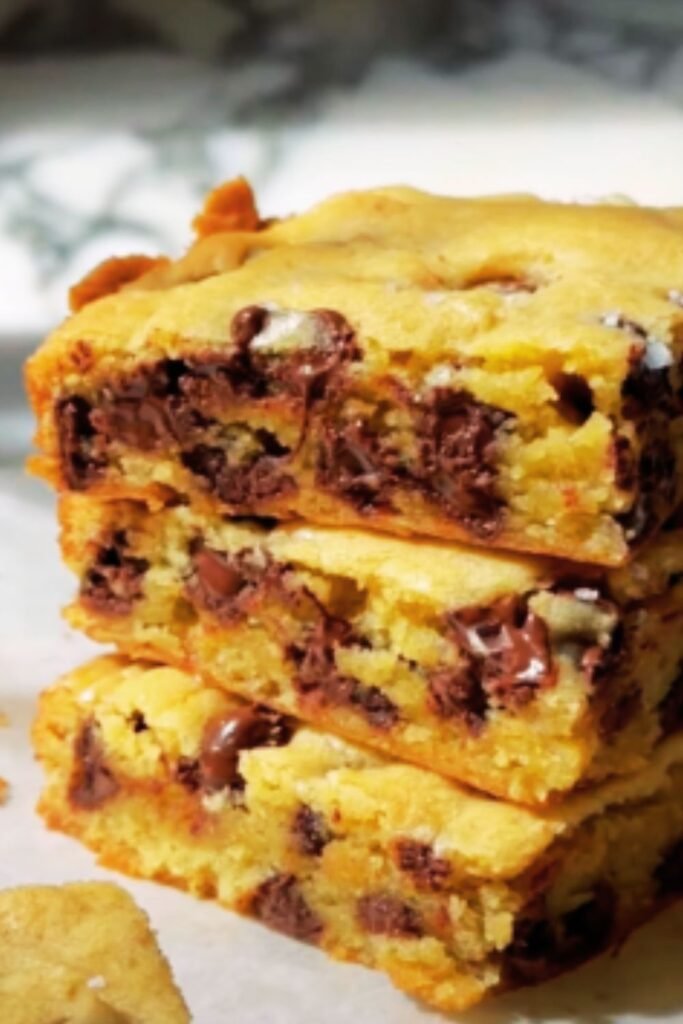
There’s something magical about the combination of brown butter, bourbon, and chocolate. The nutty depth of brown butter, the warm caramel notes of bourbon, and the rich, melty goodness of chocolate chunks come together in these blondies to create something truly extraordinary. I’ve spent years perfecting this recipe, and I’m thrilled to share it with you today!
These aren’t your ordinary blondies. The brown butter adds a toffee-like complexity, while the bourbon brings a subtle warmth that elevates every bite. Whether you’re baking for a special occasion or simply treating yourself after a long day, these blondies are guaranteed to impress.
The Magic of Brown Butter
Before we dive into the recipe, let’s talk about what makes brown butter so special. Brown butter (or beurre noisette in French cooking) is simply butter that’s been melted and cooked until the milk solids toast and turn golden brown. This simple technique transforms ordinary butter into a nutty, aromatic ingredient that adds incredible depth to both sweet and savory dishes.
I remember the first time I made brown butter—the kitchen filled with a toasty, almost caramel-like aroma that made my mouth water. That same transformative power works wonders in these blondies, giving them a rich, complex flavor profile that sets them apart from standard blondie recipes.
The Perfect Pairing: Bourbon and Chocolate
Bourbon and chocolate are natural companions. The vanilla, caramel, and oak notes in good bourbon complement chocolate’s richness perfectly. In these blondies, the bourbon isn’t overpowering—it adds warmth and depth without making them taste boozy. I’ve found that about two tablespoons provide the perfect amount of flavor without overwhelming the other ingredients.
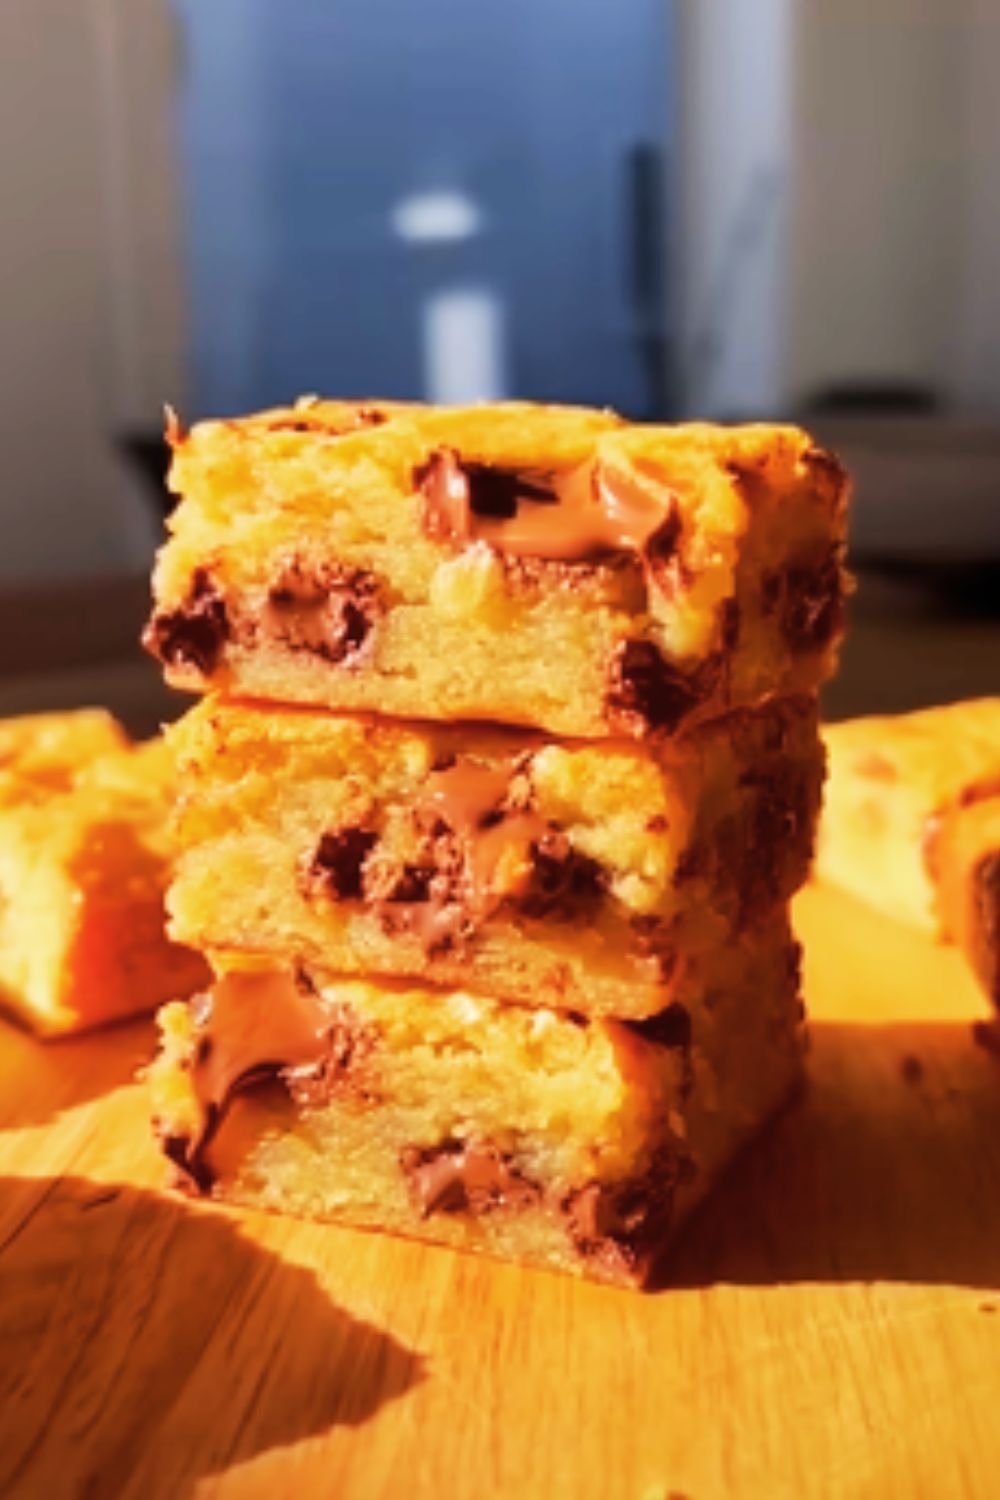
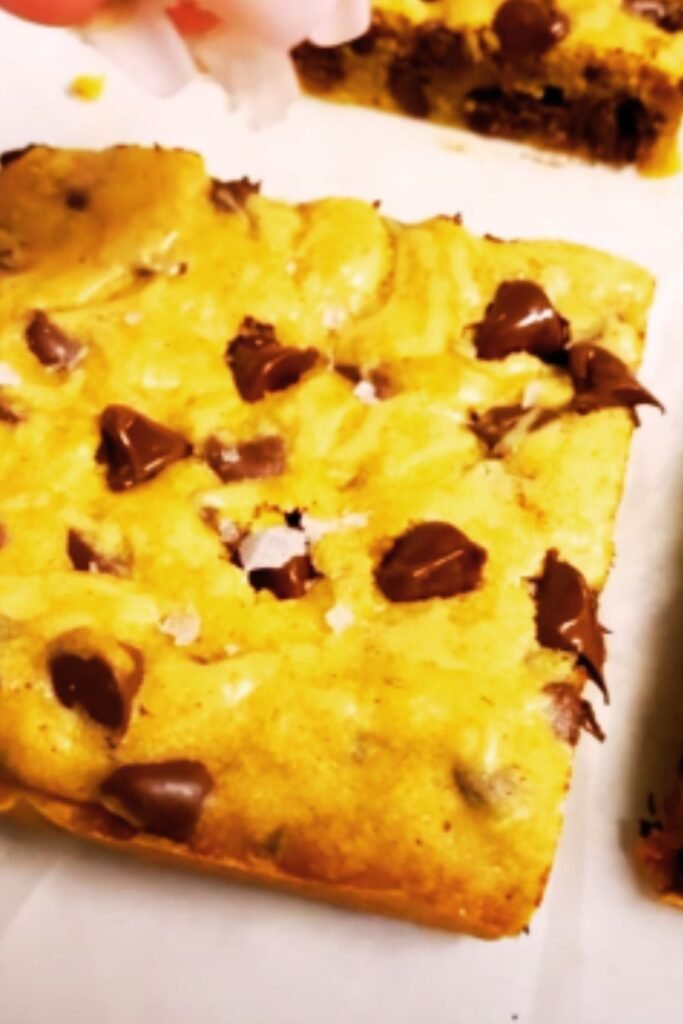
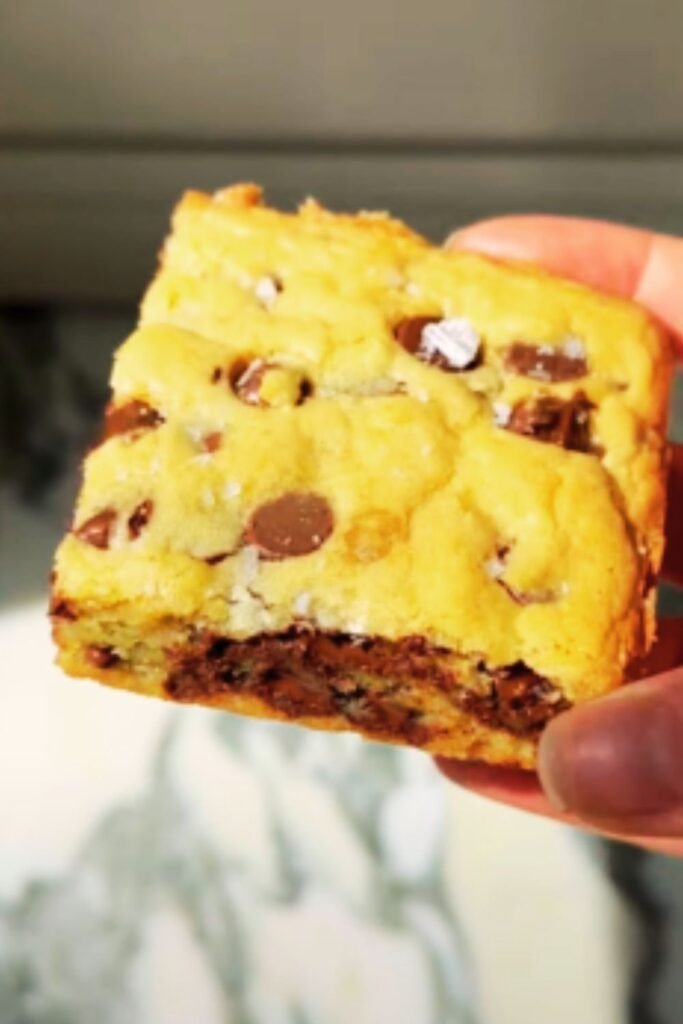
As for the chocolate, I recommend using high-quality chocolate chunks rather than chips. Chunks melt more beautifully and create pockets of molten chocolate throughout the blondies. My personal preference is a mix of dark (around 70% cacao) and milk chocolate for the perfect balance of richness and sweetness.
Ingredients
Here’s everything you’ll need to make these incredible blondies:
- 1 cup (226g) unsalted butter
- 2 cups (400g) light brown sugar, packed
- 2 large eggs, room temperature
- 2 tablespoons (30ml) good-quality bourbon
- 1 tablespoon vanilla extract
- 2 cups (250g) all-purpose flour
- 1 teaspoon baking powder
- ½ teaspoon salt
- 1½ cups (255g) chocolate chunks (mix of dark and milk recommended)
- ½ cup (60g) chopped pecans or walnuts (optional)
Kitchen Tools You’ll Need
- 9×13 inch baking pan
- Parchment paper
- Medium saucepan (for browning butter)
- Mixing bowls
- Whisk
- Rubber spatula
- Measuring cups and spoons
- Cooling rack
Step-by-Step Instructions
1. Prepare Your Pan and Oven
- Preheat your oven to 350°F (175°C).
- Line a 9×13 inch baking pan with parchment paper, leaving an overhang on two sides for easy removal. I like to lightly grease the pan first so the parchment stays in place.
- Set the prepared pan aside while you make the blondie batter.
2. Brown the Butter (The Most Important Step!)
- Cut the butter into tablespoon-sized pieces and place in a medium saucepan over medium heat.
- Melt the butter completely, then continue cooking, swirling occasionally (don’t stir!).
- Watch carefully as the butter foams, then begins to turn golden and gives off a nutty aroma.
- Once you see brown specks forming at the bottom of the pan and the butter is amber in color (about 5-7 minutes total), immediately remove from heat.
- Pour the browned butter into a large heat-proof mixing bowl and let cool for about 10 minutes.
I can’t stress enough how important it is to watch the butter carefully during this step. It can go from perfectly browned to burnt in seconds! The color should be like maple syrup—deep amber but not dark brown.
3. Make the Batter
- Once the brown butter has cooled slightly, add the packed brown sugar and whisk vigorously until well combined.
- Add the eggs one at a time, whisking well after each addition until the mixture is smooth and glossy.
- Pour in the bourbon and vanilla extract, and whisk to combine.
- In a separate bowl, whisk together the flour, baking powder, and salt.
- Gently fold the dry ingredients into the wet ingredients using a rubber spatula, mixing just until no flour streaks remain.
- Fold in 1¼ cups of the chocolate chunks and the nuts (if using), reserving ¼ cup of chocolate chunks for the top.
The key here is not to overmix. Overmixing will develop the gluten in the flour and result in tough blondies. Mix just until everything is combined, then stop!
4. Bake to Perfection
- Spread the batter evenly in the prepared pan. It will be thick, so use your spatula to push it into the corners.
- Sprinkle the remaining ¼ cup chocolate chunks over the top, pressing them in lightly.
- Bake in the preheated oven for 25-30 minutes, or until the edges are set and golden brown, and a toothpick inserted in the center comes out with a few moist crumbs (not wet batter).
My pro tip: It’s better to slightly underbake than overbake these blondies. They’ll continue to cook a bit as they cool, and slightly underbaked blondies stay wonderfully chewy.
5. Cool and Cut
- Place the pan on a wire rack and let the blondies cool completely in the pan, at least 1 hour.
- Once cooled, use the parchment paper overhang to lift the blondies out of the pan.
- Place on a cutting board and cut into squares with a sharp knife.
For the cleanest cuts, I like to refrigerate the blondies for about 30 minutes before cutting, and I wipe my knife clean between cuts.
The Science Behind the Perfect Blondie Texture
What makes these blondies so incredible is their texture—crisp edges and a chewy, fudgy center. This perfect texture comes from a few key factors:
| Factor | Function | Impact on Texture |
|---|---|---|
| Brown Sugar | Higher moisture content than white sugar | Creates a moist, chewy texture |
| Brown Butter | Contains less water than regular butter | Makes blondies denser and chewier |
| Melted vs. Creamed Butter | Doesn’t incorporate air | Results in denser, fudgier texture |
| Baking Time | Controls moisture retention | Affects chewiness and fudginess |
| Rest Time | Allows for carryover cooking and setting | Improves texture and makes cutting cleaner |
The high ratio of brown sugar to flour is also crucial—it gives these blondies their characteristic chew and keeps them moist for days (though they rarely last that long in my house!).
Flavor Variations to Try
While these blondies are perfect as is, here are some delicious variations I’ve experimented with over the years:
| Variation | Ingredients to Add/Swap | Flavor Profile |
|---|---|---|
| Salted Caramel | Add ¼ cup caramel sauce to batter + flaky sea salt on top | Sweet-salty indulgence |
| Orange Spice | Add 1 tbsp orange zest + ¼ tsp cinnamon | Bright, warming notes |
| Coffee Infused | Replace bourbon with 2 tbsp coffee liqueur | Deep mocha flavor |
| White Chocolate Cranberry | Use white chocolate chunks + ½ cup dried cranberries | Sweet-tart contrast |
| Maple Pecan | Replace bourbon with 2 tbsp maple syrup + extra pecans | Autumnal, nutty sweetness |
My personal favorite is the salted caramel variation—the sweet-salty contrast is absolutely divine!
Storage and Make-Ahead Tips
These blondies stay fresh for up to 5 days when stored properly. Here’s how to keep them at their best:
- Room Temperature: Store in an airtight container with parchment paper between layers. Good for 3-4 days.
- Refrigerator: Extends freshness to 5-7 days. Bring to room temperature before serving for best texture.
- Freezer: Wrap individual blondies tightly in plastic wrap, then aluminum foil. Freeze for up to 3 months. Thaw at room temperature or microwave for 15-20 seconds.
If you want to prep ahead for a party, you can make the batter up to a day in advance and refrigerate it in the pan. Just let it come to room temperature for about 30 minutes before baking.
Serving Suggestions
These blondies are delicious on their own, but there are several ways to elevate them for a special dessert:
- Warm the blondies slightly and top with a scoop of vanilla ice cream for a decadent treat.
- Drizzle with homemade caramel sauce for extra indulgence.
- Serve alongside fresh berries for a bright contrast to the rich blondies.
- Create a blondie sundae bar with various toppings like whipped cream, sprinkles, and chocolate sauce.
- Pair with a hot cup of coffee or a glass of milk for the perfect afternoon treat.
Troubleshooting Common Issues
Even experienced bakers sometimes run into issues. Here are solutions to common blondie problems:
| Problem | Possible Cause | Solution |
|---|---|---|
| Too cakey | Overmixing or too much flour | Mix just until combined; measure flour by weight |
| Dry texture | Overbaking | Remember blondies continue cooking after removal |
| Soggy center | Underbaking | Bake a few minutes longer; check with toothpick |
| Burnt butter | High heat or inattention | Use medium heat and watch carefully |
| Blondies stick to pan | Inadequate preparation | Use parchment with overhang on all sides |
| Uneven baking | Oven hot spots | Rotate pan halfway through baking time |
The most common mistake is overbaking. Remember that blondies should be slightly underdone when you take them out of the oven—they’ll set up perfectly as they cool.
Why These Blondies Are Special
What sets these blondies apart from other recipes is the combination of brown butter and bourbon. These two ingredients create a depth of flavor that’s hard to achieve otherwise. The brown butter gives these blondies their distinctive toffee notes, while the bourbon adds warmth and complexity.
I’ve served these at countless gatherings, and they never fail to impress. There’s something about the interplay of flavors and textures that makes them irresistible—the crisp, crackly top giving way to a chewy interior studded with molten chocolate. They’re sophisticated enough for a dinner party but comforting enough for a cozy night in.
Frequently Asked Questions
Can I make these blondies without alcohol? Absolutely! You can substitute the bourbon with an equal amount of vanilla extract, maple syrup, or even strong brewed coffee. Each will give a slightly different flavor profile, but they’ll still be delicious.
My brown butter looks very dark. Did I burn it? Brown butter should be amber-colored with brown specks (the milk solids). If it’s very dark or smells acrid rather than nutty, it may be burnt. Unfortunately, burnt butter can’t be saved and will give your blondies a bitter taste. It’s best to start over.
Can I use chocolate chips instead of chunks? Yes, you can substitute an equal amount of chocolate chips for the chunks. However, chips contain stabilizers that prevent them from melting as completely as chunks, so you won’t get quite the same pockets of gooey chocolate.
How do I know when the blondies are done? The edges should be visibly set and golden brown, while the center may still look slightly underdone. A toothpick inserted into the center should come out with a few moist crumbs, but not wet batter. Remember, they’ll continue to set as they cool.
Why did my blondies sink in the middle? Sinking usually happens when blondies are underbaked or when the batter is overmixed. Make sure to bake until the edges are set and mix just until the ingredients are combined.
Can I double this recipe? Yes! You can double it and bake in a half-sheet pan (approximately 18×13 inches). The baking time will remain roughly the same, but check a few minutes earlier just to be safe.
Final Thoughts
These Brown Butter Bourbon Chocolate Blondies represent everything I love about baking—simple ingredients transformed through technique into something extraordinary. The process of browning butter, the aroma that fills the kitchen as they bake, and the joy of sharing them with loved ones all remind me why I’m so passionate about creating homemade treats.
I encourage you to try this recipe, even if some of the techniques are new to you. Brown butter might seem intimidating at first, but once you master it, you’ll find yourself using it in all sorts of recipes. And trust me—the results are well worth the extra effort!
Whether you’re an experienced baker or just starting out, these blondies are sure to become a favorite in your recipe collection. Happy baking!