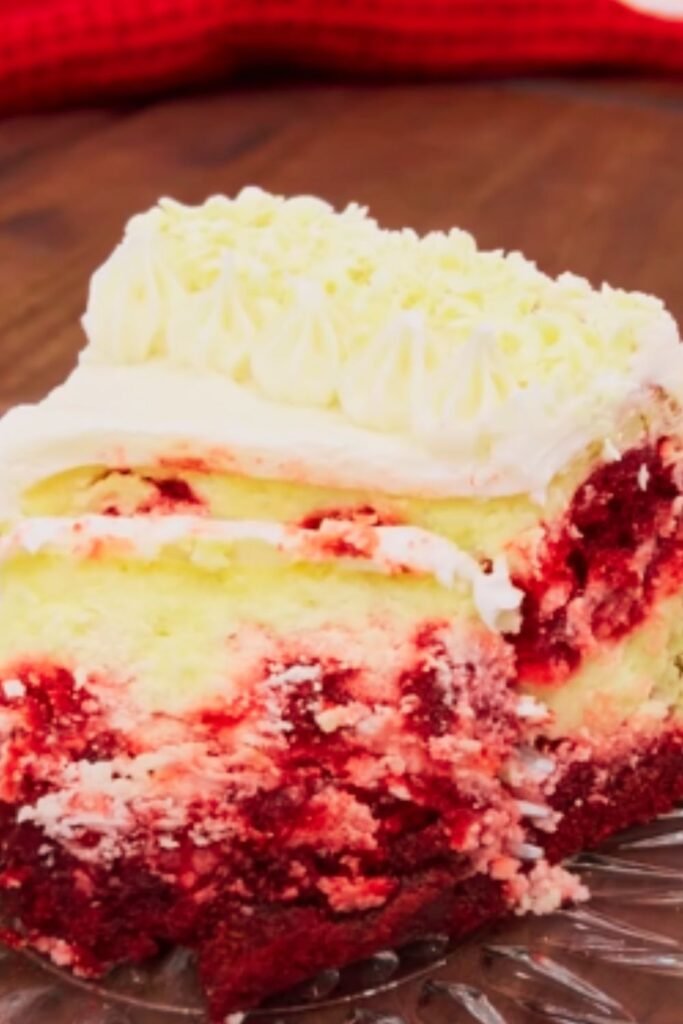
There’s something magical about the moment when your guests take their first bite of a truly memorable dessert. Their eyes widen, conversation halts, and for a brief moment, nothing else matters but the symphony of flavors dancing across their taste buds. That’s exactly the reaction I get every time I serve my Knock You Naked Red Velvet Cheesecake. This show-stopping dessert combines the tangy richness of cheesecake with the distinctive flavor and stunning color of red velvet cake, creating a marriage of textures and tastes that’s truly unforgettable.
I’ve spent years perfecting this recipe, tweaking ingredients and techniques until I achieved what I consider the ultimate version. It’s become my signature dessert for special occasions, and today, I’m sharing all my secrets with you. Whether you’re an experienced baker or a curious novice, I’ll guide you through each step to ensure your cheesecake turns out perfectly the first time.
The Magic Behind Red Velvet
Before diving into the recipe, let’s talk about what makes red velvet so special. Many people assume it’s simply a chocolate cake with red food coloring, but there’s actually much more to this classic dessert.
Red velvet cake dates back to the Victorian era when cocoa powder was first introduced to American bakers. The natural reaction between the cocoa’s anthocyanins (a type of antioxidant) and the acidic ingredients in the recipe created a subtle reddish hue. Modern recipes typically enhance this color with food coloring, but the distinctive flavor comes from the combination of buttermilk, vinegar, and a hint of cocoa.
What truly sets red velvet apart is its unique texture – velvety smooth and incredibly tender. This comes from the chemical reaction between the acidic ingredients and the baking soda, which creates a fine-crumbed cake unlike any other.
When combined with the creamy decadence of cheesecake, red velvet transforms into something even more magnificent. The tartness of the cream cheese perfectly complements the subtle chocolate notes of the red velvet layers, while the contrasting textures create a multi-dimensional dessert experience.
Ingredients You’ll Need
Creating this stunning dessert requires attention to quality ingredients. Here’s what you’ll need for each component:
For the Red Velvet Cake Layers:
- 2½ cups all-purpose flour
- 1½ cups granulated sugar
- 1 teaspoon baking soda
- 1 teaspoon fine sea salt
- 2 tablespoons natural unsweetened cocoa powder
- 1½ cups vegetable oil
- 1 cup buttermilk, at room temperature
- 2 large eggs, at room temperature
- 2 tablespoons red food coloring (liquid) or 1 tablespoon gel food coloring
- 1 teaspoon white distilled vinegar
- 1 teaspoon vanilla extract
For the Cheesecake Layer:
- 24 ounces (3 packages) cream cheese, softened
- 1¼ cups granulated sugar
- 3 large eggs, at room temperature
- ½ cup sour cream, at room temperature
- 2 teaspoons vanilla extract
- 1 tablespoon fresh lemon juice
- 3 tablespoons all-purpose flour
For the Cream Cheese Frosting:
- 16 ounces cream cheese, softened
- ½ cup unsalted butter, softened
- 4 cups powdered sugar, sifted
- 1 tablespoon vanilla extract
- Pinch of salt
For the White Chocolate Ganache Drip:
- 6 ounces white chocolate, finely chopped
- ¼ cup heavy cream
- Red food coloring (optional)
Equipment Essentials
Having the right tools makes this complex recipe much more manageable:
- Two 9-inch round cake pans
- 9-inch springform pan
- Parchment paper
- Stand mixer or hand mixer
- Rubber spatulas
- Offset spatula
- Cooling racks
- Large roasting pan (for water bath)
- Cake turntable (optional but helpful)
- Serrated knife
- Digital kitchen thermometer

The Step-by-Step Process
Now, let’s break down this recipe into manageable steps. I recommend spreading the process over two days for the best results.
Day 1: Make the Cheesecake Layer
- Preheat your oven to 325°F (165°C). Prepare a 9-inch springform pan by lining the bottom with parchment paper and greasing the sides.
- Wrap the outside of the springform pan with two layers of heavy-duty aluminum foil, ensuring it comes up at least 2 inches on all sides. This prevents water from seeping in during the water bath baking.
- In a large bowl, beat the softened cream cheese on medium speed until completely smooth and free of lumps, about 4 minutes.
- Add the sugar and beat for another 2-3 minutes until the mixture is light and fluffy.
- Add eggs one at a time, beating well after each addition and scraping down the sides of the bowl.
- Mix in the sour cream, vanilla extract, and lemon juice until just combined.
- Gently fold in the flour using a rubber spatula until no streaks remain.
- Pour the batter into the prepared springform pan and smooth the top with an offset spatula.
- Place the springform pan inside a larger roasting pan. Carefully pour hot water into the roasting pan until it reaches about halfway up the sides of the springform pan.
- Bake for 55-65 minutes, or until the edges are set but the center still has a slight jiggle when gently shaken.
- Turn off the oven, crack the door open, and let the cheesecake cool in the oven for 1 hour.
- Remove from the oven, take the springform pan out of the water bath, and let it cool completely on a wire rack.
- Once cooled, cover with plastic wrap and refrigerate overnight.
Day 2: Bake the Red Velvet Cake Layers
- Preheat your oven to 350°F (175°C). Line two 9-inch round cake pans with parchment paper and grease the sides.
- In a medium bowl, whisk together the flour, sugar, baking soda, salt, and cocoa powder.
- In a large bowl, whisk together the oil, buttermilk, eggs, food coloring, vinegar, and vanilla extract until well combined.
- Gradually add the dry ingredients to the wet ingredients, mixing on low speed until just combined. Be careful not to overmix.
- Divide the batter evenly between the prepared pans and smooth the tops.
- Bake for 25-30 minutes, or until a toothpick inserted in the center comes out clean.
- Allow the cakes to cool in the pans for 10 minutes, then remove and transfer to wire racks to cool completely.
Make the Cream Cheese Frosting
- In a large bowl, beat the softened cream cheese and butter until smooth and creamy, about 3 minutes.
- Gradually add the sifted powdered sugar, mixing on low speed to avoid a sugar cloud.
- Add the vanilla extract and salt, then increase speed to medium-high and beat until light and fluffy, about 5 minutes.
Make the White Chocolate Ganache
- Place the finely chopped white chocolate in a heat-proof bowl.
- Heat the heavy cream until just simmering (do not boil).
- Pour the hot cream over the chocolate and let sit for 2 minutes.
- Gently stir until smooth and completely melted. If adding red food coloring, mix it in now.
- Allow to cool until slightly thickened but still pourable, about 10-15 minutes.
Assemble the Cake
- Using a serrated knife, level the tops of the red velvet cake layers if needed.
- Place one red velvet layer on a cake board or serving plate.
- Remove the cheesecake from the springform pan and carefully place it on top of the red velvet layer.
- Place the second red velvet layer on top of the cheesecake.
- Apply a thin layer of cream cheese frosting all over the cake (crumb coat) and refrigerate for 30 minutes.
- Apply the final coat of frosting, making it as smooth as possible.
- Refrigerate for another 30 minutes to set the frosting.
- Pour the white chocolate ganache over the top of the cake, allowing it to drip down the sides.
- Return to the refrigerator for at least 2 hours before serving.
Nutrition Information
Understanding the nutritional content helps with portion control (though I’ll admit, controlling portions with this dessert is challenging!).
| Nutrient | Amount per Serving |
|---|---|
| Calories | 685 |
| Total Fat | 45g |
| Saturated Fat | 23g |
| Cholesterol | 165mg |
| Sodium | 420mg |
| Total Carbohydrates | 63g |
| Dietary Fiber | 1g |
| Sugars | 48g |
| Protein | 9g |
| Calcium | 135mg |
| Iron | 1.2mg |
Based on 12 servings per cake
Pro Tips for Perfect Results
After making this recipe dozens of times, I’ve discovered some tricks that make a significant difference:
- Room temperature ingredients: This cannot be stressed enough for the cheesecake. Cold cream cheese leads to lumps that never fully incorporate.
- The water bath is non-negotiable: It prevents cracking and ensures even, gentle baking of the cheesecake. Double-wrapping with foil is essential to prevent water seepage.
- Cooling process matters: The gradual cooling in the oven prevents the dramatic temperature change that often causes cheesecakes to crack.
- Don’t rush the chilling time: Each refrigeration step is crucial for proper setting and structure.
- Quality food coloring: For that signature red velvet color, gel food coloring provides the most vibrant results with less liquid added to the batter.
- Flour in the cheesecake: The small amount of flour stabilizes the cheesecake, making it easier to handle during assembly.
- Cake strips: Wrapping wet cloth strips around your cake pans helps the red velvet layers bake more evenly.
Troubleshooting Common Issues
Even experienced bakers encounter challenges. Here are solutions to common problems:
Cracked Cheesecake
- Cause: Typically from overbaking or cooling too quickly
- Solution: Use a water bath, gradual cooling, and don’t overmix the batter
Sunken Cake Layers
- Cause: Opening the oven door too early or underbaking
- Solution: Wait until at least 80% through baking time before checking, and ensure your oven temperature is accurate
Lumpy Frosting
- Cause: Cream cheese or butter not soft enough
- Solution: Ensure all ingredients are truly at room temperature (at least 1 hour on the counter)
Ganache Too Thick
- Cause: Chocolate-to-cream ratio too high or cooled too long
- Solution: Add a bit more warm cream and stir until desired consistency
Cake Layers Breaking
- Cause: Usually from trying to handle them while warm
- Solution: Cool completely, and consider freezing for 30 minutes before assembly to make them more stable
Serving Suggestions
This showstopper dessert deserves to be presented with style. Here are my favorite ways to serve it:
- Garnish with fresh berries around the base for a pop of color and complementary flavor.
- Add chocolate curls or shavings on top for additional texture and visual appeal.
- Serve with a small dollop of unsweetened whipped cream to balance the richness.
- For an elegant presentation, dust the plate with a little cocoa powder before placing the slice.
- Use a hot, clean knife (dipped in hot water and wiped dry) for clean slices that showcase the beautiful layers.

Storage Guidelines
Like most cheesecakes, this dessert keeps well if properly stored:
- Refrigerator: Cover loosely with plastic wrap or store in a cake container for up to 5 days.
- Freezer: Individual slices can be wrapped in plastic wrap and then foil for up to 2 months. Thaw overnight in the refrigerator.
- For the best flavor and texture, allow refrigerated cake to sit at room temperature for 20-30 minutes before serving.
Variations to Try
While the classic version is hard to beat, here are some delicious variations:
- Chocolate Lover’s Version: Add mini chocolate chips to the cheesecake layer and use a dark chocolate ganache instead of white chocolate.
- Raspberry Swirl: Before baking the cheesecake, swirl in 1/4 cup of seedless raspberry preserves for a fruity twist.
- Oreo Crust: Replace the bottom red velvet layer with an Oreo cookie crust for a different texture contrast.
- Individual Cheesecakes: Make mini versions in a muffin tin for portion-controlled treats that are perfect for parties.
- Cream Cheese Glaze: Instead of frosting the outside, simply drizzle with a thin cream cheese glaze for a more rustic presentation.
The History Behind This Recipe
I first encountered a version of this dessert at a small bakery during a trip to New Orleans. The owner explained that it was inspired by the classic Cheesecake Factory red velvet cheesecake but had been adapted over the years. When I returned home, I was determined to recreate it, but after several attempts, I realized I needed to develop my own unique version.
What makes this particular recipe special is the balance between the cake and cheesecake layers. Many versions have thin, almost token red velvet layers, but I believe the cake should be equal partners with the cheesecake. The addition of the white chocolate ganache drip was inspired by modern cake decorating techniques and adds a beautiful finishing touch that elevates the entire presentation.
The name “Knock You Naked” comes from an old Southern expression for desserts so good they might just make you forget your dignity (and your clothes). While I can’t guarantee such dramatic reactions, I can promise this dessert will leave a lasting impression on anyone lucky enough to try it.
Perfect Occasions to Serve
This show-stopping dessert is ideal for:
- Valentine’s Day celebrations (the red color is perfect)
- Holiday dinner finales
- Anniversary celebrations
- Dinner parties where you want to impress
- Birthday celebrations as an alternative to traditional cake
- Any occasion where you need a conversation-stopping dessert
The visual impact of the red and white layers, combined with the intricate flavors, makes this a dessert worthy of your most special occasions.
Frequently Asked Questions
Q: Can I make this dessert without food coloring?
A: Yes, you can omit the food coloring for a more subtle tan-colored cake. Some bakers use natural alternatives like beet powder (about 3 tablespoons) for a natural red hue.
Q: Is there a way to make this dessert less sweet?
A: Absolutely. You can reduce the sugar in the cheesecake by up to 1/4 cup and in the frosting by up to 1 cup without significantly affecting the texture. You can also use a darker chocolate ganache instead of white chocolate for less sweetness.
Q: Can I substitute the buttermilk?
A: Yes, you can make a homemade buttermilk substitute by adding 1 tablespoon of white vinegar or lemon juice to 1 cup of milk and letting it sit for 5 minutes before using.
Q: How far in advance can I make this dessert?
A: You can make the complete assembled dessert up to 3 days before serving. The flavors actually develop and improve with a day or two of refrigeration.
Q: My cream cheese frosting is too soft. What went wrong?
A: This typically happens in warm kitchens or if the butter was too soft. Refrigerate the frosting for 15-20 minutes and then re-whip it. If it’s still too soft, add more powdered sugar, a few tablespoons at a time.
Q: Can I use a different size pan?
A: Yes, but you’ll need to adjust the baking times accordingly. Smaller pans will require less time, while larger pans might need slightly more. The most important thing is to ensure all components are the same diameter.
Q: Is there a shortcut version of this recipe?
A: For a simpler version, you could use a red velvet cake mix for the cake layers. The cheesecake and frosting are worth making from scratch for the best flavor.
Q: What’s the best way to cut clean slices?
A: Dip a large, sharp knife in hot water, wipe it clean, and then make your cut. Clean and reheat the knife between each slice for the cleanest presentation.
The Final Word
Creating this Knock You Naked Red Velvet Cheesecake might seem intimidating at first glance. It requires time, patience, and attention to detail. But I promise you, the results are worth every minute spent. There’s something deeply satisfying about creating a dessert that not only tastes magnificent but also elicits gasps of admiration when you bring it to the table.
Remember that baking is both a science and an art. Follow the measurements precisely, but don’t be afraid to add your own creative touches to the decoration. Each time you make this recipe, you’ll discover new techniques and small adjustments that make it even better.
So go ahead and clear your schedule for a baking adventure. Put on your favorite music, gather your ingredients, and enjoy the process. Because when you slice into those perfect layers and watch your guests’ eyes light up with anticipation, you’ll know that you’ve created something truly special – a dessert that doesn’t just satisfy hunger but creates memories.
| Recipe Component | Prep Time | Cook Time | Cooling/Chilling Time |
|---|---|---|---|
| Cheesecake Layer | 20 minutes | 60 minutes | Overnight |
| Red Velvet Layers | 25 minutes | 30 minutes | 2 hours |
| Frosting | 15 minutes | N/A | N/A |
| Ganache | 10 minutes | 5 minutes | 15 minutes |
| Assembly | 30 minutes | N/A | 2 hours minimum |
| Total Active Time | 100 minutes | 95 minutes | 14+ hours |
Note: Total time spans approximately two days, though much of this is inactive chilling time.