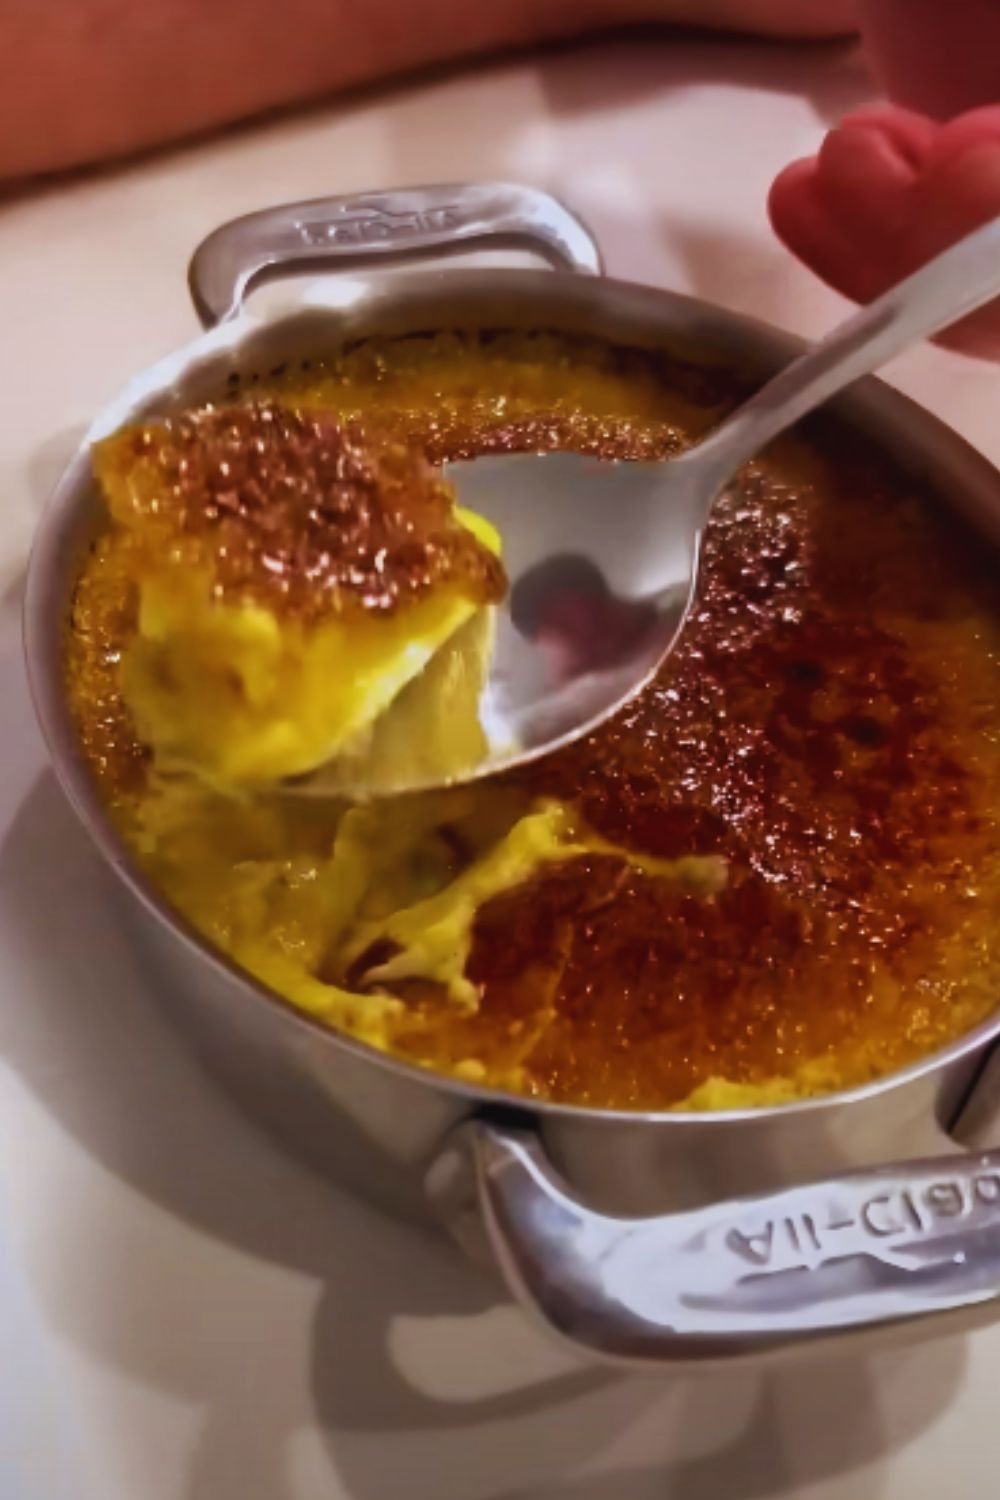
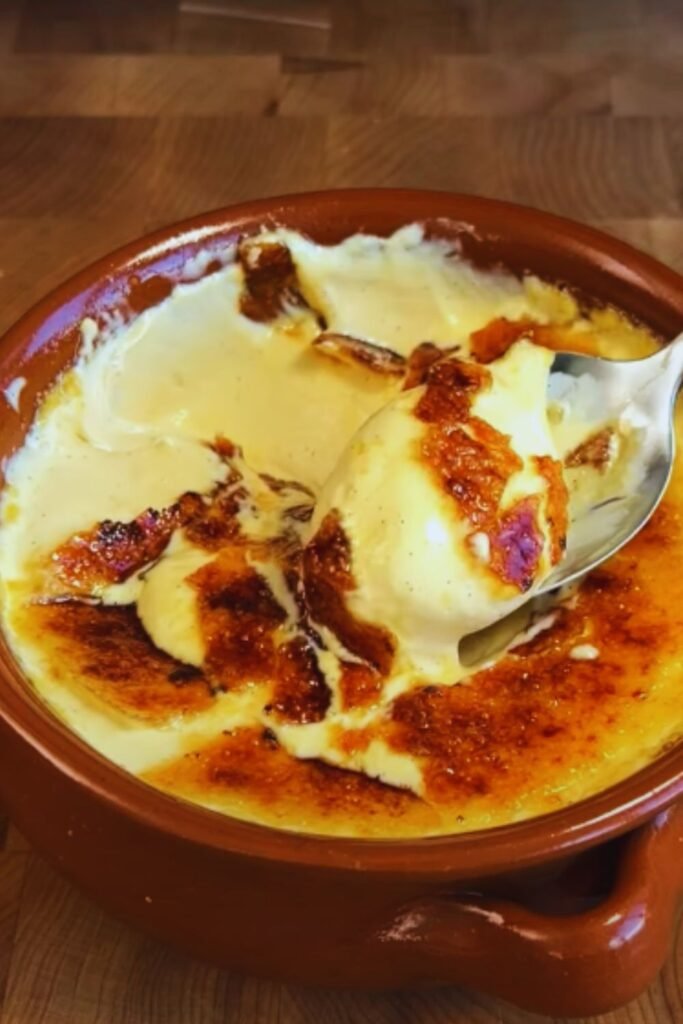
There’s something magical about cracking through that glassy caramelized sugar surface to reach the silky custard beneath. As someone who has spent years perfecting this classic French dessert, I’m excited to share my foolproof recipe for creating restaurant-quality crème brûlée at home. This isn’t just another dessert – it’s an experience that will transport you straight to a Parisian café.
What Makes This Recipe Special
After testing countless variations, I’ve discovered the perfect balance of ingredients and techniques that consistently produce a luxuriously smooth custard with that signature crackling top. The secret lies in the careful tempering of egg yolks and the precise baking temperature. Whether you’re a beginner or an experienced baker, I’ll guide you through each step to ensure success.
Essential Ingredients
For the perfect crème brûlée (serves 6), you’ll need:
| Ingredient | Amount | Notes |
|---|---|---|
| Heavy cream | 2 cups (480ml) | 36% fat content preferred |
| Vanilla bean | 1 whole pod | Or 2 tsp pure vanilla extract |
| Large egg yolks | 6 | Room temperature |
| Granulated sugar | 1/3 cup (67g) | Plus extra for topping |
| Salt | 1/8 tsp | Fine sea salt |
| Water | For water bath | About 4 cups |
Equipment Needed
| Item | Purpose | Recommended Type |
|---|---|---|
| Ramekins | Individual servings | 6 oz (180ml) ceramic |
| Kitchen torch | Caramelizing sugar | Butane torch preferred |
| Baking dish | Water bath | 9×13 inch (23×33 cm) |
| Thermometer | Temperature control | Digital instant-read |
| Fine-mesh strainer | Smooth texture | Stainless steel |
| Whisk | Mixing | Balloon whisk |
The Step-by-Step Process
Preparing the Vanilla Cream Base
- Preheat your oven to 300°F (150°C) with a rack in the middle position.
- Split the vanilla bean lengthwise and scrape out the seeds. Add both pod and seeds to the cream in a medium saucepan.
- Heat the cream mixture over medium heat until it just starts to simmer (180°F/82°C). Remove from heat and let steep for 15 minutes.
- Remove the vanilla pod and reheat the cream slightly if it has cooled too much.
Making the Custard
- In a large bowl, whisk together egg yolks, sugar, and salt until just combined – don’t over-whisk.
- Gradually temper the hot cream into the egg mixture, whisking constantly.
- Strain the mixture through a fine-mesh sieve to ensure silky smoothness.
- Divide among six ramekins, filling each about 3/4 full.
The Water Bath Method
The water bath (bain-marie) is crucial for achieving the perfect texture. Here’s how to do it right:
- Place ramekins in a deep baking dish.
- Pour hot water around the ramekins until it reaches halfway up their sides.
- Carefully transfer to the preheated oven.
- Bake for 30-35 minutes until the edges are set but centers still have a slight wobble.
The Crucial Cooling Phase
- Remove ramekins from the water bath immediately after baking.
- Cool at room temperature for 30 minutes.
- Cover with plastic wrap and refrigerate for at least 4 hours or up to 3 days.
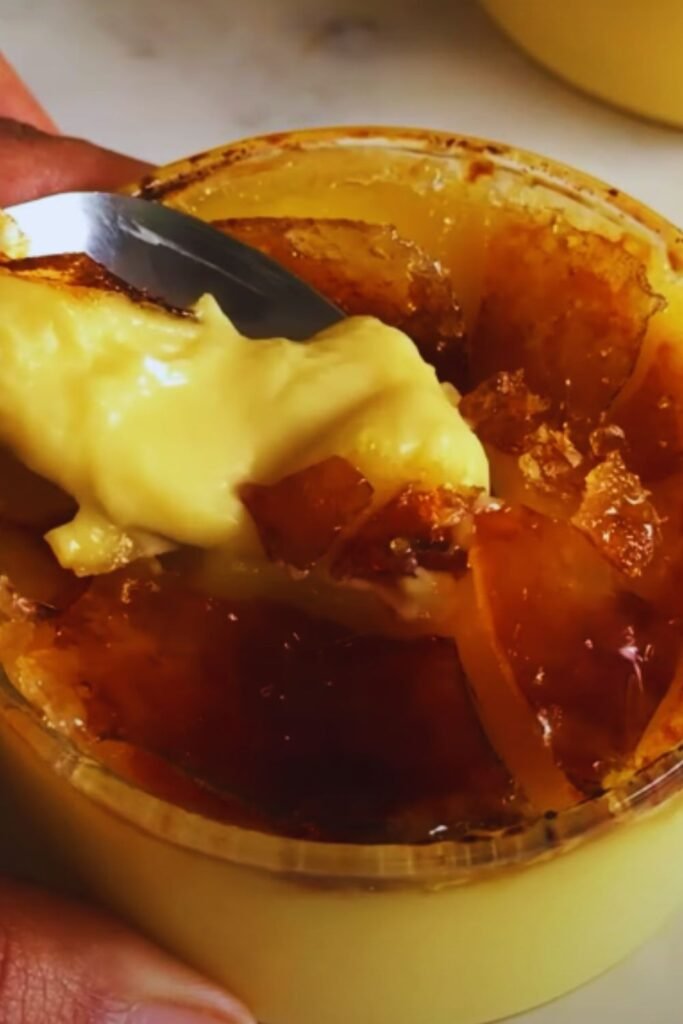
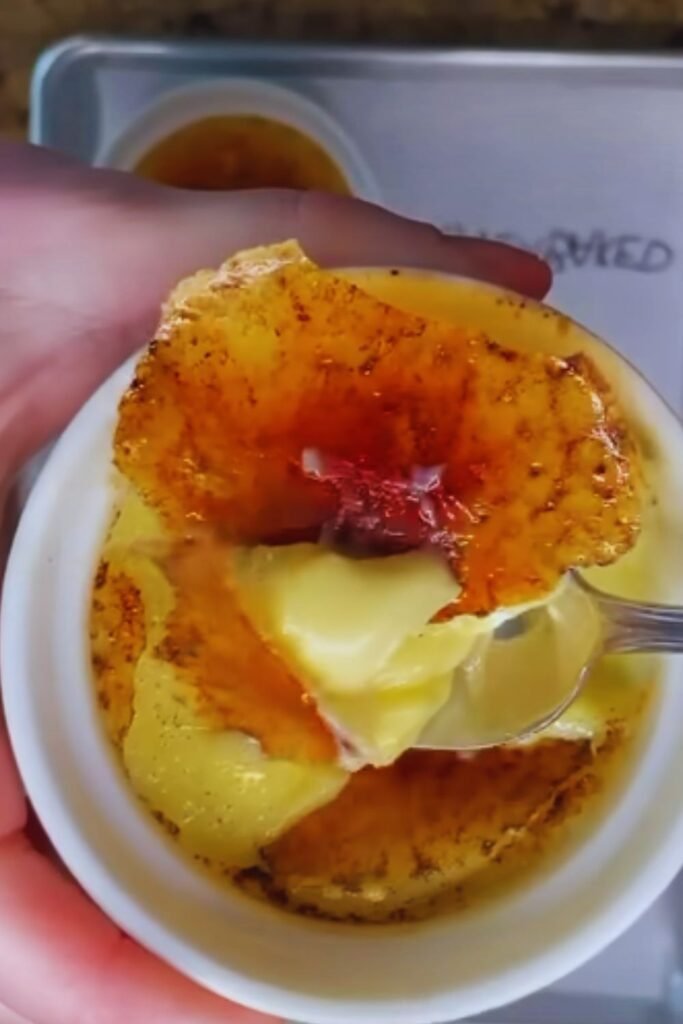
The Perfect Caramelized Top
- Just before serving, remove from refrigerator and blot any moisture from the surface.
- Sprinkle 1-1.5 teaspoons of sugar evenly over each custard.
- Hold the torch 2-3 inches from the surface and move it constantly in small circles.
- Continue until the sugar melts and turns a deep amber color.
- Let stand for 2-3 minutes until the topping hardens.
Troubleshooting Guide
| Issue | Possible Cause | Solution |
|---|---|---|
| Custard too firm | Overbaking | Reduce baking time by 2-3 minutes |
| Runny center | Underbaking | Increase baking time by 2-3 minutes |
| Grainy texture | Eggs curdled | Ensure proper tempering |
| Sugar won’t caramelize | Moisture on surface | Thoroughly blot surface dry |
| Burnt spots | Torch too close | Hold torch farther away |
Storage and Make-Ahead Tips
| Stage | Storage Method | Duration |
|---|---|---|
| Unbaked custard | Refrigerated | Up to 24 hours |
| Baked (no topping) | Refrigerated | Up to 3 days |
| Fully finished | Consume immediately | Within 2 hours |
Common Questions and Answers
Q: Can I make crème brûlée without a torch?
A: While a torch gives the best results, you can use your oven’s broiler. Place the ramekins on the top rack, 2-3 inches from the heating element, and watch carefully to prevent burning.
Q: Why did my custard curdle?
A: This usually happens when the eggs are heated too quickly. Be patient with the tempering process and whisk constantly while adding the hot cream.
Q: Can I use vanilla extract instead of a vanilla bean?
A: Yes, use 2 teaspoons of pure vanilla extract, adding it after the cream has been heated and slightly cooled.
Q: How do I know when the custard is perfectly baked?
A: The edges should be set, but the center should still have a slight wobble – similar to Jell-O. It will continue to set as it cools.
Serving Suggestions
- Serve with fresh berries on the side
- Add a light dusting of cocoa powder around the edges
- Garnish with fresh mint leaves
- Accompany with a small cookie like a langue de chat
- Pair with an espresso or coffee
- Consider adding a small quenelle of vanilla bean ice cream
Variations to Try
| Flavor | Additional Ingredient | Amount |
|---|---|---|
| Lavender | Dried culinary lavender | 1 tablespoon |
| Coffee | Espresso powder | 2 teaspoons |
| Orange | Orange zest | 2 teaspoons |
| Dark chocolate | Melted chocolate | 2 ounces |
| Matcha | Matcha powder | 1 tablespoon |
Expert Tips for Success
- Use room temperature eggs to ensure smooth incorporation.
- Strain the custard mixture twice for extra smoothness.
- Never skip the water bath – it’s essential for even cooking.
- Rotate the baking dish halfway through cooking for even heat distribution.
- Let the caramelized sugar set completely before serving.
Nutrition Information (Per Serving)
| Nutrient | Amount |
|---|---|
| Calories | 375 |
| Total Fat | 29g |
| Saturated Fat | 17g |
| Cholesterol | 285mg |
| Sodium | 65mg |
| Total Carbohydrates | 26g |
| Sugar | 25g |
| Protein | 5g |
| Calcium | 65mg |
Remember, creating the perfect crème brûlée takes practice, but with these detailed instructions and tips, you’re well on your way to mastering this classic French dessert. The key is patience and attention to detail, but the result – that magical moment when your spoon cracks through the caramelized surface – makes it all worthwhile.