Have you ever found yourself standing in front of the office microwave at 12:30 pm, waiting to heat up yet another overpriced takeout meal? Or maybe you’ve scrambled through the morning rush, desperately trying to throw something—anything—into a container before racing out the door? I’ve been there too, and I know firsthand how challenging it can be to maintain healthy eating habits when life gets hectic.
That’s why meal prepping lunches changed my entire week. After years of trial and error (and yes, some spectacular failures), I’ve developed a system that saves me time, money, and countless decision-making moments throughout my busy workweek.
In this comprehensive guide, I’ll walk you through everything you need to know about meal prepping lunches—from the essential tools and time-saving techniques to delicious recipes that won’t leave you bored by Wednesday. Whether you’re a meal prep newbie or looking to level up your existing routine, you’ll find practical strategies to create lunches that you’ll actually look forward to eating.
Why Meal Prep Your Lunches?
Before diving into the how-to, let’s talk about why meal prepping is worth your Sunday afternoon. The benefits extend far beyond just having food ready in the fridge:
- Financial savings: Preparing your own lunches can save $50-100+ per week compared to buying lunch daily.
- Time efficiency: While you’ll invest 1-3 hours on prep day, you’ll save 30+ minutes each workday.
- Nutritional control: You decide exactly what goes into your meals, making it easier to meet health goals.
- Reduced food waste: Planned shopping and cooking dramatically cuts down on spoiled ingredients.
- Environmental impact: Fewer takeout containers and less food waste means a smaller carbon footprint.
- Stress reduction: Eliminating daily lunch decisions reduces decision fatigue during busy workdays.
When I first started meal prepping five years ago, I was skeptical about whether I’d stick with it. Fast forward to today, and I can’t imagine my week without my Sunday meal prep session. The structure it brings to my eating habits has been transformative for my health, wallet, and overall sense of having my life together.
Essential Tools for Effective Meal Prepping
Let’s start with the basics. Having the right tools will make your meal prep sessions smoother and more enjoyable:
Storage Containers
Food storage containers are the backbone of any meal prep system. While you don’t need to buy everything at once, these are worth investing in over time:
- Glass containers: Microwave-safe, non-toxic, and don’t absorb odors or stains
- Divided containers: Perfect for keeping components separate
- Mason jars: Ideal for salads, overnight oats, and soups
- Silicone bags: Reusable alternative to plastic bags for snacks and smaller items
My personal recommendation: I love the glass containers with snap-lock lids. Yes, they’re heavier to carry, but they don’t leak, keep food fresher, and don’t stain even when I pack tomato-based dishes. After replacing cheap plastic containers multiple times, investing in quality glass containers proved more economical in the long run.
Kitchen Equipment
While you can meal prep with minimal equipment, these tools will significantly improve your efficiency:
- Sharp chef’s knife: The single most important tool for faster prep
- Large cutting board: Provides adequate workspace for chopping multiple ingredients
- Food processor or blender: Speeds up chopping and enables dressings, sauces, and soups
- Sheet pans: Essential for roasting multiple vegetables simultaneously
- Instant Pot or slow cooker: Set-it-and-forget-it cooking for proteins and grains
- Measuring cups and spoons: For consistent results every time
I started with just a knife, cutting board, and a sheet pan. Over time, I added other items as my meal prep routine evolved. Don’t feel pressured to buy everything at once—start simple and build your collection gradually.
Planning Your Meal Prep Strategy
The key to successful meal prepping isn’t just about cooking—it’s about planning. Here’s how I approach the planning phase:
Step 1: Schedule Your Prep Time
Block out 2-3 hours on your calendar for meal prep. For most people (myself included), Sunday afternoons work best, but choose whatever time fits your schedule. The important thing is consistency—make it a non-negotiable appointment with yourself.
Step 2: Plan Your Menu
I use a simple template approach to keep my meals balanced and interesting:
| Component | Options | Preparation Methods |
|---|---|---|
| Protein | Chicken breast, thighs, ground turkey, tofu, tempeh, eggs, salmon, tuna, beans, lentils | Bake, poach, grill, slow cook, pressure cook |
| Complex Carbs | Brown rice, quinoa, farro, sweet potatoes, whole grain pasta, barley | Boil, steam, bake, pressure cook |
| Vegetables | Broccoli, bell peppers, zucchini, spinach, kale, carrots, mushrooms, cauliflower | Roast, steam, sauté, raw |
| Healthy Fats | Avocado, nuts, seeds, olive oil, tahini | Raw, toasted |
| Flavor Boosters | Herbs, spices, citrus, low-sugar sauces, vinaigrettes | Mix, blend |
When planning, I consider:
- What ingredients I already have
- What’s in season and on sale
- How much variety I need (some people are fine with the same lunch daily; others need different options)
- How long different components will stay fresh
- The reheating situation at my workplace
Step 3: Create a Detailed Shopping List
Organize your shopping list by store section to make shopping more efficient. I typically group my list into:
- Produce
- Protein
- Grains and pantry staples
- Dairy and refrigerated items
- Spices and condiments
This simple organization saves me from backtracking through the store and helps ensure I don’t forget anything essential.
Meal Prep Execution: The Step-by-Step Process
Now comes the fun part—turning all that planning into actual meals. Here’s how I structure my prep sessions for maximum efficiency:
1. Prep Your Workspace
- Clear and clean all countertops
- Empty the dishwasher so it’s ready for dirty dishes
- Set out all cutting boards, knives, and tools you’ll need
- Fill a bowl with soapy water for quick cleaning between tasks
- Review your plan and set out all ingredients
2. Cook in Order of Cooking Time
Start with items that take longest to cook:
- Preheat the oven for roasting vegetables or baking proteins
- Begin cooking grains (rice, quinoa, etc.) that need simmering time
- Prep proteins that need marinating or longer cooking times
- Chop vegetables while other items cook
- Make dressings and sauces while waiting for other components
3. Use Multitasking Techniques
Efficiency comes from doing multiple things simultaneously:
- While the oven preheats, chop vegetables for roasting
- While grains simmer, prepare proteins
- While proteins cook, make sauces or dressings
- Use different areas of your kitchen for different tasks
4. Cool Before Storing
This crucial step prevents condensation that can make food soggy:
- Spread cooked items on sheet pans to cool faster
- Allow at least 30 minutes of cooling time before packing
- For safety, don’t leave perishable foods at room temperature for more than 2 hours
5. Assembly and Storage
You have two options for storage:
- Component method: Store prepped ingredients separately and assemble daily
- Complete meal method: Fully assemble meals into individual containers
I use a hybrid approach—some components separately (like dressings) and others pre-assembled—for the perfect balance of freshness and convenience.
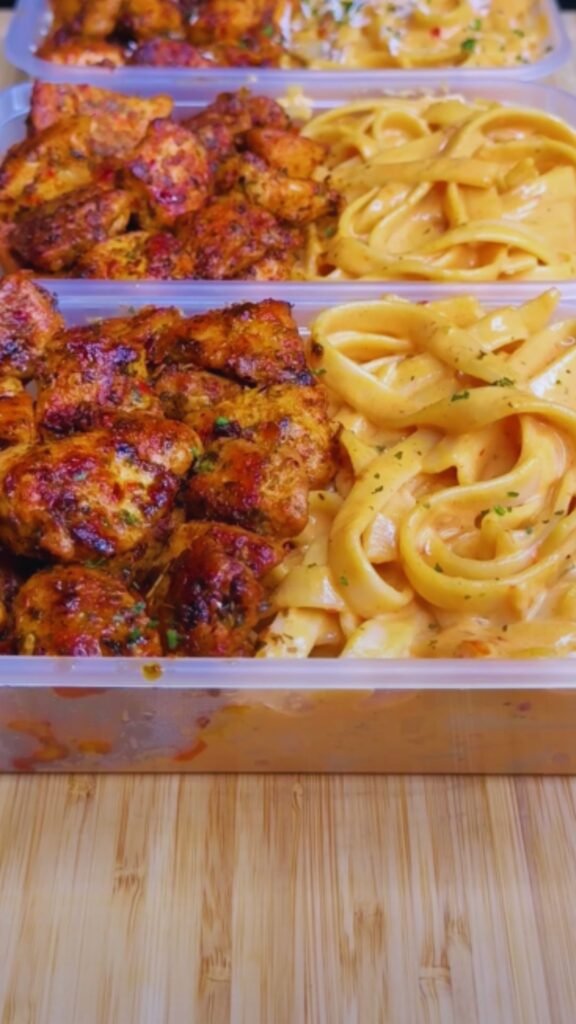
5 Foolproof Meal Prep Lunch Ideas
Let’s get into some specific meal ideas that hold up well throughout the week:
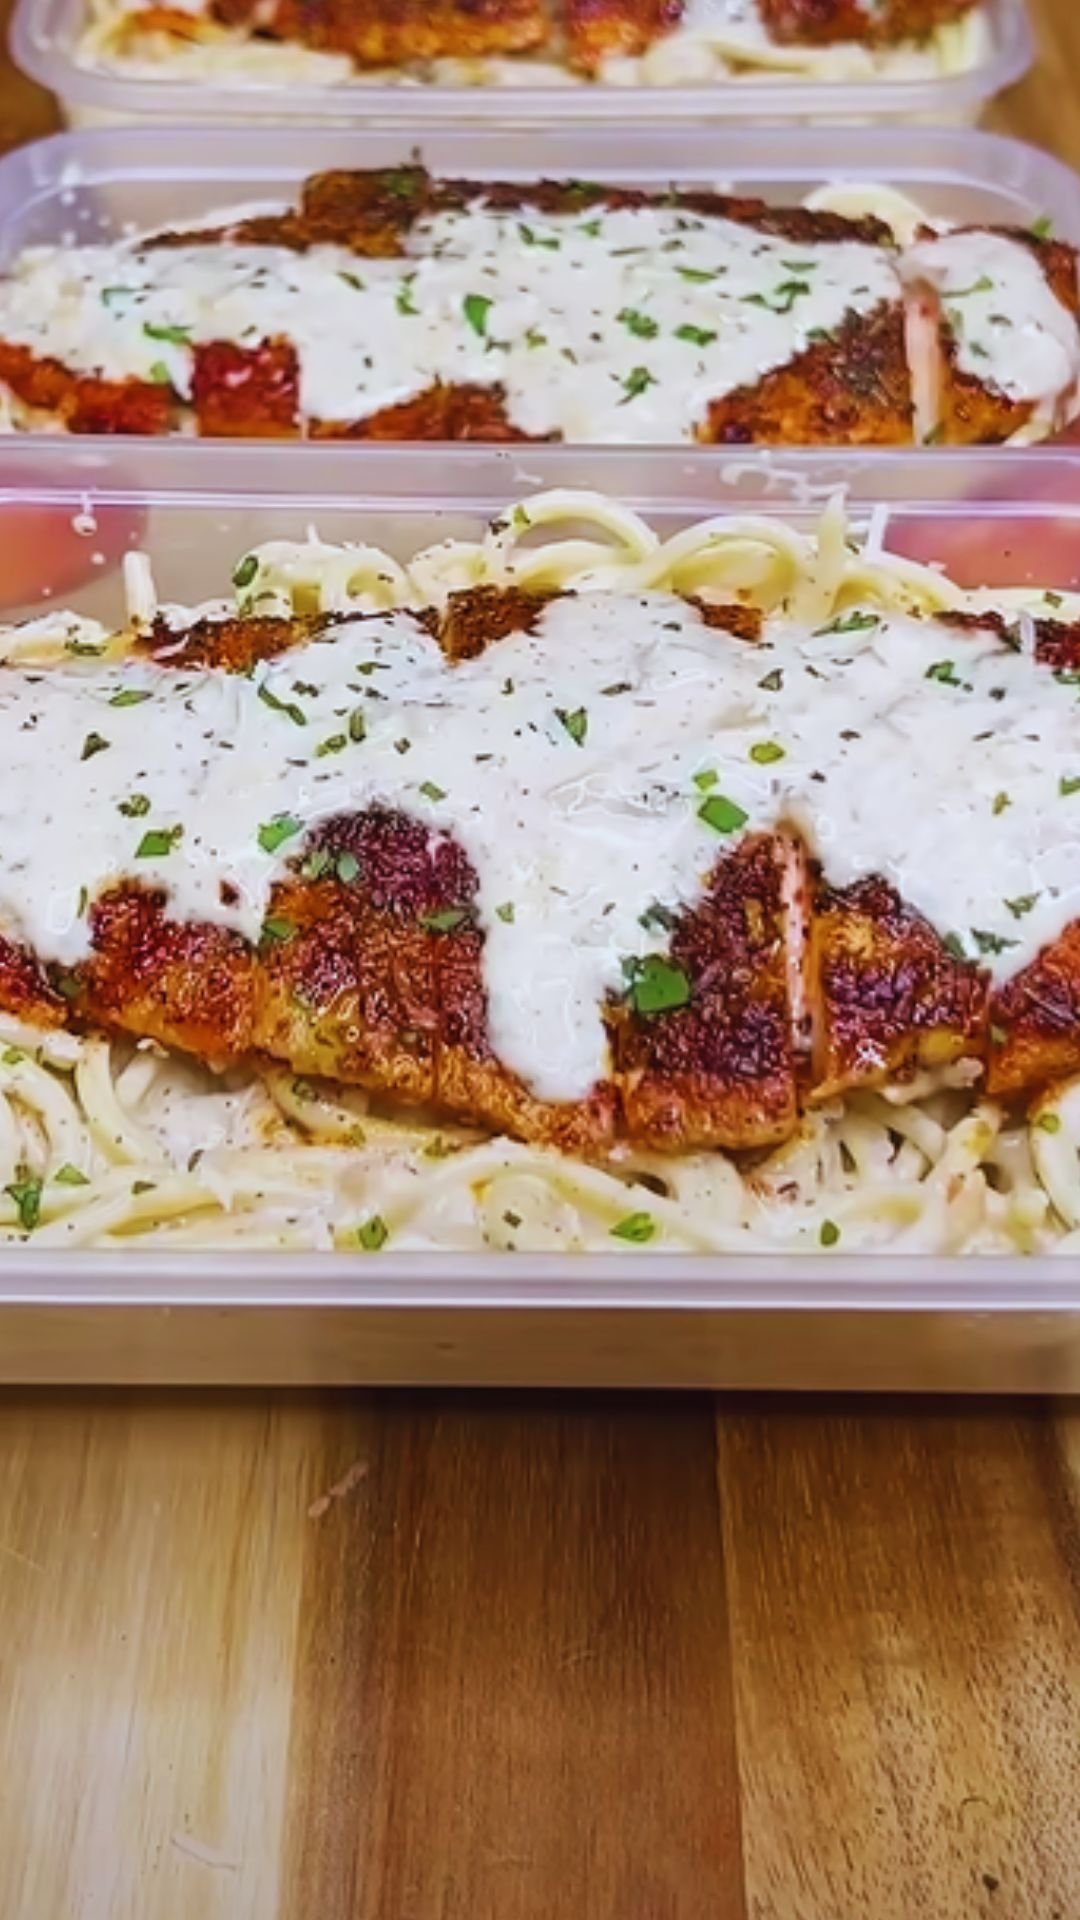
1. Build-Your-Own Grain Bowls
Base recipe (makes 5 lunches):
| Component | Ingredients | Preparation |
|---|---|---|
| Grain Base (1 cup per serving) | 2.5 cups dry quinoa or brown rice | Cook according to package directions with broth instead of water for extra flavor |
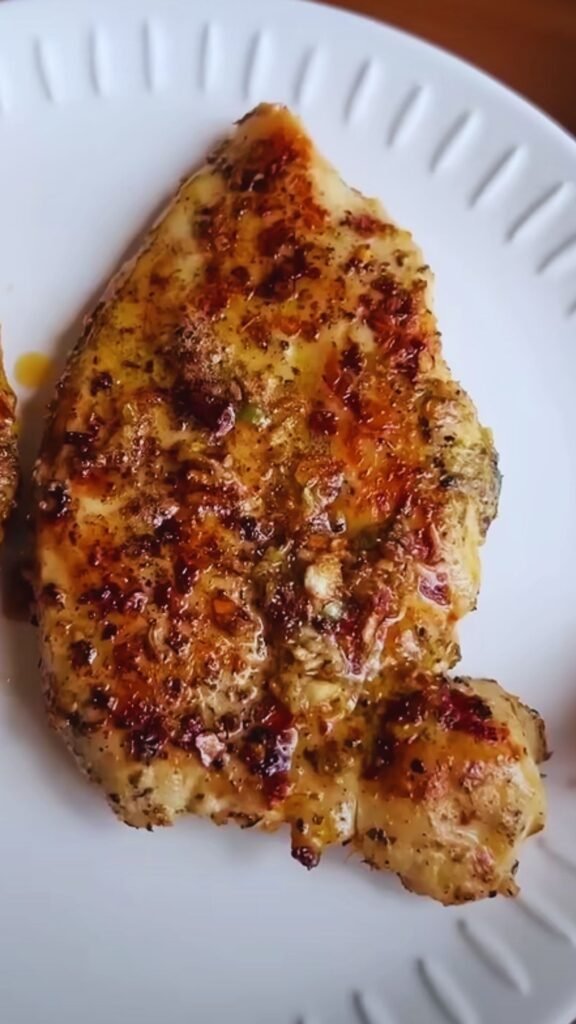
| Protein (4-5 oz per serving) | 1.5 lbs chicken breast or 2 blocks extra-firm tofu | Chicken: Season with salt, pepper, garlic powder, and paprika; bake at 425°F for 18-22 minutes until 165°F internal temperature<br>Tofu: Press, cube, toss with cornstarch and spices, bake at 425°F for 25-30 minutes |
| Vegetables (2 cups per serving) | 2 bell peppers, 1 red onion, 2 zucchini, 1 head broccoli | Chop into uniform pieces, toss with olive oil, salt, and pepper; roast at 425°F for 20-25 minutes |
| Toppings (2-3 Tbsp per serving) | Pumpkin seeds, sunflower seeds, chopped nuts | Toast in dry pan until fragrant |
| Sauce (2-3 Tbsp per serving) | Tahini sauce: 1/2 cup tahini, 3 Tbsp lemon juice, 1 garlic clove, water to thin | Blend all ingredients until smooth; store separately |
Storage tip: Keep sauce separate until ready to eat to prevent sogginess.
2. Mason Jar Salads
The key to a successful jar salad is layering ingredients properly to prevent sogginess:
Base recipe (makes 5 lunches):
| Layer (bottom to top) | Ingredients | Preparation |
|---|---|---|
| Dressing (2-3 Tbsp per jar) | Balsamic vinaigrette: 1/4 cup balsamic vinegar, 1/2 cup olive oil, 1 Tbsp Dijon mustard, 1 tsp honey, salt and pepper | Whisk all ingredients together or shake in a separate jar |
| Hard vegetables | 2 cups cherry tomatoes, 1 cucumber, 2 bell peppers, 1 cup shredded carrots | Chop into bite-sized pieces |
| Proteins/grains | 3 cups cooked quinoa, 2 cups chickpeas or 1 lb cooked chicken | Cook quinoa according to package; drain and rinse chickpeas; cook chicken as preferred |
| Soft vegetables/fruits | 2 avocados (add day of), 1/2 cup olives | Slice avocado when ready to eat |
| Greens | 10 cups mixed greens or spinach | Wash and thoroughly dry before adding |
| Toppings | 1/2 cup crumbled feta, 1/4 cup sunflower seeds | Add just before sealing jars |
Serving tip: When ready to eat, shake the jar or pour into a bowl to distribute the dressing.
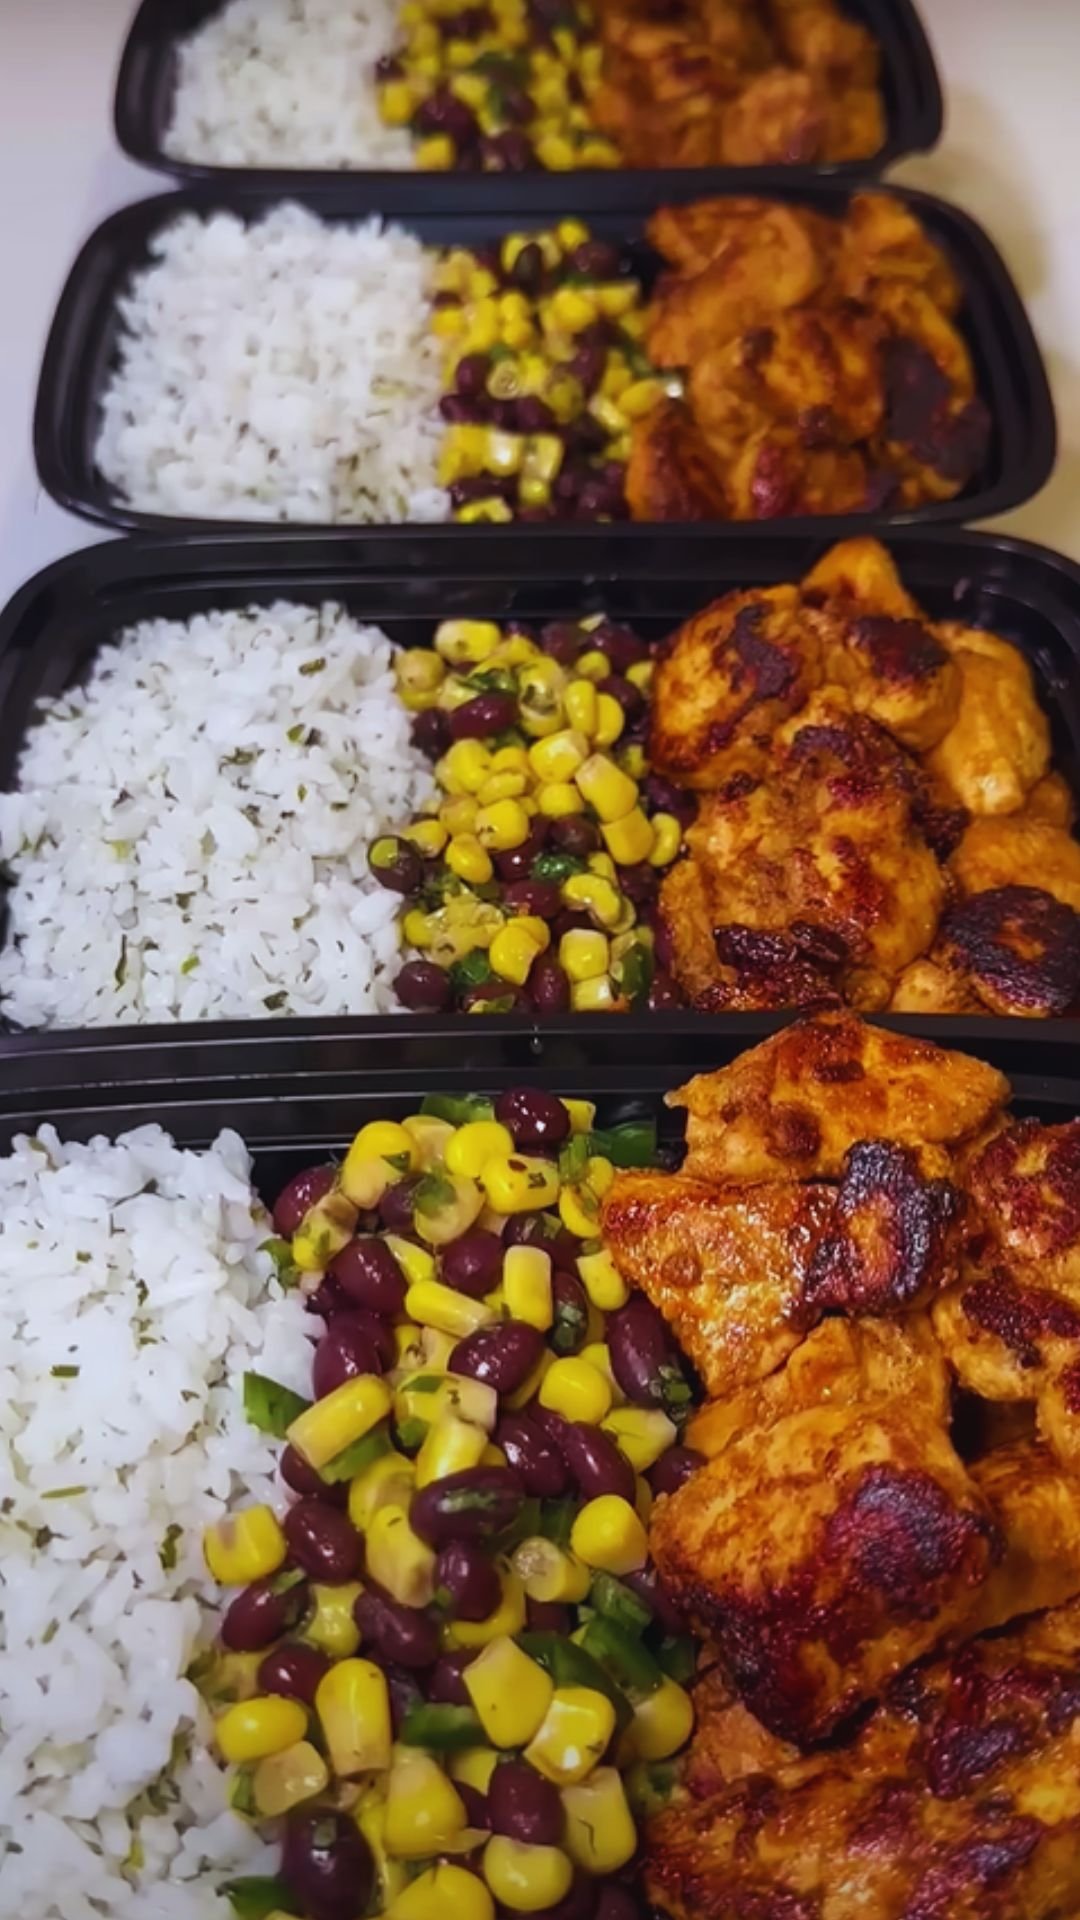
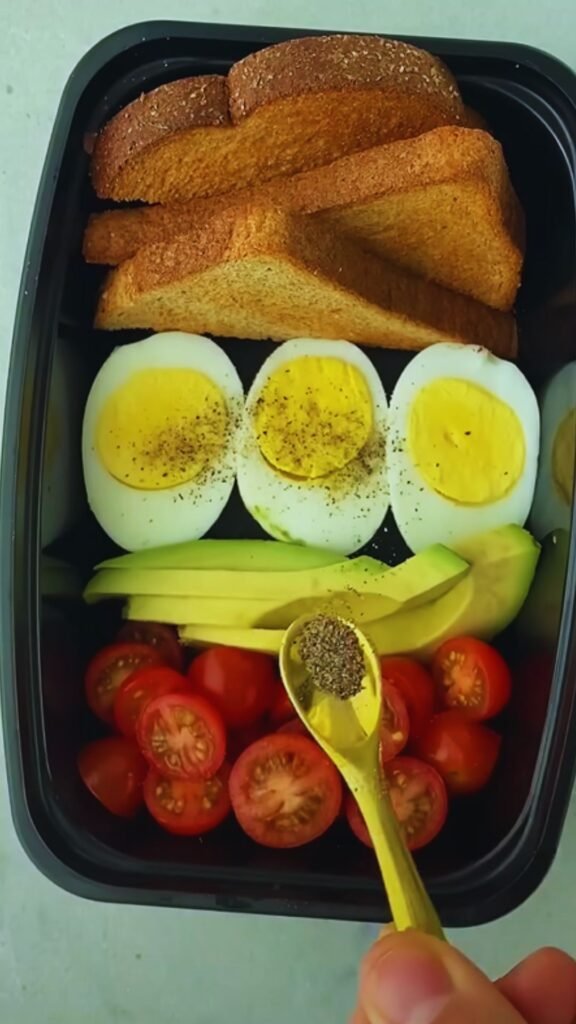
3. Protein-Packed Bento Boxes
These customizable boxes are perfect for those who prefer variety in each meal:
Base recipe (makes 5 lunches):
| Compartment | Options | Preparation |
|---|---|---|
| Protein | 5 hard-boiled eggs, 1 lb turkey slices, 2 cups hummus | Boil eggs for 9 minutes, cool in ice bath, peel; portion hummus into small containers |
| Vegetables | 5 cups baby carrots, 1 cucumber, 2 bell peppers, 1 head broccoli | Wash and cut into snackable pieces |
| Complex carbs | 5 servings whole grain crackers, 5 small whole wheat pitas | Portion into servings |
| Fruits | 5 apples, 2 cups grapes, 5 clementines | Wash and prepare as needed |
| Healthy fats | 5 portions cheese cubes, 30 almonds, 10 Tbsp guacamole | Prepare portions; store guacamole with lemon juice to prevent browning |
Assembly tip: Use divided containers to keep components separate and fresh.
4. Hearty Soups and Stews
Perfect for cooler months, soups often taste better after flavors meld for a day or two:
Base recipe (makes 5 lunches):
| Component | Ingredients | Preparation |
|---|---|---|
| Base | 2 Tbsp olive oil, 1 onion, 3 carrots, 3 celery stalks, 3 garlic cloves | Dice vegetables; sauté in oil until soft |
| Protein | 1 lb chicken breast or 2 cans beans (drained and rinsed) | Add to pot after vegetables are softened |
| Liquid | 8 cups low-sodium broth | Add to pot after protein |
| Vegetables | 2 cups seasonal vegetables (sweet potato, kale, zucchini, etc.) | Chop into bite-sized pieces; add to pot |
| Grains (optional) | 1 cup barley, farro, or brown rice | Add to pot with broth if using |
| Seasonings | Bay leaves, thyme, rosemary, salt, pepper, etc. | Add to taste |
Storage tip: Allow soup to cool completely before portioning into individual containers to prevent bacterial growth.
5. Wrap and Roll Options
These can be fully assembled ahead (minus sauces) or kept as components:
Base recipe (makes 5 lunches):
| Component | Ingredients | Preparation |
|---|---|---|
| Wrap | 5 whole grain tortillas or collard green leaves | If using collard greens, blanch briefly to make pliable |
| Protein | 1.5 lbs grilled chicken or 3 cups chickpea salad | Season and grill chicken; for chickpea salad: mash chickpeas with Greek yogurt, lemon juice, diced celery, herbs, salt and pepper |
| Vegetables | 1 cucumber, 2 bell peppers, 2 cups greens, 1 cup shredded carrots | Slice thinly for easy rolling |
| Spread | Hummus, Greek yogurt herb spread, avocado | Make or purchase spreads; keep separate until assembly if meal prepping for several days |
Assembly tip: If pre-rolling wraps, wrap tightly in parchment paper first, then in foil, to maintain freshness.
Advanced Meal Prep Strategies
Once you’ve mastered the basics, try these advanced techniques to elevate your lunch game:
Batch Cooking vs. Meal Prepping
While related, these are different approaches:
- Batch cooking: Preparing large quantities of individual components (like roasted vegetables or grilled chicken) that can be mixed and matched
- Complete meal prepping: Assembling finished meals ready to heat and eat
I find a hybrid approach works best—batch cooking staples while fully assembling 2-3 days of complete meals.
Freezer-Friendly Options
Not every lunch has to be refrigerated. These freeze beautifully for 1-3 months:
- Chili, stews, and most soups (except cream-based or with potatoes)
- Cooked grains like rice and quinoa
- Cooked proteins like chicken, turkey, and beef
- Bean and grain burritos
Label everything with contents and date, and use the “first in, first out” principle when selecting meals to eat.
Preventing Meal Prep Fatigue
Even the most dedicated meal prepper can get bored. Here’s how I keep things interesting:
- Rotate global cuisines: Mexican one week, Mediterranean the next, then Asian-inspired
- Transform leftovers: Tuesday’s roasted vegetables become Wednesday’s frittata
- One new recipe rule: Try at least one new recipe or ingredient each week
- Seasonal approach: Let what’s fresh and in-season guide your meal planning
Troubleshooting Common Meal Prep Challenges
Even with perfect planning, challenges arise. Here are solutions to common meal prep problems:
Challenge: Food Safety Concerns
Solution: Follow these guidelines:
- Cool food completely before refrigerating
- Store prepared meals in the refrigerator for a maximum of 4 days
- Keep refrigerator temperature below 40°F
- Reheat foods to 165°F before eating
- When in doubt, throw it out—food poisoning isn’t worth the risk
Challenge: Soggy or Mushy Food
Solution:
- Store wet and dry ingredients separately when possible
- Use divided containers to keep components isolated
- Cook vegetables slightly less than fully done—they’ll continue cooking when reheated
- Pat ingredients dry before storage
- Consider adding fresh components the day you eat the meal
Challenge: Limited Refrigerator Space
Solution:
- Use stackable, uniform containers to maximize space
- Freeze meals planned for days 4-5
- Consider a smaller second refrigerator if meal prepping for multiple people
- Prep components that don’t require refrigeration (like whole fruits or certain snacks)
Challenge: Limited Time for Prep
Solution:
- Start with just 3 days of meals instead of 5
- Use grocery store shortcuts like pre-chopped vegetables or rotisserie chicken
- Invest in time-saving tools like an Instant Pot or food processor
- Create a prep playlist to make the process more enjoyable
- Enlist family members to help with specific tasks
Cost Analysis: Meal Prep vs. Buying Lunch
Let’s break down the financial impact of meal prepping lunches compared to buying them:
| Expense Category | Meal Prep (Weekly Cost) | Buying Lunch (Weekly Cost) |
|---|---|---|
| Food costs | $25-40 for 5 lunches | $50-75 for 5 lunches |
| Container costs | $1-2 amortized cost | $0 (included in purchase) |
| Utilities for cooking | $2-3 | $0 |
| Time value (at $15/hr) | $30-45 (2-3 hrs prep) | $25 (10 min/day ordering x 5) |
| Total Weekly Cost | $58-90 | $75-100 |
| Annual Savings | $780-2,184 | Baseline |
Beyond direct savings, consider these financial benefits:
- Less food waste from unused ingredients
- Fewer impulse purchases while buying lunch
- Better portion control (no supersizing)
- Potential health benefits leading to lower healthcare costs
Sustainability Aspects of Meal Prepping
Meal prepping isn’t just good for your wallet—it’s better for the planet:
- Reduced packaging waste: Reusable containers instead of single-use takeout packaging
- Lower food waste: Planned purchasing and cooking reduces spoilage
- Reduced carbon footprint: Fewer delivery trips and packaging production
- Seasonal eating: Easier to incorporate local, seasonal produce when planning ahead
To make your meal prep even more sustainable:
- Shop with reusable bags and produce bags
- Buy in bulk when possible to reduce packaging
- Choose local and seasonal ingredients when available
- Compost food scraps
- Use energy-efficient cooking methods like pressure cooking or batch roasting
Q&A Section: Your Meal Prep Questions Answered
Q: Won’t I get bored eating the same thing every day?
A: Variety is key! You can either prep different meals for different days or use the component method, where you prepare various proteins, grains, and vegetables that can be mixed and matched throughout the week. Even small variations like different sauces or toppings can make meals feel new again.
Q: How do I prevent salads from getting soggy?
A: The secret is proper layering and separation. Keep dressings in separate containers until you’re ready to eat. For mason jar salads, put the dressing at the bottom, followed by hard vegetables, proteins, and greens at the top. Using a paper towel between wet and dry ingredients can also help absorb excess moisture.
Q: Is it safe to meal prep for the entire week?
A: Most prepared foods stay fresh in the refrigerator for 3-4 days. For a 5-day workweek, consider freezing Thursday and Friday’s lunches and moving them to the refrigerator to thaw the night before. Always use proper food safety practices: cool foods completely before storing, keep your refrigerator below 40°F, and reheat foods to 165°F.
Q: How do I reheat meals without making them rubbery or dry?
A: When reheating in a microwave, add a few drops of water before heating and cover the container to create steam. Heat at 70-80% power rather than full power. For proteins like chicken, slice before reheating to ensure even heating. Some foods, like certain vegetables and grain bowls, can be enjoyed cold or at room temperature.
Q: How do I find time for meal prepping with a busy schedule?
A: Start small—even just prepping components like chopped vegetables or cooking a batch of protein can save significant time during the week. Consider shorter, more frequent prep sessions if a single long session doesn’t fit your schedule. Utilize time-saving appliances like slow cookers or pressure cookers that require minimal hands-on time.
Q: What are the best containers for meal prepping?
A: Glass containers with secure lids are ideal for most meal prep. They’re microwave-safe, don’t absorb odors or stains, and are environmentally friendly. For portability, look for leak-proof designs. If weight is a concern, high-quality BPA-free plastic containers are a lighter alternative. Specialized containers with compartments work well for meals with multiple components.
Conclusion: Your Meal Prep Journey Starts Now
After five years of consistent meal prepping, I can confidently say it’s one of the best habits I’ve developed. Beyond the obvious financial and health benefits, there’s something empowering about taking control of what I eat throughout the week. That Sunday afternoon investment pays dividends in reduced stress, better nutrition, and more mindful eating habits.
If you’re new to meal prepping, remember that perfection isn’t the goal—progress is. Start with just 2-3 days of lunches, use shortcuts when needed, and gradually build your skills and efficiency. Celebrate small wins, learn from inevitable mishaps, and adjust your approach based on what works for your lifestyle.
Most importantly, prepare foods you’ll actually look forward to eating. All the efficiency in the world won’t matter if you’re dreading your lunch by Tuesday. Experiment with flavors, try new recipes, and remember that meal prep should enhance your life, not complicate it.
Your future self will thank you for the gift of nourishing, ready-to-eat meals during busy workdays. Happy prepping!