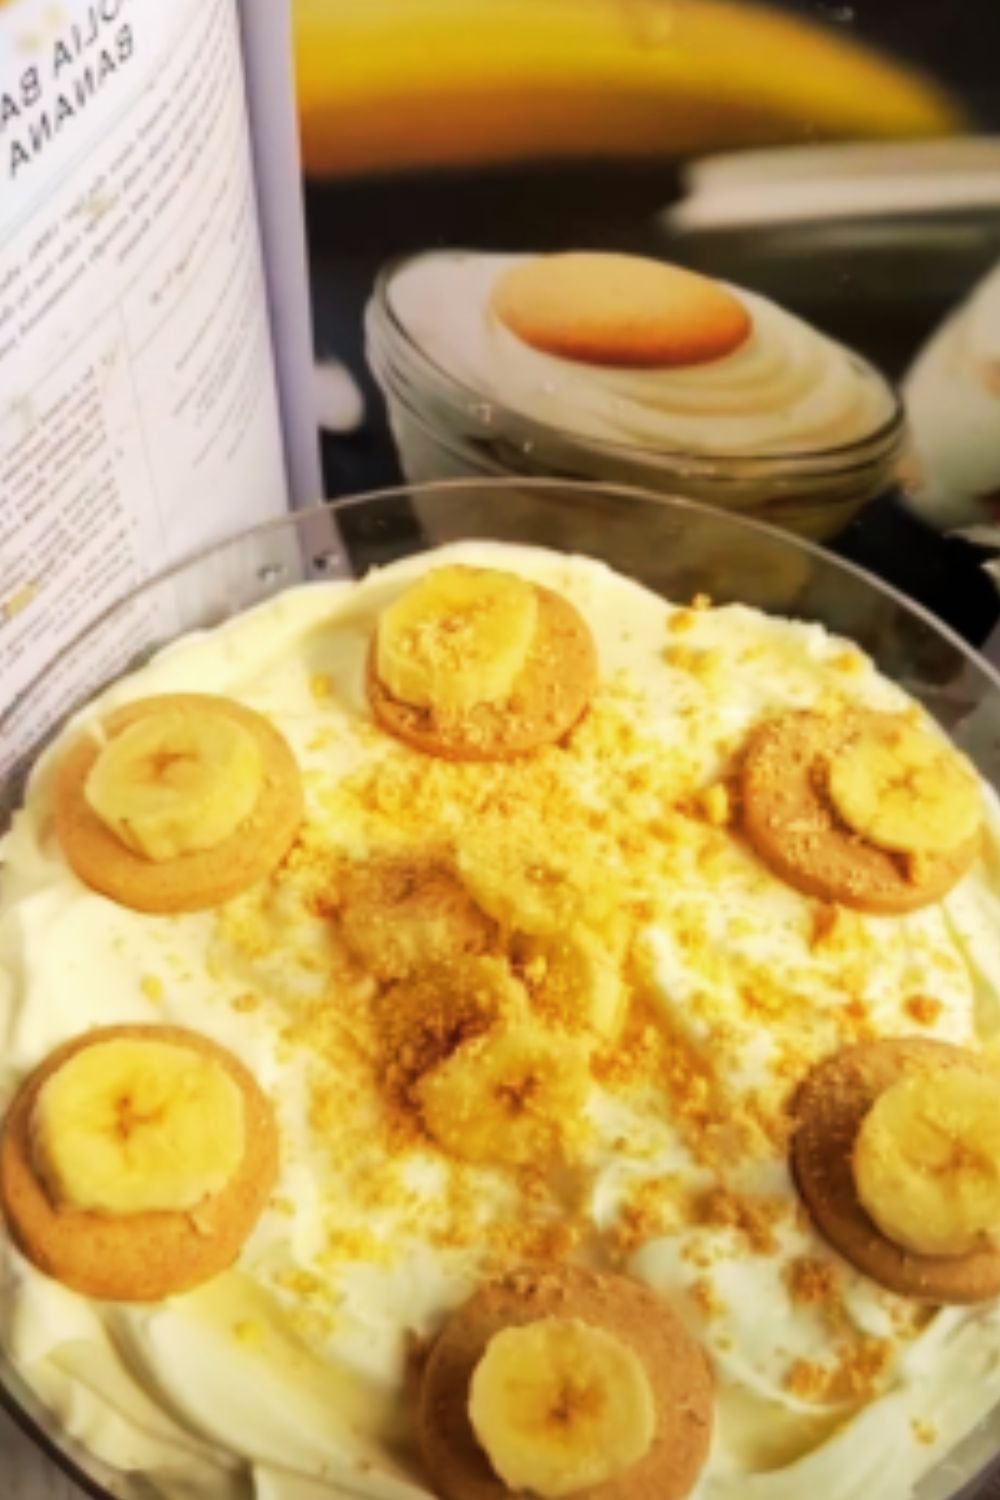
There’s something magical about a perfectly crafted banana pudding that takes me right back to my grandmother’s kitchen. After years of testing and tweaking, I’ve finally perfected what I boldly claim to be the best banana pudding recipe you’ll ever taste. This isn’t just any ordinary banana pudding – it’s a heavenly combination of silky smooth vanilla pudding, perfectly ripe bananas, and those classic Nilla wafers that somehow manage to stay both soft and crispy in all the right places.
Why This Recipe is Special
Let me tell you why this banana pudding stands head and shoulders above the rest. First, we’re making everything from scratch (yes, even the pudding!), but don’t let that scare you away. Trust me, it’s easier than you think, and the results are absolutely worth it. The secret lies in using real vanilla beans, perfectly ripened bananas, and a special technique that prevents the pudding from becoming grainy or lumpy.

Ingredients You’ll Need
For the Vanilla Pudding:
- 6 large egg yolks
- 1 cup granulated sugar
- ¼ cup cornstarch
- ¼ teaspoon salt
- 3 cups whole milk
- 1 vanilla bean (or 2 tablespoons pure vanilla extract)
- 3 tablespoons unsalted butter
For Assembly:
- 2 (11-ounce) boxes Nilla Wafers
- 6-7 medium ripe bananas
- 3 cups heavy whipping cream
- ¼ cup powdered sugar
- 1 teaspoon pure vanilla extract
Essential Equipment
| Item | Purpose | Notes |
|---|---|---|
| 3-quart trifle dish | Serving | A clear dish shows off the beautiful layers |
| Heavy-bottom saucepan | Making pudding | Prevents scorching |
| Whisk | Mixing | Must be sturdy |
| Stand mixer or hand mixer | Whipping cream | Hand mixing won’t achieve proper texture |
| Rubber spatula | Folding & scraping | Heat-resistant preferred |
| Fine-mesh strainer | Straining pudding | Ensures silky smooth texture |
The Perfect Timing
| Stage | Time Required | Visual Cue |
|---|---|---|
| Pudding preparation | 20 minutes | Thick enough to coat back of spoon |
| Cooling time | 2 hours | No longer warm to touch |
| Assembly | 30 minutes | Even, distinct layers |
| Chilling | 4-6 hours | Set but not too firm |
| Total time | 7-8 hours | Worth every minute! |

Step-by-Step Instructions
- Make the Pudding Base
- Separate your eggs while they’re cold (easier!)
- Whisk together egg yolks, sugar, cornstarch, and salt
- Heat milk with vanilla bean (if using) until steaming
- Slowly temper hot milk into egg mixture
- Return to pan and cook until thickened
- Perfect the Pudding
- Strain through fine-mesh sieve
- Stir in butter until melted
- Cover surface with plastic wrap
- Chill until completely cold
- Prepare the Assembly Station
- Slice bananas uniformly (about ¼ inch thick)
- Whip cream with powdered sugar and vanilla
- Have wafers ready to go
- Clear space in refrigerator
- Layer with Love
- Start with wafers on bottom
- Add banana slices
- Spread pudding
- Repeat layers
- End with whipped cream
- Garnish with crushed wafers
Pro Tips for Success
- Banana Selection and Prep
- Choose bananas with light brown spots
- They should be firm but yielding
- Slice only when ready to use
- Dip in lemon juice if needed
- Pudding Perfection
- Never stop stirring while cooking
- Look for bubble pattern like volcanic mud pots
- Strain while hot
- Cool properly before layering
- Assembly Mastery
- Keep layers even
- Press wafers slightly into pudding
- Create visible side layers
- Save best-looking garnishes for top

Storage and Make-Ahead Tips
| Storage Method | Duration | Notes |
|---|---|---|
| Refrigerator (assembled) | 2-3 days | Cover tightly |
| Refrigerator (pudding only) | 5 days | Press plastic wrap on surface |
| Freezer | Not recommended | Affects texture |
Troubleshooting Common Issues
| Problem | Cause | Solution |
|---|---|---|
| Lumpy pudding | Improper tempering | Strain while hot |
| Soggy wafers | Too much moisture | Pat bananas dry |
| Brown bananas | Over-ripeness | Use firmer fruit |
| Weepy cream | Over-whipping | Stop at medium peaks |
Variations to Try
- Chocolate Lover’s Version
- Add 4 oz melted chocolate to pudding
- Use chocolate wafers
- Garnish with chocolate shavings
- Tropical Twist
- Add coconut extract to pudding
- Layer with toasted coconut
- Use coconut whipped cream
- Caramel Dream
- Drizzle layers with caramel sauce
- Add toffee bits between layers
- Top with caramel drizzle
Serving Suggestions
- Serve in crystal glasses for elegant presentation
- Pair with hot coffee or milk
- Add fresh banana slices just before serving
- Consider individual portions for parties
Nutritional Information (Per Serving)
| Nutrient | Amount |
|---|---|
| Calories | 385 |
| Fat | 18g |
| Carbohydrates | 52g |
| Protein | 6g |
| Fiber | 2g |
| Sugar | 32g |
Questions & Answers
Q: Can I make this pudding with instant vanilla pudding?
A: While you can, I strongly advise against it. The homemade pudding is what makes this recipe special, and it’s not as difficult as you might think. The texture and flavor are incomparably better.
Q: How do I prevent my bananas from turning brown?
A: Choose bananas that are ripe but still firm, and toss them in a bit of lemon juice before layering. Also, make sure they’re completely covered by the pudding.
Q: Can I make this ahead for a party?
A: Yes! You can make it up to 24 hours in advance. The texture is actually best after about 8 hours of chilling, when the wafers have softened slightly but still maintain some structure.
Q: What’s the best way to transport this dessert?
A: If possible, assemble it at your destination. If not, use a trifle dish with a tight-fitting lid and transport it in a cooler with ice packs.
Q: My pudding became lumpy – what went wrong?
A: This usually happens when the eggs weren’t tempered properly or the pudding was cooked over too high heat. Always strain your pudding while hot, and keep stirring constantly during cooking.
A Personal Note
I’ve made this banana pudding for countless family gatherings, potlucks, and special occasions, and it never fails to impress. The key is taking your time with each step and using quality ingredients. Remember, great banana pudding can’t be rushed – it’s a labor of love that pays off in smiles and empty dishes. Every time I make this recipe, I’m reminded of why some desserts become classics, passed down through generations. This is definitely one of those recipes.